How to Calculate the Field of View on a Microscope
By Dr. Zubair Khalid, DVM, MS, PhD ·
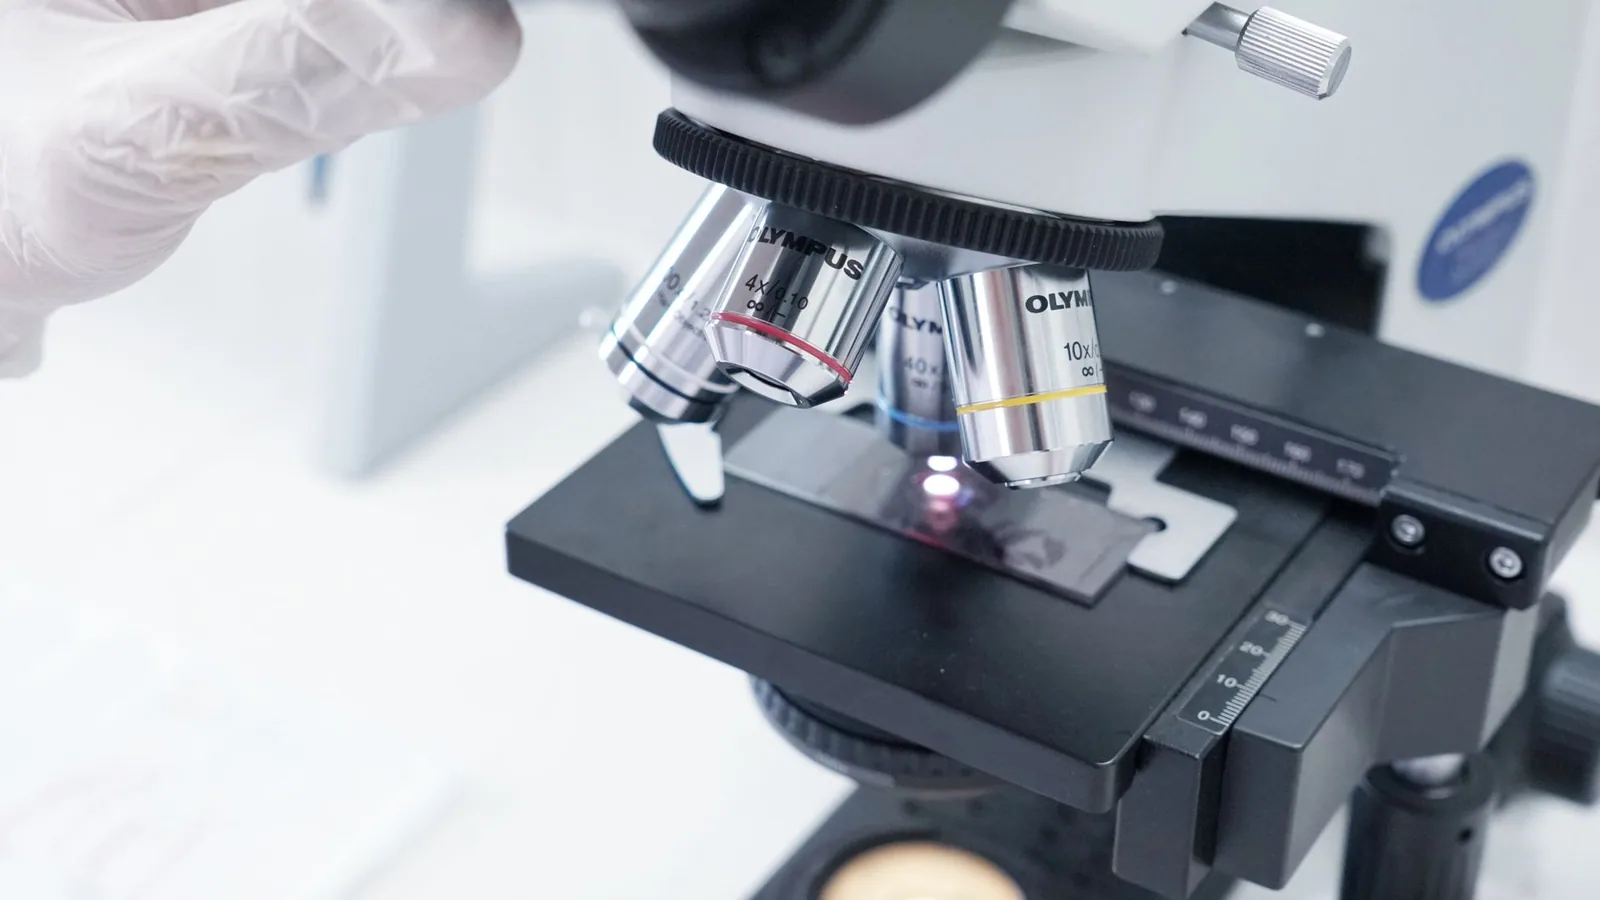
Key Takeaways
- The Field of View (FOV) diameter, measured in micrometers (µm), is calculated using the formula: FOV (µm) = (Field Number (FN) / Objective Magnification) × 1000. The Field Number (FN) is a property of the eyepiece, typically engraved on its barrel (e.g., 18, 20, 22, 25 mm).
- For infinity-corrected microscopes, any additional magnification introduced by a tube lens or intermediate magnifier must be incorporated into the denominator of the FOV calculation: FOV (µm) = (FN / (Objective Magnification × Tube Factor)) × 1000.
- Calibration with a stage micrometer is critical for verifying calculated FOV values, ensuring accuracy within ±5%. This process is essential for reliable specimen size estimation and experimental planning.
- When using digital cameras, the FOV is determined by the sensor dimensions and camera adapter magnification, not the eyepiece FN. The formula for camera FOV is: Camera FOV (µm) = (Sensor dimension (mm) / (Objective Magnification × Adapter Magnification)) × 1000.
- Practical limitations such as field curvature in non-plan objectives and optical distortion can reduce the usable FOV for accurate measurements, necessitating the use of plan objectives or focusing on the central, sharp region of the image.
- FOV calculations are fundamental for quantitative microscopy, enabling estimations of specimen size, cell density, and spatial coverage, which are vital for tasks ranging from bacterial morphology assessment to cell counting and tissue analysis.
The field of view (FOV) on a microscope is the diameter of the circular area visible through the eyepieces or camera, measured in micrometers (µm) at the specimen plane. Calculating the FOV allows you to estimate the actual size of microscopic specimens, determine whether a structure will fit within a single image frame, and plan imaging experiments with appropriate spatial coverage. This calculation is essential for any laboratory task requiring dimensional measurements, from bacterial colony morphology assessment to cell counting and tissue section analysis. The fundamental relationship is straightforward: FOV diameter decreases as magnification increases, following the formula FOV diameter (µm) = (Field Number / Objective Magnification) × 1000, where the field number is the eyepiece's diaphragm diameter in millimeters and the factor 1000 converts millimeters to micrometers.
At a Glance
| Parameter | Value or Guideline |
|---|---|
| Core formula | FOV (µm) = (Field Number / Objective Magnification) × 1000 |
| Field Number (FN) | Printed on eyepiece barrel (e.g., 18, 20, 22, 25 mm) |
| Objective magnification | Marked on objective housing (e.g., 4×, 10×, 40×, 100×) |
| Typical FOV at 10× (FN 20) | 2000 µm (2 mm) |
| Typical FOV at 40× (FN 20) | 500 µm |
| Typical FOV at 100× (FN 20) | 200 µm |
| Calibration method | Stage micrometer or calibrated reticle |
| Key limitation | Formula assumes no additional tube lens factor; check manufacturer specifications |
| Common error | Using FN from camera port instead of eyepiece FN |
Scientific Principle
The field of view in a compound microscope is determined by the optical design of the eyepiece and objective working together. The eyepiece contains a fixed circular aperture called the field stop, whose diameter is the field number (FN). This aperture limits how much of the intermediate image formed by the objective reaches the eye or camera. The objective magnifies the specimen, so the actual area visible at the specimen plane is the field stop diameter divided by the objective magnification.
The relationship derives from basic geometric optics. The objective creates a real, magnified intermediate image at the eyepiece's front focal plane. The eyepiece then acts as a magnifier to view this intermediate image. The field stop sits at this intermediate image plane, physically blocking light from outside its diameter. Therefore, the diameter of the specimen area that can be imaged equals the field stop diameter divided by the objective's lateral magnification.
For modern infinity-corrected microscopes, the objective magnification is defined with a specific tube lens focal length (typically 180 mm or 200 mm, depending on the manufacturer). If your microscope uses a different tube lens or an additional magnification changer (e.g., 1.5× or 2× intermediate magnification), you must include that factor in the denominator. The general formula becomes:
FOV (µm) = (FN / (Objective Magnification × Tube Factor)) × 1000
Where tube factor accounts for any additional magnification between objective and eyepiece (e.g., 1.5× for a built-in magnifier). Most standard teaching microscopes have a tube factor of 1.0×, so the simpler formula applies.
Materials and Instrumentation
Essential Equipment
Microscope with calibrated objectives and eyepieces. Ensure your microscope objectives are marked with their magnification (e.g., 4×, 10×, 40×, 100×) and numerical aperture. Eyepieces should display the field number, typically engraved on the barrel as "10×/20" (meaning 10× magnification, 20 mm field number) or "10×/22". If the field number is not visible, consult the manufacturer's documentation or measure it using a stage micrometer.
Stage micrometer. This is a microscope slide with an engraved scale, usually 1 mm or 2 mm long, divided into 0.01 mm (10 µm) divisions. Stage micrometers are available from microscopy supply companies and are essential for calibration. For high-magnification work, a stage micrometer with 0.01 mm divisions is standard; for very high precision, micrometers with 0.001 mm (1 µm) divisions exist but require careful handling.
Calibrated eyepiece reticle (optional). An eyepiece with an internal scale (reticle) allows direct measurement of specimen dimensions without separate FOV calculation. The reticle must be calibrated against a stage micrometer for each objective.
Camera and imaging software (optional). If using a digital camera, the FOV depends on the camera sensor size and the camera adapter magnification. Most camera adapters introduce additional magnification (e.g., 0.5×, 0.63×, 1.0×), which must be included in the calculation.
Instrumentation Choices and Their Impact
Eyepiece field number. Common field numbers range from 18 mm (older or budget microscopes) to 25 mm (wide-field eyepieces on research microscopes). A larger FN gives a wider FOV, which is advantageous for scanning large areas but may show more optical aberrations at the periphery. For example, switching from FN 18 to FN 22 at 10× increases the FOV from 1800 µm to 2200 µm, a 22% increase in linear dimension and a 49% increase in area.
Objective type. Plan (flat-field) objectives provide a uniformly focused image across the entire FOV, making them suitable for measurement. Non-plan objectives may show curvature at the edges, reducing the usable FOV for accurate measurement. For critical measurements, use plan objectives and verify that the entire FOV is in focus.
Camera adapter magnification. When using a camera, the effective magnification at the sensor is the objective magnification multiplied by the camera adapter magnification. The FOV on the camera sensor is then determined by the sensor dimensions, not the eyepiece FN. To calculate the FOV for a camera system, use:
Camera FOV (µm) = (Sensor dimension (mm) / (Objective Magnification × Adapter Magnification)) × 1000
For example, with a 1/2" sensor (6.4 mm × 4.8 mm), a 40× objective, and a 0.5× adapter, the horizontal FOV is (6.4 / (40 × 0.5)) × 1000 = 320 µm.
Controls and Calibration
Positive Controls
Stage micrometer verification. Always verify your calculated FOV against a stage micrometer at each magnification. Place the stage micrometer on the stage, focus on the scale, and measure the visible width using the eyepiece reticle or by capturing an image. The measured width should match your calculated FOV within ±5%. If it does not, check for incorrect field number, tube factor, or objective magnification.
Known-size reference specimens. Use commercially available size standards, such as polystyrene beads of known diameter (e.g., 10 µm or 50 µm), to validate your measurement workflow. Measure the bead diameter using your calibrated FOV and compare to the manufacturer's specification. This control tests both your FOV calculation and your measurement technique.
Negative Controls
No specimen control. Confirm that the FOV is consistent when no specimen is present. The visible area should be the same regardless of specimen presence. If the FOV changes when a specimen is added, check for optical obstruction or incorrect focus.
Objective-specific control. Each objective should produce a FOV consistent with its labeled magnification. If a 40× objective gives a FOV closer to what you expect for a 20× objective, the objective may be mislabeled or damaged.
Calibration Procedure
- Place the stage micrometer on the stage and focus on the scale using the lowest-power objective.
- Align the scale so that it spans the full width of the FOV.
- Count the number of divisions visible across the FOV. Each division on a standard stage micrometer is 0.01 mm (10 µm).
- Calculate the measured FOV: Measured FOV (µm) = Number of divisions × 10 µm/division.
- Compare to the calculated FOV: Calculated FOV (µm) = (FN / Objective Magnification) × 1000.
- If the difference exceeds 5%, recalibrate using the measured value as your working FOV for that objective.
- Repeat for each objective.
Conceptual Workflow
Step 1: Identify the Field Number
Locate the field number on your eyepieces. It is usually printed after the magnification, such as "10×/20" (FN = 20 mm) or "10×/22" (FN = 22 mm). If the eyepieces are not marked, check the microscope manual or contact the manufacturer. For binocular microscopes, both eyepieces should have the same FN; if they differ, use the smaller FN for conservative measurements.
Step 2: Record Objective Magnifications
List all objectives on your microscope turret with their labeled magnifications. Common values are 4×, 10×, 20×, 40×, 60×, and 100× (oil immersion). Note any additional magnification factors, such as a 1.5× or 2× intermediate magnifier, which must be included in the denominator.
Step 3: Calculate FOV for Each Objective
For each objective, apply the formula:
FOV (µm) = (FN / (Objective Magnification × Tube Factor)) × 1000
Example with FN = 20 mm and tube factor = 1.0×:
- 4× objective: (20 / 4) × 1000 = 5000 µm (5 mm)
- 10× objective: (20 / 10) × 1000 = 2000 µm (2 mm)
- 40× objective: (20 / 40) × 1000 = 500 µm
- 100× objective: (20 / 100) × 1000 = 200 µm
If a 1.5× tube factor is present:
- 40× objective: (20 / (40 × 1.5)) × 1000 = (20 / 60) × 1000 = 333 µm
Step 4: Verify with Stage Micrometer
Perform the calibration procedure described in the Controls section. Record the measured FOV for each objective in your laboratory notebook. Use the measured value for all subsequent specimen size estimations.
Step 5: Estimate Specimen Size
To estimate the size of a specimen:
- Observe the specimen at a known magnification.
- Estimate what fraction of the FOV diameter the specimen occupies.
- Multiply that fraction by the FOV diameter.
For example, if a bacterial cell spans approximately 1/10 of the FOV at 100× with a 200 µm FOV, its estimated length is 200 µm × 0.1 = 20 µm. This is a rough estimate; for precise measurements, use an eyepiece reticle or image analysis software.
For more accurate measurements, capture an image with a calibrated scale bar. Most imaging software allows you to set a scale based on the FOV diameter or a stage micrometer image. Draw a line across the specimen and read the measurement directly.
Quality Checks
Consistency Across Magnifications
The FOV should decrease proportionally as magnification increases. For a given FN, the FOV at 40× should be exactly 1/4 of the FOV at 10×. If this relationship does not hold, one or more objectives may be mislabeled or the tube factor may vary between objectives.
Edge-to-Edge Uniformity
Inspect the entire FOV for uniform illumination and focus. If the edges are dark or blurry, the usable FOV may be smaller than the calculated value. For measurement purposes, use only the region where the image is sharp and evenly illuminated.
Reproducibility
Repeat the FOV measurement three times for each objective, removing and replacing the stage micrometer between measurements. The values should agree within 2%. Larger variability suggests mechanical instability in the stage or eyepiece positioning.
Documentation
Record the following in your laboratory notebook:
- Microscope make, model, and serial number
- Eyepiece field number
- Objective magnifications and numerical apertures
- Tube factor (if applicable)
- Calculated FOV for each objective
- Measured FOV from stage micrometer calibration
- Date of calibration
- Any discrepancies and corrective actions taken
Troubleshooting
| Observation | Likely Cause | Discriminating Check |
|---|---|---|
| Calculated FOV does not match measured FOV | Incorrect field number or tube factor | Verify FN on eyepiece; check for intermediate magnifier |
| FOV changes when switching between eyepieces | Eyepieces have different field numbers | Compare FN markings on both eyepieces |
| FOV is smaller than expected at high magnification | Objective magnification is higher than labeled | Check objective marking; measure with stage micrometer |
| FOV is larger than expected at low magnification | Objective magnification is lower than labeled | Check objective marking; verify turret position |
| Edges of FOV are dark or distorted | Field stop is partially closed or objective is not plan-corrected | Inspect eyepiece field stop; use plan objective |
| FOV varies with focus position | Stage is not perpendicular to optical axis | Check stage alignment; consult service manual |
| Measured FOV differs between brightfield and fluorescence | Different optical paths have different magnifications | Measure FOV in each mode separately |
| Camera FOV does not match eyepiece FOV | Camera adapter magnification differs from assumed value | Measure camera FOV with stage micrometer |
Limitations
Optical Limitations
Field curvature. Non-plan objectives produce images where the center and edges are not simultaneously in focus. This makes accurate measurement at the periphery impossible. Always use plan objectives for measurement work, or restrict measurements to the central region of the FOV.
Distortion. Some objectives, particularly low-cost or wide-field designs, introduce barrel or pincushion distortion. This causes the apparent size of objects to vary with their position in the FOV. Distortion is most noticeable at the edges and can introduce 5–10% error in measurements.
Depth of field. At high magnifications, the depth of field is very shallow (typically <1 µm at 100×). Specimens that are thicker than the depth of field will appear partially out of focus, making accurate size estimation difficult. For thick specimens, consider using a different imaging modality or measuring only the in-focus portion.
Practical Limitations
Eyepiece variability. The field number is a nominal value; actual field stop diameters can vary by ±0.5 mm between eyepieces of the same model. This introduces a small but systematic error. Calibration with a stage micrometer corrects for this.
Objective labeling. Some objectives are labeled with their magnification for a specific tube lens focal length. Using an objective on a microscope with a different tube lens focal length changes the effective magnification and thus the FOV. Always verify compatibility.
Digital camera systems. When using a camera, the FOV depends on sensor size and adapter magnification, not the eyepiece FN. The camera FOV may be smaller or larger than the eyepiece FOV, depending on the adapter. Always calibrate the camera system separately.
Specimen-Related Limitations
Refractive index mismatch. When imaging through media with different refractive indices (e.g., water, oil, or mounting medium), the apparent size of objects can change due to refraction. This effect is usually small (<2%) for typical biological specimens but becomes significant with high-NA oil immersion objectives.
Specimen thickness. For thick specimens, the FOV at the top surface may differ from the FOV at the bottom surface due to parallax. This is particularly problematic for 3D structures like organoids or tissue sections. For such specimens, use the FOV calculated for the plane of focus.
Interpretation of Results
Using FOV for Size Estimation
The FOV provides a reference scale for estimating specimen dimensions. The accuracy of your estimate depends on how precisely you can determine the fraction of the FOV occupied by the specimen. For rough estimates (e.g., "this cell is about half the FOV"), the error can be 20–50%. For more precise measurements, use an eyepiece reticle or image analysis software.
Converting FOV to Area
The area of the FOV is calculated as:
Area (µm²) = π × (FOV/2)²
For example, a 500 µm FOV gives an area of π × (250)² ≈ 196,350 µm². This is useful for estimating cell density or coverage area.
Relating FOV to Resolution
The FOV and resolution are inversely related. Higher magnification objectives provide smaller FOVs but higher resolution. The resolution (minimum distinguishable distance) is given by the Abbe formula:
Resolution (µm) = 0.61 × λ / NA
Where λ is the wavelength of light (typically 0.55 µm for green light) and NA is the numerical aperture of the objective. For a 40× objective with NA 0.65, the resolution is approximately 0.52 µm. This means you can distinguish details down to about 0.5 µm within the 500 µm FOV.
Practical Example: Estimating Bacterial Cell Size
At 100× magnification with FN 20, the FOV is 200 µm. A rod-shaped bacterium appears to span about 1/40 of the FOV. Estimated length = 200 µm / 40 = 5 µm. This is consistent with typical Escherichia coli dimensions (2–6 µm). For confirmation, measure multiple cells and calculate the mean and standard deviation.
Documentation and Record Keeping
Essential Records
Maintain a calibration log for each microscope, including:
- Date of calibration
- Microscope identification (make, model, serial number)
- Eyepiece field number
- Objective magnifications and numerical apertures
- Calculated FOV for each objective
- Measured FOV from stage micrometer calibration
- Any discrepancies and corrective actions
- Calibrator's name and signature
Standard Operating Procedure (SOP)
Write an SOP for FOV calculation and calibration that includes:
- Purpose and scope
- Equipment and materials list
- Step-by-step procedure
- Calculation examples
- Quality control criteria
- Troubleshooting guide
- Documentation requirements
Review and update the SOP annually or whenever equipment changes.
Data Management
Store calibration data in a laboratory information management system (LIMS) or a secure spreadsheet. Include metadata such as microscope settings, ambient conditions (temperature, humidity), and any notes on specimen preparation. For research projects, archive calibration images with stage micrometers for audit purposes.
Biosafety Considerations
General Laboratory Safety
While FOV calculation itself poses no biological hazard, the specimens you measure may be infectious. Always follow your institution's biosafety guidelines, as outlined in the CDC/NIH publication "Biosafety in Microbiological and Biomedical Laboratories" (BMBL) [<a href="#ref-1">1</a>]. For routine teaching laboratories, work with BSL-1 organisms (e.g., non-pathogenic Escherichia coli K-12, Saccharomyces cerevisiae, or Bacillus subtilis). Do not use pathogenic organisms for calibration or practice measurements.
Specimen Handling
- Use aseptic technique when handling microbial cultures.
- Disinfect the microscope stage and objectives after each use with 70% ethanol or an appropriate disinfectant.
- Never use oil immersion objectives with live cultures unless the objective is designed for such use and properly decontaminated afterward.
- Dispose of slides and coverslips in sharps containers if they are broken or contaminated.
Chemical Safety
- Stage micrometers and calibration standards are typically non-hazardous, but handle them as you would any glass slide.
- Immersion oil is generally non-toxic but can cause skin irritation in some individuals. Wash hands after handling.
- If using fluorescent calibration beads, follow the manufacturer's safety data sheet for disposal.
Recombinant or Synthetic Nucleic Acids
If your specimens contain recombinant or synthetic nucleic acids, follow the NIH Guidelines for Research Involving Recombinant or Synthetic Nucleic Acid Molecules [<a href="#ref-2">2</a>]. Ensure your work is approved by your Institutional Biosafety Committee (IBC) and conducted at the appropriate containment level.
Frequently Asked Questions
1. What if my eyepiece does not have a field number printed on it?
If the field number is not marked, you can determine it by measuring the field stop diameter. Remove the eyepiece and look at the bottom; you will see a circular metal aperture. Measure its diameter with a ruler or calipers in millimeters. This is your field number. Alternatively, use a stage micrometer to measure the FOV directly at a known magnification and solve for FN: FN = (Measured FOV (µm) × Objective Magnification) / 1000.
2. Does the FOV change when I use a camera instead of eyepieces?
Yes. The camera FOV depends on the sensor size and the camera adapter magnification, not the eyepiece field number. To calculate the camera FOV, use the sensor dimensions (available from the camera manual) and the adapter magnification. For example, a 1/2" sensor (6.4 mm × 4.8 mm) with a 40× objective and 0.5× adapter gives a horizontal FOV of (6.4 / (40 × 0.5)) × 1000 = 320 µm. Always calibrate the camera system with a stage micrometer for accurate measurements.
3. How do I measure the FOV for a stereo microscope?
Stereo microscopes have a different optical design. The FOV is typically given by the manufacturer as a function of zoom position. For example, a stereo microscope with a 1× objective and 10× eyepieces might have a FOV of 20 mm at 1× zoom and 2 mm at 10× zoom. Consult the microscope manual for the FOV at each zoom setting. Alternatively, place a ruler directly on the stage and measure the visible width at each zoom setting.
4. Can I use the FOV to calculate the number of cells in an image?
Yes, but only as a rough estimate. If you know the FOV area and the average cell size, you can estimate the number of cells per FOV. For example, if the FOV area is 200,000 µm² and each cell occupies approximately 100 µm², you might expect about 2000 cells per FOV. However, this assumes uniform cell distribution and no overlap. For accurate cell counting, use a hemocytometer or automated cell counter, as described in the related article "How to Calculate Cell Concentration Using a Hemocytometer."
Related Clinical & Scientific Guides
- Loop-Mediated Isothermal Amplification (LAMP) Assay for Rapid Detection of African Swine Fever Virus in Oral Fluids
- How to Calculate the Concentration of Protein Using the Lowry Assay
- DNA Extraction from Saliva: Non-Invasive Sampling and Protocols
References and Further Reading
[1] CDC and NIH. Biosafety in Microbiological and Biomedical Laboratories (BMBL), 6th Edition. U.S. Department of Health and Human Services, 2020. Available at: https://www.cdc.gov/labs/bmbl/index.html. This is the authoritative reference for biosafety practices in microbiological laboratories, including safe handling of specimens during microscopy. [2] National Institutes of Health. NIH Guidelines for Research Involving Recombinant or Synthetic Nucleic Acid Molecules. Available at: https://osp.od.nih.gov/policies/biosafety-and-biosecurity-policy/nih-guidelines-for-research-involving-recombinant-or-synthetic-nucleic-acid-molecules/. This document provides the regulatory framework for work with recombinant nucleic acids, relevant when imaging genetically modified organisms. [3] Sparks H, Rowe-Brown L, Alexandrov Y, et al. High content 3D imaging by dual-view oblique plane microscopy. 2025. PubMed ID: 41356843. This article describes advanced microscopy techniques that require precise FOV calculations for multifield imaging of biological samples in multiwell plates. [4] Patra A, Melton L, Sawyer LS, et al. A Standardized Prism-Based TIRF Platform for Quantitative Single-Molecule Fluorescence Studies of Biomolecular Dynamics. 2026. PubMed ID: 42345887. This work provides a framework for calibration and validation in fluorescence microscopy, including FOV considerations for single-molecule imaging. [5] Ramahefarivo E, Böger L, Saichol T, et al. A modular multi-color fluorescence microscope for simultaneous tracking of cellular activity and behavior. 2026. PubMed ID: 42156370. This article demonstrates a modular microscope system where FOV calculation is essential for tracking moving organisms and quantifying behavior. [6] National Center for Biotechnology Information. NCBI Bookshelf: Molecular Biology and Laboratory Methods. Available at: https://www.ncbi.nlm.nih.gov/books/. This searchable collection of biomedical books and methods references provides additional background on microscopy principles and laboratory techniques.Related Articles
- How to Calculate the Resolution of a Light Microscope
- How to Calculate the Magnification of a Microscope Image
- How to Calculate the Volume of a Bacterial Colony from Diameter
- How to Calculate Bacterial Colony-Forming Units (CFU) per mL
- How to Calculate the Limit of Detection for a qPCR Assay
- How to Calculate Cell Concentration Using a Hemocytometer