Umbilical Herniorrhaphy in Dogs: Procedure Steps
By Dr. Zubair Khalid, DVM, MS, PhD ·
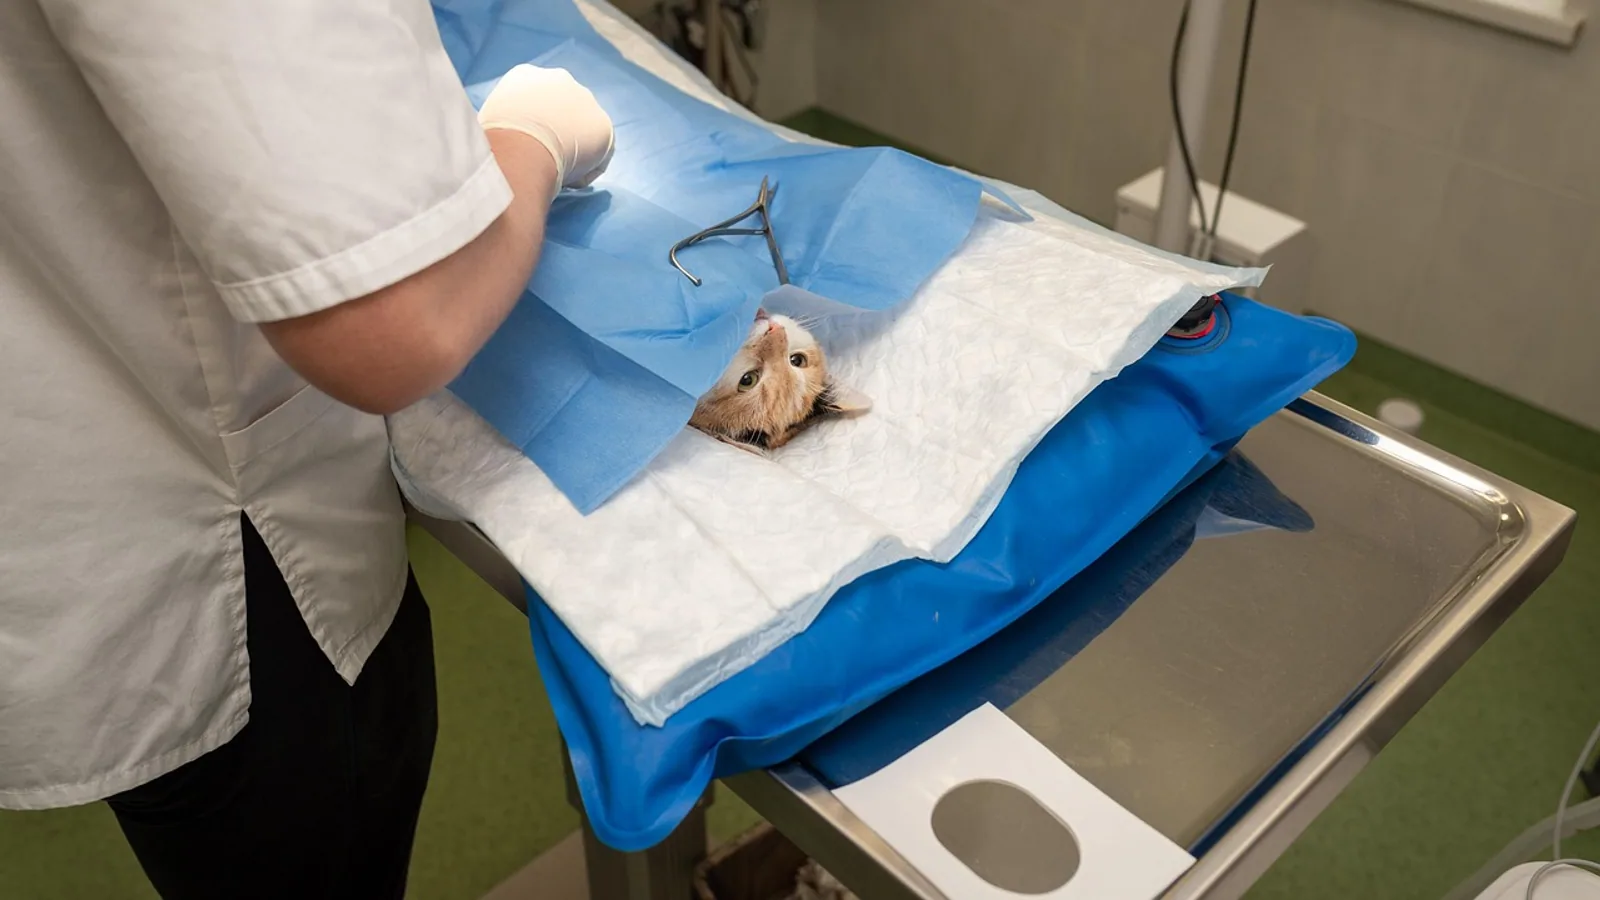
Umbilical herniorrhaphy in dogs closes the abdominal wall defect at the umbilicus, returns any herniated contents to the abdomen, and reconstructs a tension-free abdominal wall. The method achieves three goals at once: it removes the risk of bowel incarceration, it restores the linea alba as a continuous load-bearing structure, and it produces a comfortable, cosmetic scar line.
A simple open herniorrhaphy of a small umbilical defect takes roughly 20 to 40 minutes of hands-on surgical time in a stable puppy. A large defect, a chronic hernia with adhesions, or a case requiring mesh can take 60 to 90 minutes. When the procedure is combined with an ovariohysterectomy or castration, the umbilical repair adds about 15 to 25 minutes to the anesthetic episode. Total elapsed time includes induction, clipping and aseptic preparation, the repair itself, and recovery, so plan a 60 to 120 minute hospital visit for an elective case.
This article covers the herniorrhaphy incision, the reduction of hernial contents, the assessment for strangulation and adhesions, closure by layers, the difference between simple herniorrhaphy and hernioplasty with mesh, and the post-op monitoring points that catch complications early.
This article is educational and is not a substitute for veterinary diagnosis or treatment.
What an Umbilical Hernia Is and Why Timing Matters
An umbilical hernia is a failure of the umbilical ring to close after birth. The abdominal wall defect sits at the umbilicus, in the linea alba, and it may be filled with fat only (often called a fatty or omental hernia) or with intestine. A dog umbilical hernia is usually congenital. Puppies umbilical hernias are frequently first noted by the breeder or the new owner as a soft, reducible swelling at the belly button.
Umbilical hernias are one of the most common congenital abdominal wall defects in dogs, and they frequently occur alongside other congenital anomalies. In a case series of peritoneopericardial diaphragmatic hernias in dogs and cats, umbilical hernias, other abdominal wall hernias, and sternal anomalies were the most common concurrent congenital abnormalities identified [1]. That association is a reminder to examine the whole patient, not just the umbilicus.
A puppy umbilical hernia has two possible natural courses. Many close spontaneously as the abdominal wall matures. Others persist. A small, soft, reducible defect in a growing puppy is often monitored, and if it is still present at the time of spay or neuter, it is repaired during that same anesthetic episode. That combined timing is efficient, it spares the puppy a second anesthesia, and it gives the surgeon a fully grown abdominal wall to close. The Veterinary Partner client-education resources from VIN describe this conservative-then-elective approach as standard for small, uncomplicated hernias in puppies and kittens [2][3].
The reason timing matters is incarceration. A defect that admits intestine can trap it. Once bowel is trapped, the blood supply can be compromised, and the patient develops an incarcerated or strangulated hernia. That is a surgical emergency rather than an elective procedure. Any umbilical swelling that is firm, painful, warm, discolored, or accompanied by vomiting, lethargy, or abdominal pain needs immediate veterinary assessment.
Anatomy of the Umbilical Defect
The hernial ring is a fibrous opening in the linea alba, the midline fibrous band formed by the fused aponeuroses of the abdominal muscles. The linea alba is the strongest anchoring tissue in the ventral abdominal wall and the tissue the surgeon uses for the primary closure.
The hernial sac is a thin, translucent layer of peritoneum and often a small amount of fibrous tissue. In a congenital hernia, the sac is usually complete. In chronic hernias, the sac may be thick and adherent to the skin or the underlying contents.
The hernial contents can be omentum, falciform fat, small intestine, or, in large defects, portions of the spleen or bladder. Contents determine urgency. Fat-only hernias rarely strangulate. Bowel-containing hernias carry incarceration risk. A narrow ring with a large amount of herniated tissue is the highest-risk pattern because a tight ring compresses the herniated bowel.
Surgeons should also remember the dorsal relationship. The umbilical region is bounded by the falciform ligament cranially and the prepuce in males. In females, the umbilicus sits cranial to the mammary chain. That anatomy matters for the herniorrhaphy incision placement, because staying on the midline avoids the prepuce and the mammary tissue and preserves the linea alba as the closure anchor.
Assessing the Hernia Before Surgery
Preoperative assessment separates the elective case from the urgent case.
Palpation is the first tool. With the dog standing and then in dorsal recumbency, the surgeon palpates the ring and estimates its diameter in centimeters. A ring that admits one finger is small. A ring that admits two to three fingers is moderate. A ring larger than about 3 to 4 cm is large and raises the question of mesh or a more extensive reconstruction.
Reducibility is the second tool. If the contents can be gently pushed back into the abdomen, the hernia is reducible. If they cannot, it is irreducible, and adhesion or incarceration becomes more likely.
Imaging can help when the diagnosis is in doubt or when contents are equivocal. Ultrasound of the umbilical region shows the sac, the contents, and any bowel wall thickening. Abdominal radiographs show gas-filled bowel loops outside the peritoneal cavity in larger hernias. Cross-sectional imaging is reserved for complex or atypical cases.
Systemic signs are the third tool and the most important. Vomiting, anorexia, abdominal pain, and a firm, nonreducible swelling point to incarceration. Those patients are not elective. They need stabilization, fluid therapy, and prompt surgery.
Materials and Reagents
| Item | Working detail and purpose |
|---|---|
| Chlorhexidine or povidone iodine scrub and solution | Aseptic skin preparation of the ventral midline and flank |
| Sterile saline | Lavage of the hernial sac and abdominal cavity if contamination is suspected |
| Absorbable monofilament suture, size 3-0 to 2-0 | Primary linea alba closure in adult dogs |
| Absorbable monofilament suture, size 4-0 to 3-0 | Primary closure in puppies and small dogs, and subcutaneous closure |
| Nonabsorbable monofilament suture, size 3-0 to 2-0 | Skin closure, or skin staples |
| Polypropylene mesh | Reinforcement when the defect is large or the closure is under tension |
| Sterile drapes, scalpel handle and blades, Metzenbaum scissors | Sharp dissection of the hernial sac |
| Rat-tooth and Adson forceps, mosquito hemostats, needle holders | Tissue handling and hemostasis |
| Suction or sterile gauze sponges | Fluid and blood management in the dissection field |
| Local anesthetic (bupivacaine or lidocaine) | Incisional line block as part of a multimodal plan |
| Warm isotonic crystalloid fluids | Perioperative support |
| Multimodal analgesia plan | Opioid plus NSAID where not contraindicated |
Suture size scales with the patient. A 4 to 6 kg adult dog gets 3-0 to 2-0 for the linea alba. A 1 to 2 kg puppy gets 4-0. Monofilament absorbable suture is preferred for the linea alba because it maintains tensile strength during the critical healing window and produces less long-term reactivity than braided material. The subcutaneous and subcuticular layers take the same or one size smaller. Skin takes nonabsorbable monofilament or staples.
If mesh is needed, polypropylene mesh is the material most often described in canine hernia repair reporting. A case report of a complex perineal hernia with rectal diverticulum used polypropylene mesh combined with a collagen-based sponge to reinforce the repair, with no recurrence reported over a one-year period [4]. A retrospective series of perineal hernia repairs used a cone-shaped polypropylene mesh formed by suturing and placed into the hernial foramen, and reconstruction with the mesh was feasible in all 22 dogs [5]. Those reports are about a different anatomic hernia but the material behavior they describe, a synthetic mesh that is incorporated by the host and reinforces a weakened tissue plane, is the same principle that applies to a large umbilical defect.
Procedure Steps
The classic open technique for umbilical herniorrhaphy in dogs has been described in the veterinary literature for decades, including early reports of combined congenital hernia repairs [6]. The steps below follow the open technique used for umbilical hernia repair and described comparatively in the calf literature, where the open approach and the closed approach have been directly compared [7].
Step 1: Anesthesia, Positioning, and Preparation
Induce general anesthesia. Place the dog in dorsal recumbency with the limbs secured so the ventral abdomen is fully accessible. Clip a generous field, at least 5 cm beyond the proposed incision in every direction, and include the whole umbilical and preputial or mammary area. Scrub the skin with chlorhexidine or povidone iodine alternating with alcohol, and drape the field with sterile towels and a fenestrated drape.
Deliver local anesthesia as an incisional line block, or perform a regional block if your training supports it. Rectus sheath blocks have been described in calves undergoing umbilical herniorrhaphy and were associated with lower pain scores and reduced intraoperative anesthetic requirements [8]. The same regional principle applies in dogs, and a rectus sheath or transverse abdominis plane block can be used by surgeons trained in ultrasound-guided regional anesthesia.
The reason for careful preparation: the umbilicus folds on itself and traps bacteria in the umbilical recess. Prepare the umbilicus itself deliberately.
Step 2: The Herniorrhaphy Incision
Make a ventral midline incision directly over the hernia. Start 1 to 2 cm cranial to the hernial sac and extend 1 to 2 cm caudal to it. Use a scalpel blade to incise skin and subcutaneous tissue in one controlled pass, then extend with Metzenbaum scissors. If the sac is thin and adherent to the skin, incise the skin carefully and use blunt dissection near the sac.
Enlarge the incision, if needed, so the whole hernial ring is visible. If the dog is a male, angle the caudal extent of the incision slightly lateral to the prepuce to avoid the preputial fascia. If the dog is female, stay on the midline to avoid the mammary tissue.
The reason for the midline orientation: the linea alba runs along that same line, and the incision places the closure in line with the strongest tissue available. An off-midline incision forces you to anchor closure in weaker rectus sheath muscle rather than the linea alba.
Step 3: Sharp Dissection of the Hernial Sac
Free the hernial sac from the skin and subcutaneous tissue. Grasp the sac with atraumatic forceps, tent it up, and dissect around its base with Metzenbaum scissors or a scalpel, staying close to the sac to avoid creating dead space.
Once the sac is fully mobilized to the level of the ring, decide the sac's fate. For a small, clean, congenital sac, you can invert it into the abdomen with a blunt instrument and include it in the closure, or you can excise it at the level of the ring and discard it. For a thick, fibrous, chronic sac, excise it at the ring.
Open the sac if contents need to be inspected. Make a small nick in the sac, extend it with scissors, and expose the contents under direct vision.
The reason for tenting the sac before incision: tenting prevents inadvertent laceration of herniated bowel that may lie immediately underneath a very thin sac.
Step 4: Reduction of Contents
Inspect the contents before reducing them. Omentum or falciform fat is reduced with gentle traction. If bowel is present, examine the bowel wall for discoloration, edema, thinning, or a ring of compression where it crosses the hernial ring. Assess peristalsis and the mesenteric vessels. A viable bowel loop reduces into the abdomen after gentle traction and returns to a normal color and thickness.
If the contents are irreducible, do not force them. Extend the ring cranially or caudally to relieve the constriction. Extend along the avascular midline rather than laterally, where the cranial epigastric vessels run. Once the ring is enlarged, adhesions can be broken down bluntly with a finger or a swab, and the contents can be reduced.
Strangulated, nonviable bowel needs resection and anastomosis before closure. That is a substantially larger procedure, and it converts a simple hernia repair into an abdominal exploratory with intestinal surgery.
Step 5: Assess for Adhesions and Strangulation
Adhesions are fibrous bands from the sac to the bowel, omentum, or abdominal wall. Break them down with blunt dissection or sharp dissection under direct vision. Keep the dissection on the surface of the sac, not on the bowel serosa, to avoid an enterotomy.
Strangulation is a vascular event. The bowel wall is dark, the mesentery is congested, and peristalsis is absent. Confirm viability after reduction by wrapping the loop in a warm, saline-soaked sponge and re-inspecting after several minutes. If color, thickness, and peristalsis return, the bowel can be left in place. If not, resect the affected segment.
The reason for the deliberate assessment: a hernia repair that simply reduces a nonviable loop will result in peritonitis or dehiscence postoperatively, and the patient becomes far sicker than before surgery.
Step 6: Primary Closure of the Defect (Simple Herniorrhaphy)
A simple herniorrhaphy closes the defect with suture alone, using the tissue already present. This is the standard repair for small and moderate congenital hernias.
Place simple interrupted, figure-of-eight, or horizontal mattress sutures across the ring, taking bites of the linea alba and the fibrous ring edge. Include the peritoneum with each bite so no gap is left in the peritoneal seal. Use absorbable monofilament suture.
Start at the cranial end and progress caudally, or start at both ends and close toward the middle. The pre-placed technique (placing all sutures before tying any) gives the best control of tension, but it is optional for small defects.
Check the closure for gaps. The linea alba should feel continuous and flat. Close the subcutaneous tissue in a separate layer with interrupted or continuous absorbable suture. Close the skin with nonabsorbable monofilament in a simple interrupted, cruciate, or subcuticular pattern, or with staples.
In puppies, the linea alba bites should be small and gentle. Puppy tissue tears easily. A 4-0 suture on a small taper needle handles better than 2-0 on a large cutting needle.
Step 7: Hernioplasty With Mesh (When Primary Closure Fails)
A hernioplasty reinforces the closure with a synthetic or biological material. Herniorrhaphy types are usually categorized by what closes the defect (suture alone versus suture plus reinforcement), and mesh is the main reinforcement option in dogs.
Mesh is indicated when:
- The defect is large, generally larger than about 3 to 4 cm in a medium or large breed dog.
- Primary closure creates tension. Any closure that pulls the tissue edges together under visible tension is at risk of dehiscence and recurrence.
- The tissue at the ring is weak, thin, or has failed a previous repair.
- The dog has a chronic hernia with an attenuated linea alba that cannot hold sutures reliably.
Placement technique is onlay or inlay. In the onlay technique, the mesh is sutured over the closed linea alba or over the ring with a rim of overlap of at least 1 to 2 cm beyond the defect edge. In the inlay technique, the mesh is sutured into the ring itself, bridging the defect. Place interrupted sutures of nonabsorbable monofilament or long-lasting absorbable monofilament around the perimeter of the mesh. Take full-thickness bites of the abdominal wall so the mesh cannot migrate.
Tension matters because mesh that is sutured under tension will pull through the tissue. Sea the mesh down without tension by using the surrounding abdominal wall, not the edges of the defect, for most of the bite depth.
Polypropylene mesh is the material most often described for reinforcement in canine hernia repair. In the cone-shaped mesh repair of perineal hernias, polypropylene mesh reconstruction was feasible in all dogs and results included 73% excellent long-term prognosis at more than two weeks of follow-up, with major postoperative complications in 32% and recurrence in 14% [5]. Those numbers are for a different hernia type, but they show that mesh repairs can be done with good long-term functional results in dogs when the mesh is correctly positioned and covered.
Step 8: Layered Closure and Skin
Close the subcutaneous tissue with absorbable suture in a simple continuous or simple interrupted pattern. Eliminate dead space. Dead space is the single largest contributor to seroma formation.
Close the skin with nonabsorbable monofilament suture in an interrupted pattern, a cruciate pattern, or a subcuticular pattern if the surgeon prefers buried knots. Skin staples are an efficient alternative in well-behaved patients.
The closure should have three distinct layers: the linea alba or peritoneal layer, the subcutaneous layer, and the skin. Skipping the subcutaneous layer is a common cause of seroma and wound dehiscence.
Step 9: Recovery and Post-op Care
Recover the dog in a warm, quiet area with monitoring of heart rate, respiratory rate, temperature, and pain score. Provide multimodal analgesia, typically an opioid during the immediate postoperative period and an NSAID for several days if not contraindicated. Return the dog to its normal diet as soon as it is alert and swallowing. Limit activity for 10 to 14 days. Use an Elizabethan collar or a recovery suit to prevent licking and self-trauma.
Table: Defect Size, Contents, and Repair Choice
| Defect size | Typical contents | Repair approach |
|---|---|---|
| Under 1 cm | Fat or omentum only | Monitor in a young puppy, or simple herniorrhaphy at spay/neuter |
| 1 to 2 cm | Fat, sometimes omentum | Simple herniorrhaphy, single-layer or layered closure |
| 2 to 3 cm | Omentum, sometimes small bowel | Simple herniorrhaphy with careful ring inspection and reduction |
| Over 3 to 4 cm | Omentum, bowel, occasionally spleen or bladder | Hernioplasty with mesh, especially if primary closure is under tension |
| Recurrent or chronic | Adhesions, thickened sac | Resect sac, break down adhesions, reinforce with mesh if tissue quality is poor |
The table is a guide rather than a rule. The surgeon's intraoperative assessment of tissue quality and tension decides the final technique.
Decision Path for Repair
The flow below shows the main decision points from diagnosis to closure choice.
flowchart TD
    A[Diagnose umbilical hernia] --> B{Reducible and soft}
    B -->|Yes| C[Elective repair]
    B -->|No| D[Urgent surgery]
    C --> E{Defect size and tension}
    D --> E
    E -->|Small and no tension| F[Simple herniorrhaphy]
    E -->|Large or tension| G[Hernioplasty with mesh]
    F --> H[Close linea alba]
    G --> H
    H --> I[Close subcutaneous layer]
    I --> J[Close skin]
    J --> K[Post op monitoring]
Postoperative Monitoring Points
Monitor the incision daily for the first 10 to 14 days. Expect mild swelling and a soft, warm incision line. Report swelling that is rapidly enlarging, firm, red, draining, or painful. Expect mild bruising. Report spreading bruising, especially if the dog is uncomfortable.
Seroma is the most common postoperative finding. A seroma is a fluid pocket under the skin at the closure line. It is a serous collection rather than an infection. It can be managed conservatively in most cases, with warm compresses and leash-restricted activity. Large or tense seromas can be drained with a sterile needle under aseptic conditions, and a pressure wrap can help.
Wound swelling, wound dehiscence, and temporary discomfort or straining have been reported as minor postoperative complications after herniorrhaphy in dogs, with minor complications including surgical wound swelling in nine dogs, wound dehiscence in four, and temporary tenesmus in two dogs out of a series of 47 [9]. That pattern is typical of hernia repairs generally: minor wound issues are common, major failures are uncommon when the closure is technically sound.
Signs that need a same-day call:
- Vomiting more than once, or any vomiting with a swollen abdomen
- Lethargy that is not improving 24 hours after surgery
- A firm, painful, enlarging swelling at the incision
- Drainage of pus or foul-smelling fluid
- Dehiscence, meaning the incision line opens
- Difficulty urinating or defecating
- Pale gums or collapse
Monitor bowel function. A dog should pass stool within 48 to 72 hours after surgery. A longer delay, combined with a painful abdomen, is a red flag for an obstruction or an ileus.
Recheck at 10 to 14 days for suture or staple removal. Recheck at 4 to 6 weeks if the dog is a large breed or if mesh was used, to confirm the closure is stable.
When a Small Puppy Hernia Can Wait
A small, soft, reducible umbilical hernia in a puppy under 6 months old can be monitored if it is not causing signs and is under about 1 to 2 cm. That is the position described in client-facing veterinary education resources [2][3].
Reasons to monitor rather than repair immediately:
- The defect may close as the puppy grows.
- Anesthesia is safer in a slightly older puppy.
- The repair can be combined with the spay or neuter, giving one anesthetic episode.
Reasons to repair now rather than wait:
- The defect is large.
- Contents are intestine rather than fat.
- The hernia is irreducible, painful, or has caused any signs of illness.
- The owner cannot reliably monitor the puppy.
- The puppy is being placed for adoption and follow-up cannot be guaranteed.
The decision belongs to the veterinarian and the owner together, with the puppy's age, size, and general health in mind.
Herniorrhaphy Variations
Open herniorrhaphy is the standard technique. Variations exist for specific situations.
The open technique with peritoneal opening is the classic approach and is used when contents must be inspected directly. The closed technique avoids opening the peritoneum and relies on the sac staying intact. A prospective study in calves compared open and closed umbilical hernia techniques and found that the closed technique, avoiding peritoneal opening, was associated with reduced postoperative pain and oxidative stress, suggesting it is less invasive than the open technique [7]. For a small, uncomplicated puppy hernia with fat-only contents, the closed concept can be applied. For any hernia with suspected bowel, the open technique is preferred because it allows direct inspection of the contents.
Laparoscopic techniques exist for other hernia types in dogs. A laparoscopic percutaneous internal ring suturing technique has been described for inguinal hernia in dogs, using a single umbilical trocar and a small skin puncture for suture placement, with no recurrence during the study period and immediate return to full mobility after recovery [10]. Laparoscopy has also been described for peritoneopericardial diaphragmatic hernia repair, with a low-pressure carbon dioxide technique successfully completed in 92% of patients in one case series [11]. These techniques are not the standard approach for umbilical hernias in dogs, but they show that minimally invasive hernia repair is an active area of veterinary surgery.
Mesh reinforcement as a hernioplasty option fits within the broader herniorrhaphy types used in dogs. Polypropylene mesh and collagen-based scaffolds have been used to reinforce complex hernia repairs, with good long-term outcomes reported in a case report [4] and feasibility demonstrated across a case series [5].
Storage and Stability Notes for Implants and Suture
Store mesh in its original sterile packaging, flat, at room temperature, away from direct sunlight. Do not cut the package until the patient is on the table and the decision to place mesh has been made, because an opened package is no longer sterile.
Absorbable suture has a limited shelf life. Check the expiration date before opening. Store sutures at room temperature and away from moisture. Suture that has been soaked or that has passed its expiration date loses tensile strength and should not be used on a linea alba closure.
Nonabsorbable monofilament suture for skin closure should be stored the same way. Do not reuse suture from an opened pack that has been sitting out of the package.
Clinical Relevance, Limitations and Common Mistakes
Umbilical herniorrhaphy is a common, generally straightforward procedure with a good prognosis when the technique is clean and the closure is tension-free. The main risks are incarceration of bowel preoperatively, wound complications postoperatively, and recurrence if the closure is under tension or the tissue is weak.
Common mistakes include:
- Making the incision off the midline. This forces the closure to anchor in weak tissue.
- Incising the sac without tenting it first. This risks cutting herniated bowel.
- Reducing contents without inspecting them. A nonviable bowel loop left in the abdomen can cause peritonitis.
- Closing the linea alba under tension. This is a setup for dehiscence and recurrence.
- Using mesh in a contaminated field. Mesh in an infected field becomes a chronic nidus for infection.
- Skipping the subcutaneous layer. This leaves dead space and promotes seroma.
- Letting the dog lick the incision. Self-trauma is a common cause of dehiscence and infection.
- Sending a puppy home without a clear recheck schedule. Early detection of a seroma or dehiscence is much easier than late repair.
Individual dogs vary in anatomy, tissue quality, and healing. Every case needs a veterinarian's examination and judgment, and a complication in a previously repaired hernia or a patient with a very large defect should be managed by an experienced surgeon.
Frequently Asked Questions
How long does umbilical herniorrhaphy take in a dog?
A simple open umbilical herniorrhaphy takes roughly 20 to 40 minutes of hands-on surgical time. A large or complex repair with mesh can take 60 to 90 minutes. Combined with spay or neuter, the entire anesthetic episode typically runs 60 to 120 minutes.
What is the herniorrhaphy incision for a dog umbilical hernia?
The herniorrhaphy incision is a ventral midline skin incision directly over the hernia, extending 1 to 2 cm cranial and caudal to the hernial sac. Staying on the midline places the closure in the linea alba, which is the strongest anchor tissue for the repair.
What are the layers closed in umbilical herniorrhaphy?
Three layers are closed in sequence: the peritoneum and linea alba as the primary structural closure, then the subcutaneous tissue to eliminate dead space, then the skin with nonabsorbable suture or staples. Each layer has its own suture type and pattern.
When is mesh indicated in a dog umbilical hernia repair?
Mesh is indicated when the defect is large, when primary closure creates tension, or when the tissue at the ring is too weak to hold sutures reliably. Mesh reinforcement converts a simple herniorrhaphy into a hernioplasty.
Can a puppy umbilical hernia close on its own?
Yes, a small, soft, reducible umbilical hernia in a young puppy under 6 months old can close on its own as the abdominal wall matures. Those hernias are often monitored and then repaired at the time of spay or neuter if the defect is still present.
What are the signs of an incarcerated umbilical hernia in a dog?
An incarcerated umbilical hernia is firm, painful, and not reducible. The dog may vomit, refuse food, or show abdominal pain. This is a surgical emergency and needs immediate veterinary assessment.
What complications should I watch for after umbilical herniorrhaphy?
Watch for a seroma (a soft fluid pocket under the incision), wound swelling, dehiscence (the incision opening), drainage, and signs of pain. Minor swelling is common. Rapidly enlarging or painful swelling needs a same-day veterinarian call.
Can umbilical herniorrhaphy be combined with spay or neuter?
Yes, umbilical herniorrhaphy is commonly combined with ovariohysterectomy or castration, particularly in puppies with small hernias that were monitored rather than repaired at diagnosis. Combining procedures means one anesthetic episode rather than two.
Related Articles
- Procedure for Quality Control: Step-by-Step Implementation in a Molecular Lab
- Understanding Laboratory Balance Calibration: Types, Procedures, and Quality Checks
- How to Calibrate a Micropipette: Step-by-Step Procedure for Accurate Liquid Handling
- RNA Modification: Types, Steps, and Why It Matters
- RNA Processing: Steps, Types, and Mechanisms Explained
- Polymerase Chain Reaction: Steps, Types, and Uses
- Removing Surgical Stitches: Step-by-Step Guide
- Cephalic Venipuncture in Dogs and Cats: Steps
Sources
- Surgical and nonsurgical treatment of peritoneopericardial diaphragmatic hernia in dogs and cats: 58 cases (1999-2008).
- Umbilical Hernias in Puppies and Kittens - Veterinary Partner - VIN
- Umbilical Hernias in Puppies and Kittens - Veterinary Partner - VIN
- Combined use of polypropylene mesh and collagen sponge in the surgical repair of perineal hernia with rectal diverticulum in a dog.
- Retrospective analysis of perineal herniorrhaphy with cone-shaped polypropylene mesh in dogs: technique description and outcome.
- Repair of congenital diaphragmatic hernia and umbilical hernia in a dog.
- Impact of Two Surgical Techniques for Umbilical Hernia Repair, With and Without Peritoneal Opening, on Pain Response, Sedation, and Oxidative Stress in Calves.
- Clinical efficacy of an ultrasound-guided bilateral rectus sheath block for umbilical hernia repair in calves: A prospective randomized trial.
- A novel technique to incorporate the sacrotuberous ligament in perineal herniorrhaphy in 47 dogs.
- Laparoscopic assisted percutaneous herniorrhapy in dogs using PIRS technique.
- Laparoscopic repair of peritoneopericardial hernias: Multicentric retrospective case series of 12 dogs and one cat.