Removing Surgical Stitches: Step-by-Step Guide
By Dr. Zubair Khalid, DVM, MS, PhD ·
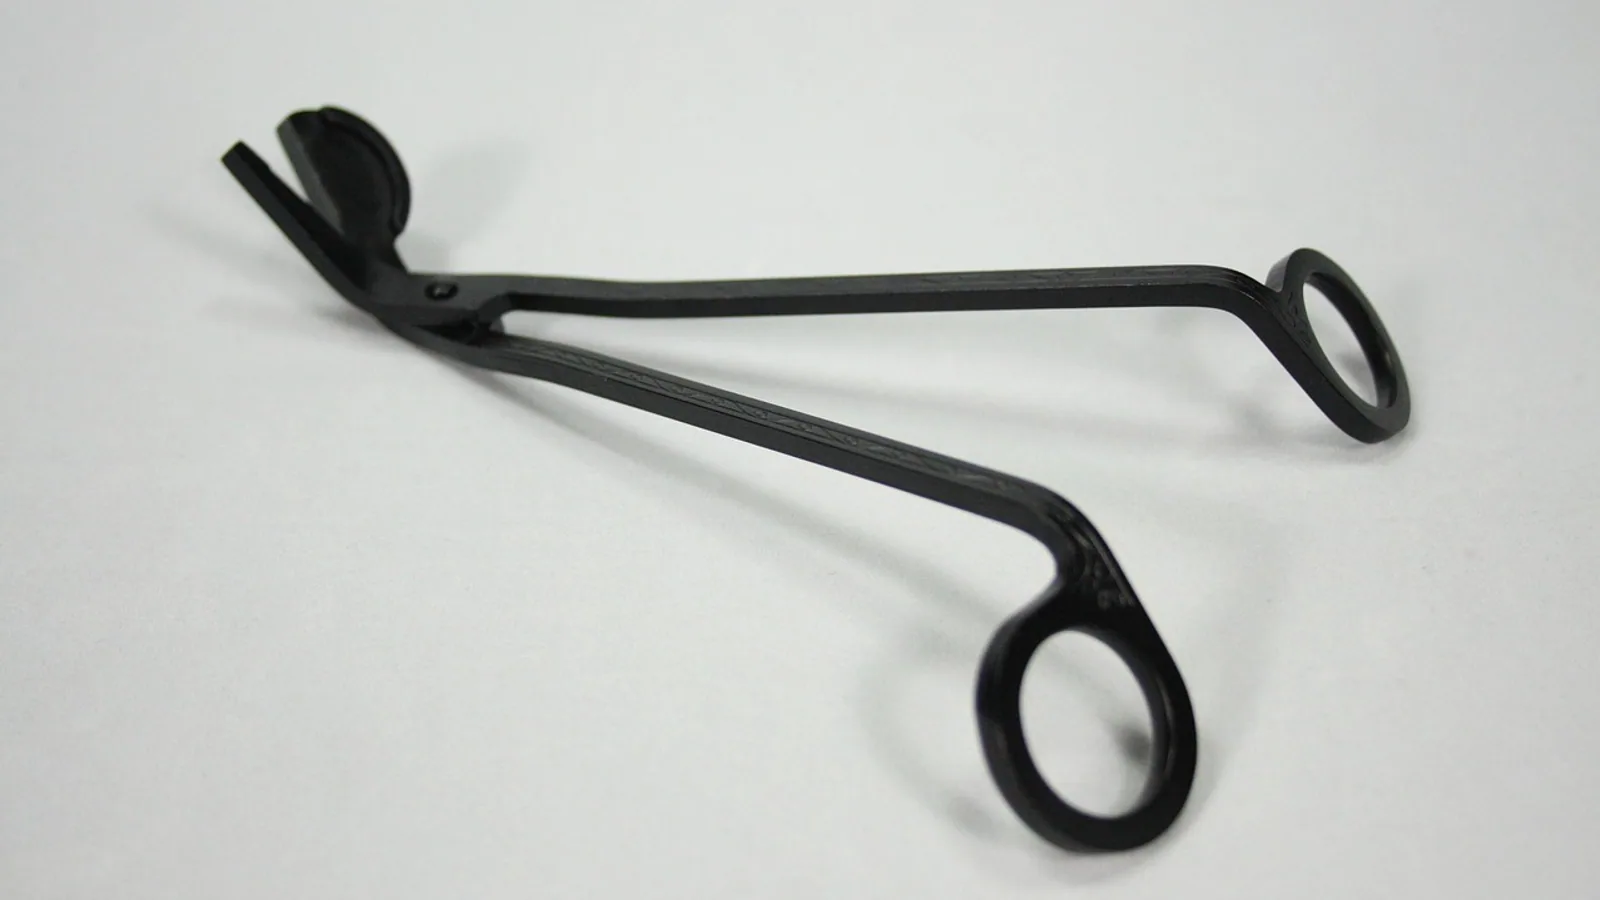
Removing surgical stitches looks simple until you are the person holding the scissors. This guide walks you through the full procedure the way it is taught in a clinical skills lab: confirm the wound has healed enough, confirm the suture type, set up the correct instruments, prepare the skin aseptically, cut the right strand in the right place, and document every suture that comes out. By the end you will be able to run a suture removal appointment from start to finish, recognize the four situations that require a veterinarian instead of a pair of scissors, and explain the timeline to a client without guessing.
You need a clean examination surface, good lighting, a suture removal kit, and a way to restrain the patient safely. You also need the operative record from the day of surgery. Without knowing the suture material and the closure pattern, you are working blind, and cutting the wrong strand can leave a buried loop of foreign material inside the skin.
This article is educational and is not a substitute for veterinary diagnosis or treatment.
Why Suture Removal Is a Clinical Procedure, Not a Chore
A suture is a foreign body. The skin tolerates it long enough to hold the wound edges together, then the body starts to react to it. Nonabsorbable materials such as nylon and polypropylene stay in place until someone removes them, and the tissue response around each bite is a mix of inflammation, epithelial tracking along the suture tract, and bacterial colonization of the braided or monofilament surface. Removing stitches is the step that ends that foreign body exposure.
The evidence on closure materials shows why the timing and material matter. In a randomized trial of wound closure after total knee arthroplasty, erythema was more frequent in the polypropylene group in the early postoperative days, while complications clustered in the polyglactin 910 group later in the postoperative period [1]. That pattern makes sense. A nonabsorbable monofilament holds tension and irritates the skin early, while an absorbable braided suture loses strength and can become a nidus for late inflammation if it is left too long. Female sex, diabetes mellitus, and ASA Grade III status were significant factors associated with dehiscence and surgical site infection in that trial [1].
The suture pattern also changes how removal works. Knotless barbed sutures, used in human oral surgery and lumbar spine closure, reduce suturing time and eliminate the knot that must be located and cut during removal [2][3]. A knotless closure changes the removal step from "find the knot and cut below it" to "identify the terminal end and withdraw the strand." Adhesive and device-based closures such as cyanoacrylate, hydrogel adhesives, and dermatotraction devices avoid the removal step entirely or replace it with atraumatic debonding [4][5][6]. For the traditional knotted closure you will still see in most veterinary practices, the knot is your landmark.
One practical detail that is easy to overlook: the scissors themselves become contaminated during removal. In a veterinary study of suture scissors used on 41 patients (38 dogs and 3 cats), 14 of 41 pre-disinfection cultures (34.1%) grew bacteria, with Staphylococcus species the most frequent organisms at 9 of 14 isolates, and 4 of those were methicillin-resistant subtypes [7]. After 60 seconds of glass bead disinfection, no post-disinfection cultures showed growth [7]. The lesson is straightforward. Suture scissors are a fomite, and they need a defined disinfection step between patients.
Before You Cut Anything: Two Checks That Prevent Most Mistakes
Check 1: Has the wound actually healed?
Suture removal is a healing assessment disguised as a mechanical task. You are looking for a wound that is closed, dry, and holding its own tension. Run through this list before you touch the skin.
- The wound edges are apposed along the full length with no gap.
- The incision line is dry, or has only a thin serous crust.
- There is no purulent discharge, no foul odor, and no expanding area of redness.
- Swelling is stable or decreasing compared with earlier visits.
- The patient is not painful on gentle palpation of the wound margins.
- No suture has already pulled through the skin or loosened.
If any of those fail, stop. An infected or partially dehisced wound is not a removal appointment. It is a re-evaluation appointment.
Check 2: What was placed, and how?
Pull the surgical record and answer four questions.
- What suture material was used in the skin layer?
- What size was it?
- What pattern was used (simple interrupted, cruciate, continuous, subcuticular, or knotless)?
- Were there buried sutures in deeper layers?
The fourth question is the one people skip. Absorbable sutures placed in the subcutaneous or fascial layer are meant to stay. If a wound was closed with a buried absorbable layer plus skin sutures, you remove only the skin sutures. If the record is unclear, treat the wound as if buried material is present and remove only what is visibly on the surface.
Suture Material and Typical Removal Timing
Timing follows two rules. The wound must be strong enough to hold without support, and the suture must not be left long enough to cause its own problems. Skin regains meaningful tensile strength over the first one to two weeks in dogs and cats, which is why most skin closures come out in that window. Sites under tension, over joints, or in species with slower healing need longer.
| Suture material | Absorbable? | Typical skin removal timing | Notes |
|---|---|---|---|
| Nylon (monofilament) | No | 7 to 14 days | Standard nonabsorbable skin suture in dogs and cats. Remove when healed. |
| Polypropylene | No | 7 to 14 days, longer over joints | More early erythema reported after knee arthroplasty closure [1]. |
| Silk | No | 7 to 14 days | Braided, holds bacteria, remove on schedule. |
| Polyglactin 910 | Yes | Often not removed, or 10 to 14 days if external | Late postoperative complications clustered in this group in one arthroplasty trial [1]. |
| Polydioxanone (PDS) | Yes | Usually not removed | Slow absorption, sustained tensile strength, comparable scar outcomes to nonabsorbable in one rhinoplasty trial [8]. |
| Knotless barbed | Usually absorbable | Not removed, or per manufacturer | Eliminates the knot, reduces suturing time [2][3]. |
| Cyanoacrylate adhesive | Not a suture | Not removed | Sutureless closure option [4]. |
| Hydrogel skin adhesive | Not a suture | Not removed | On-demand debonding is an emerging design goal [5]. |
Two clinical anchors for the dog and cat timeline come from veterinary case series. In dogs undergoing limb amputation, the median interval from surgery to suture removal was 13 days, with a range of 4 to 23 days, and all recorded complications occurred in dogs weighing more than 27 kg [9]. In dogs recovering from tibial plateau leveling osteotomy, follow-up visits were scheduled at seven days for suture removal [10]. Those two numbers frame the normal range: seven days is a common first look, and 13 to 14 days is a common actual removal point.
Instrument and Consumable List
Set up before you restrain the patient. A missing item mid-procedure means releasing a patient who has already been positioned.
- Thumb forceps (fine, non-toothed or lightly toothed) to grasp the knot or suture strand
- Suture scissors (small, sharp, curved tips preferred) to cut below the knot
- Straight scissors as a backup for thick or buried strands
- Sterile gauze squares for blotting and for wiping the skin
- Antiseptic solution for skin preparation, used as directed by your practice protocol
- Examination gloves, changed between patients
- A sharps container within arm's reach
- A suture count record or the patient's chart
- Good directional lighting, ideally a headlamp or adjustable exam light
- Optional: a suture removal staple remover if staples were used instead of sutures
The glass bead disinfection study is worth building into your workflow. Suture scissors used on dogs and cats carried bacteria in roughly one third of pre-disinfection samples, and a 60-second glass bead cycle eliminated detectable growth in that study [7]. If your practice does not have a glass bead device, use your standard instrument disinfection protocol between patients and treat the scissors as contaminated after every removal.
Step-by-Step Suture Removal
The workflow below is the sequence to follow for a standard knotted skin closure. Read it once before you start, then work through it in order.
flowchart TD
    A[Review surgical record] --> B{Wound healed}
    B -->|No| C[Stop and refer]
    B -->|Yes| D[Confirm suture type]
    D --> E[Assemble instruments]
    E --> F[Prepare skin aseptically]
    F --> G[Grasp knot with forceps]
    G --> H[Cut strand below knot]
    H --> I[Withdraw suture]
    I --> J{All sutures counted}
    J -->|No| G
    J -->|Yes| K[Inspect wound and document]
Step 1: Review the Record and Confirm the Plan
Read the operative note aloud to yourself. Confirm the material, the pattern, and whether buried sutures exist. Decide in advance how many external sutures you expect to remove. If the note says "12 simple interrupted skin sutures," you will count 12 strands out. That number is your audit trail.
Step 2: Position and Restrain the Patient
Use the least restraint that keeps the patient still and keeps you safe. For most dogs and cats, a trained holder plus a non-slip surface is enough. Muzzle training or a basket muzzle may be appropriate for a painful or anxious patient. For horses, a stocks or a well-handled head tie is standard, and a twitch may be needed for a hind limb wound. For reptiles, gentle manual restraint with support of the body and limbs works for most small species, and a towel wrap helps for lizards and snakes.
Do not proceed if the patient is thrashing. A moving patient plus sharp scissors near a healing wound is how wounds get reopened.
Step 3: Prepare the Skin Aseptically
Aseptic preparation means reducing the bacterial load on the skin around the wound before you create any new break in the surface. The suture tract is a direct channel from the skin surface into the dermis, so a contaminated strand dragged through that tract can seed the deeper tissue.
Follow your practice protocol for skin antisepsis. The general sequence is:
- Put on clean examination gloves.
- Remove any dried crust or discharge with a gauze square moistened with your chosen antiseptic solution.
- Clean from the wound outward in a circular pattern, using a fresh gauze square for each pass.
- Allow the antiseptic to contact the skin for the contact time specified by the manufacturer.
- Blot dry with sterile gauze if the product requires it.
Do not soak the wound. Do not scrub the incision line. The goal is a clean field, not a wet one.
Step 4: Grasp the Knot
Use the thumb forceps to lift the knot gently off the skin. You want the knot elevated so you can see the strand that passes through the skin on both sides of it. Gentle traction is enough. Pulling hard on the knot drags the contaminated external portion of the suture through the tissue and can tear the healing wound edge.
If the knot is crusted into the skin, moisten it with a gauze square before you try to lift it. Forcing a dry knot loose damages the epithelium that has already closed over it.
Step 5: Cut the Strand Below the Knot
This is the step that separates a clean removal from a contaminated one. Slide the tip of the suture scissors under the knot and cut the strand on one side, as close to the skin surface as you can get without nicking the skin. Cutting below the knot means the portion of suture that was outside the body, the part carrying surface bacteria, stays attached to the knot and comes out with it. If you cut above the knot, you leave a contaminated segment inside the tract and you have to pull it through.
For a simple interrupted suture, you cut one side of the loop and then withdraw the suture by pulling on the knot. The strand slides out through the tract in the direction it was placed.
For a continuous or Ford interlocking pattern, you cut each loop individually and withdraw each segment. Do not cut one end and pull the whole line, because the strand will drag through every tract along its path.
For a subcuticular pattern, the strand runs inside the dermis and only the ends are external. Cut one end and pull from the other, and confirm the full length comes out.
Step 6: Withdraw the Suture and Inspect the Tract
Pull the suture out in line with the wound, not at an angle. Watch the tract as the strand leaves it. A tract that gapes open, bleeds, or discharges after removal is a finding you need to document. Set the removed suture aside on the gauze so you can count it.
Step 7: Count Every Suture
Count the removed sutures against the operative record before the patient leaves the table. If the record says 12 and you have 11 on the gauze, find the twelfth. It may be buried under a crust, it may have already fallen out, or it may have been placed in a deeper layer that was never meant to come out. Do not close the appointment until the count reconciles or the discrepancy is explained in the record.
Step 8: Final Wound Assessment and Documentation
Look at the wound one more time after all sutures are out. Note the apposition, the color of the wound margins, any discharge, and the patient's comfort level. Record the date, the number of sutures removed, the material, the wound appearance, and any instructions given to the owner.
How to Check the Result Is Right
A correctly removed wound looks closed, dry, and intact immediately after the last suture comes out. The edges should stay together without support. There should be no gap that you can see, no fresh bleeding beyond a pinpoint, and no purulent material.
If the wound edges separate when the last suture is removed, the closure was not ready. That is a dehiscence, and it needs veterinary assessment. Do not attempt to re-suture a wound in a non-sterile field.
If the wound looks healed but the skin is red and warm along the incision, you may be looking at early infection. Document it and refer.
Species Differences in Suture Removal Timing
Dogs and cats heal skin wounds on a similar timeline, and the 7 to 14 day window applies to both. The veterinary suture scissors study enrolled 38 dogs and 3 cats and treated them as a single population for the purposes of instrument contamination [7], and the amputation case series that reported a 13-day median removal time was entirely canine [9]. In practice, cats are often managed on the same schedule as dogs, with the caveat that cats are more likely to remove their own sutures if the wound becomes itchy.
Horses need longer. Equine skin, particularly over the limbs and over joints, is under high tension and heals with more granulation tissue and more risk of proud flesh. A limb wound in a horse commonly stays sutured well beyond the two-week mark, and the decision to remove is driven by wound strength rather than the calendar.
Reptiles need longer still. Reptiles are ectotherms, and their healing rate depends heavily on their preferred optimal temperature zone. A reptile kept below its optimal temperature range heals slowly, and suture removal that would be routine in a dog can be premature in a snake or lizard. Confirm the patient's temperature management with the owner before scheduling removal.
Cattle and other large animals fall between the two extremes. A bovine mammary biopsy study reported one case of mastitis attributed to premature suture removal, which is a reminder that removal timing in production animals is a real clinical decision and not a formality [11].
When to Refer Instead of Removing
Refer or escalate to a veterinarian in these four situations.
Infection. Purulent discharge, foul odor, expanding redness, or a wound that is warm and painful. Infected wounds need culture, debridement, and possibly a change in closure strategy. Tension-reduction techniques and secondary closure after debridement are established approaches for infected incisions that cannot be closed primarily [12].
Dehiscence. Any separation of the wound edges, partial or complete. A dehisced wound needs assessment of the deeper layers, not just the skin.
Tension wounds. Wounds over joints, over the chest wall, or under high skin tension. These need a longer interval and sometimes a staged closure. Super-tension-reduction sutures using a modified buried vertical mattress technique have been described for salvaging infected abdominal incisions where edema and retraction create excessive tension [12].
Uncertainty about what was placed. If the record does not clearly state the material and pattern, or if you suspect buried sutures, refer for assessment rather than probing the wound.
Clinical Relevance, Limitations and Common Mistakes
The clinical relevance of suture removal is that it is the last checkpoint in the surgical episode. A wound that is assessed and documented at removal either closes the loop on a successful surgery or catches a complication while it is still manageable. The amputation case series is a good illustration: seroma occurred in 1 of 27 cases (3.7%) and convalescent surgical site infection in 3 of 27 (11%), and all complications were documented in dogs weighing more than 27 kg [9]. Those are the kinds of findings that get caught at the removal visit.
The limitations are real. Suture removal timing is a clinical judgment, not a fixed rule. The 7 to 14 day window is a starting point, and the actual decision depends on the wound, the site, the species, and the patient's overall health. Comorbidities matter. In the arthroplasty trial, diabetes mellitus and ASA Grade III status were significant factors associated with dehiscence and surgical site infection [1]. A diabetic dog with a limb wound is not on the same schedule as a healthy dog with a flank incision.
Common mistakes to avoid:
- Cutting above the knot instead of below it, which leaves contaminated suture material inside the tract.
- Pulling the knot hard instead of lifting it gently, which drags surface bacteria through the tissue.
- Removing sutures from a wound that has not healed because the calendar says it is time.
- Forgetting to count, which leaves retained suture material in the skin.
- Reusing suture scissors between patients without a defined disinfection step. The pre-disinfection contamination rate in the veterinary study was 34.1%, and Staphylococcus species made up 64% of those isolates, with 4 methicillin-resistant subtypes [7].
- Assuming a knotless or adhesive closure needs the same removal technique as a knotted one. Knotless barbed sutures and cyanoacrylate or hydrogel adhesives change or eliminate the removal step [2][3][4][5].
Individual cases need a veterinarian's assessment. This guide describes the standard technique, not a substitute for examining the specific patient in front of you.
Frequently Asked Questions
How long do stitches stay in after surgery?
Most skin stitches in dogs and cats come out between 7 and 14 days, with 13 days a common median in one canine case series [9] and 7 days a common first follow-up in another [10]. Wounds over joints, in horses, and in reptiles stay longer.
How are stitches removed?
The knot is lifted gently with thumb forceps, the strand is cut below the knot with suture scissors, and the suture is withdrawn in line with the wound. Each suture is counted against the operative record.
Can I remove my pet's stitches at home?
Only if your veterinarian has cleared the wound and shown you the technique. Removing stitches from an unhealed or infected wound can cause dehiscence, and a wound that separates needs veterinary care.
What happens if a stitch is left in too long?
Nonabsorbable sutures left in place act as a chronic foreign body and can cause inflammation, epithelial tracking, and infection along the suture tract. Absorbable sutures left too long can also become a nidus for late inflammation [1].
Do cats and dogs heal at the same rate?
Yes, dogs and cats heal skin wounds on a similar timeline, and the 7 to 14 day removal window applies to both. Cats may be more likely to remove their own sutures if the wound becomes irritated.
Why do horses need stitches left in longer?
Equine limb wounds are under high tension and heal with more granulation tissue and more risk of proud flesh. Removal is driven by wound strength rather than a fixed number of days.
What should I do if the wound opens after stitch removal?
Contact your veterinarian immediately. A wound that separates after removal is a dehiscence and needs assessment of the deeper layers, not an attempt to re-suture at home.
Can stitches be removed if the wound is infected?
No. Infected wounds need veterinary assessment, and closure strategy may change. Tension-reduction techniques and secondary closure are established options for infected incisions that cannot be closed primarily [12].
Related Articles
- How to Tell If Your Dog's Cut Needs Stitches or Can Heal at Home
- A Practical Guide to Filtering Structural Variant Calls: Removing Artifacts and Reducing False Positives
- Removing Host Contamination from Shotgun Metagenomic Reads: A Practical Guide to Tools and Strategies
- Overcorrection in Single-Cell Data Integration: How to Detect and Avoid Removing Real Biological Variation
- Surgical Drains: Indications and Maintenance
- Surgical Site Infection Prevention in Exotic Pets
- Linea Alba Anatomy: Landmarks and Surgical Use
- Cephalic Venipuncture in Dogs and Cats: Steps
Sources
- Wound closure after total knee arthroplasty: Comparison of polypropylene and polyglactin 910 suture-a randomized controlled trial.
- Knotless Suture for Primary Wound Closure Following Surgical Removal of Impacted Mandibular Third Molars - A Comparative Study.
- [[A randomized controlled trial of knotless barbed sutures for wound closure in short-segment posterior lumbar decompression and fusion surgery].](https://pubmed.ncbi.nlm.nih.gov/41582506/)
- Cyanoacrylate Adhesive With Low-Level Laser Therapy for Sutureless Periodontal Flap Closure: A Pilot Randomized Controlled Trial.
- Next-Generation Hydrogel Skin Adhesives: From Bioinspired Adhesion Chemistry to Regenerative Wound Interfaces.
- Clinical Application and Outcome Assessment of a Novel Adhesive-Based Shoelace Wound Closure Device (EZip): A Retrospective Case Series.
- A thermal glass bead device provides an effective method of rapid disinfection of suture scissor blades in a veterinary environment.
- Comparison of Polydioxanone and Polypropylene Sutures in Columellar Incision Closure: A Prospective Randomized Clinical Trial.
- Use of a bipolar vessel-sealing device in 27 canine limb amputations.
- Tibial plateau leveling osteotomy in dogs: Postoperative evaluation and owners' perception.
- Ultrasound-assisted minimally invasive technique for tissue collection from bovine mammary glands.
- Super-tension-reduction suture versus conventional closure for secondary closure of infected abdominal incisions.