Penrose Drain Care: Placement, Management, Removal
By Dr. Zubair Khalid, DVM, MS, PhD ·
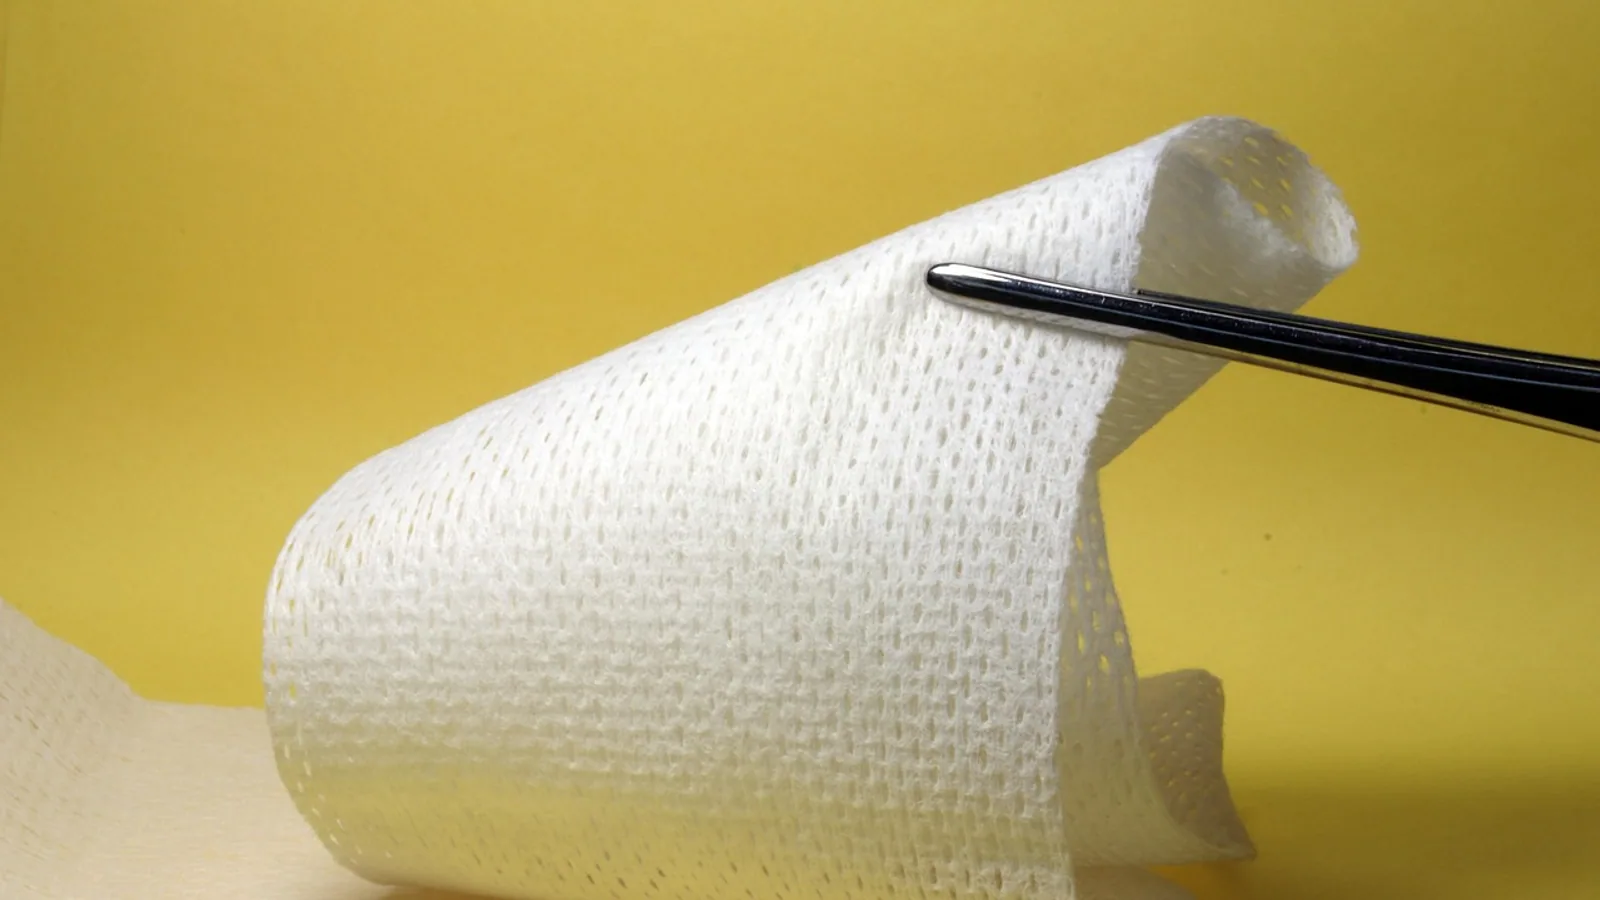
A Penrose drain is a flat, soft, latex or silicone tube that is placed into a surgical wound or abscess cavity so that fluid can escape along its outer surface. The drain does no pumping. It is a passive conduit. Fluid moves along the drain because of gravity and capillary action, and it leaves the body at the point where the drain exits the skin. For the system to work, the fluid must then be absorbed by a bandage, or it must drip into a collection area that is changed frequently.
That single principle explains almost every rule in this article. If the exit wound sits higher than the pocket being drained, fluid pools instead of escaping. If the bandage is saturated and left in place, the wound sits in a warm, wet bacterial culture medium. If the drain is pulled too early, the cavity refills with serum and forms a seroma. If it stays too long, bacteria track inward along the drain tract and the wound becomes infected.
Penrose drains are used in general practice for abscesses, bite wounds, contaminated soft tissue wounds, anal sac abscesses, seromas, and selected body cavity drains. They are also used as slings or stents in procedures such as temporary tracheostomy [1], and they have been placed after drainage of prostatic abscesses [2], inguinal wounds [3], mammary abscesses [4], and panniculitis [5].
This guide covers the full protocol: choosing a drain, placing it, dressing it, reading the exudate, and deciding when to remove it. The hands-on time for placement is roughly 10 to 20 minutes of surgical time added to the primary procedure. Management then takes 10 to 15 minutes per bandage change, once or twice daily. The elapsed time to removal is usually 3 to 5 days.
This article is educational and is not a substitute for veterinary diagnosis or treatment.
The Principle Behind a Passive Drain
A drain system can be passive or active. The difference matters because the two types are managed differently and removed on different schedules.
A passive drain, such as a Penrose drain, depends on gravity and on the absorptive capacity of the bandage overlying it [6]. It has no reservoir and no suction. It cannot pull fluid out of a cavity that is higher than its exit point, and it cannot overcome the resistance of a tight bandage or a swollen tissue plane.
An active drain, such as a closed suction system, applies negative pressure to the cavity and continuously collapses it [6]. The classic veterinary example is a Jackson-Pratt style drain with a compressible bulb. In people, a closed suction drain has been used successfully to manage a canine elbow hygroma, collapsing the pocket continuously over a 3 week period with no recurrence at 18 months [6]. The same report noted that closed drainage removed the need for the postoperative bandage care that a Penrose drain requires [6].
Gravity is not a theoretical concern. In a study of peritoneal drainage in normal dogs, contrast medium injected into the abdomen dispersed throughout the peritoneal cavity within 15 to 30 minutes after cranial injection and within 1 to 2 hours after caudal injection [7]. Drainage through a sump-Penrose system took 24 to 48 hours, while open peritoneal drainage cleared most of the contrast within 6 hours [7]. The lesson is simple: a passive drain is slow, and its position relative to the fluid pool determines whether it works at all.
At necropsy in the same study, all sump-Penrose drains were completely encased by omentum, and open peritoneal wounds were partially occluded by omentum adhered to the wound edges [7]. Histology showed acute inflammation associated with the drain or wound edge in every dog, without gross peritonitis [7]. Even a well-placed drain is a foreign body. The body walls it off. That is why drains are temporary by design.
When to Place a Drain
Place a drain when a wound is expected to produce fluid faster than the body can clear it. Typical indications include:
- Abscesses after lancing and lavage, where a residual cavity remains
- Bite wounds and other heavily contaminated wounds after debridement
- Seromas and dead space after large skin or mass removals
- Areas with a high risk of fluid accumulation over a pressure point, such as the olecranon
- Body cavity or deep tissue infections where dependent drainage is achievable, such as prostatic abscessation [2]
- Adjuncts to second intention healing, as in an inguinal wound managed with open drainage [3]
The evidence on Penrose drains is mixed, and that matters for case selection. In a retrospective study of 19 dogs with elbow hygromas, follow-up information showed that 4 of 12 hygromas treated with Penrose drainage recurred and one developed ulceration over the olecranon, whereas complete surgical excision appeared to have fewer postoperative complications [8]. In the fusion podoplasty study of 16 cases, no wound complications occurred in the 5 total fusion podoplasty procedures in which a Penrose drain was placed [9]. Penrose drains are a tool, not a default. Choose them when a dependent exit and a manageable bandage are realistic.
Do not place a drain when you cannot create a dependent exit tract, when the wound is in an area that cannot be bandaged and the patient will not tolerate frequent changes, or when the fluid volume is expected to be very high and continuous, in which case an active drain is a better tool [6].
Drain Types Compared
The table below matches the three common veterinary drain categories to their indications and removal criteria. Use it as a decision aid before surgery, not after.
| Drain type | Mechanism | Typical indications | Removal criteria |
|---|---|---|---|
| Penrose (passive) | Open tube, fluid exits along the outer surface by gravity and capillary action, absorbed by bandage | Abscesses, bite wounds, contaminated wounds, seromas, small dead space, adjunct to open drainage [3] | 3 to 5 days, when exudate is serous and low volume (roughly under 1 to 2 mL per day), or sooner if no output. Recurrence risk if removed too early [8] |
| Jackson-Pratt (active, closed suction) | Perforated tube connected to a compressible bulb that applies negative pressure | Dead space that must be collapsed, hygroma, seroma, high-volume fluid, sites where bandaging is impractical [6] | When fluid production falls to a low, stable rate, often after several days to weeks. Documented use over 3 weeks for a canine elbow hygroma [6] |
| Other closed suction systems | Negative pressure reservoir with an occlusive seal at the skin | Deep cavities, contaminated cavities where strike-through and ascending infection are a concern | Same principle: low stable output, or per the treating clinician's protocol |
A passive Penrose drain relies on the bandage. An active drain relies on suction. If you cannot commit to bandage changes every 12 to 24 hours, choose the active drain or do not drain at all.
Materials and Supplies
Set up before the patient is draped. Running out of drain stock mid-procedure wastes anesthesia time and tempts a clinician to use a drain that is too short.
| Item | Detail | Purpose |
|---|---|---|
| Penrose drain tubing | Flat latex or silicone, selected width (narrow for small pockets, wide for large cavities) | The conduit itself |
| Sterile scissors and forceps | Standard surgical set | Cutting and positioning the drain |
| No. 11 blade or sharp-pointed scissors | For the stab incision | Creates the separate exit wound |
| Monofilament nonabsorbable suture | 2-0 to 4-0 depending on patient size | Secures the drain to skin |
| Needle holders and thumb forceps | Standard | Suture placement |
| Sterile saline or lavage solution | Isotonic | Lavage of the pocket before drain placement |
| Sterile gloves and drapes | Standard | Aseptic technique |
| Absorbent bandage materials | Primary absorbent layer, secondary layer, tertiary layer | Capture exudate and protect the wound |
| Measuring container or syringe | Graduated | Quantify daily exudate volume |
| Elizabethan collar | Correctly sized | Prevent self-removal of the drain |
Working concentrations are not relevant to a drain itself. The relevant solution is an isotonic lavage fluid for the pocket before closure. Do not instill caustic or concentrated antiseptic solutions into a cavity.
Step-by-Step Placement
Placement follows a fixed sequence. Each step has a reason, and skipping a step is how drains fail.
Step 1: Prepare and Lavage the Pocket
Clip and aseptically prepare the surgical field widely, including the planned exit site. Open the wound or abscess, remove necrotic tissue, and lavage thoroughly with isotonic fluid. Copious lavage reduces the bacterial and particulate load that the drain will be asked to clear. Debride devitalized tissue, because dead tissue produces more exudate and supports infection.
Step 2: Debride and Assess Dead Space
After debridement, judge the shape of the remaining cavity. A drain works best in a cavity that funnels toward the exit. If the cavity has multiple pockets with no common low point, one drain will not drain all of them. Consider a second drain or a different technique.
Step 3: Create a Separate Stab Incision for the Exit
Make a small separate stab incision through the skin and subcutaneous tissue, 1 to 3 cm away from the main wound edge. Use a No. 11 blade or sharp-pointed scissors. The exit must be separate from the primary incision, and it must be the lowest point of the cavity when the patient is standing, sternal, or recumbent as they will be most of the time.
A separate exit is not cosmetic preference. If the drain exits through the main incision, fluid runs back into the fresh suture line, macerates the tissue, and increases the chance of dehiscence. The stab incision also gives you a clean suture anchor away from the primary closure.
Step 4: Cut the Drain to Length
Cut the Penrose drain so that the internal portion reaches the far end of the cavity and the external portion extends 2 to 4 cm beyond the skin. A longer external segment tends to snag on the bandage. A shorter segment disappears under the swelling and cannot be retrieved or secured. Cut the internal end with a notch or a single slit if you want to increase the drainage surface, a technique used with multiple drains in prostatic abscess management [2].
Step 5: Pass the Drain Through the Exit
Grasp the drain with forceps and pass it through the stab incision from outside to inside, or inside to outside, whichever keeps the drain sterile and the passage smooth. The internal end should sit in the deepest part of the pocket. The external end should lie flat against the skin without kinking.
Step 6: Secure the Drain to the Skin Only
This is the single most important safety rule in drain placement. Suture the external portion of the drain to the skin with a monofilament nonabsorbable suture. Use a simple interrupted suture or a finger-trap pattern, passing the needle through the skin and catching only the outer wall of the drain. Never suture the drain itself closed, and never place a suture that crosses through the lumen and occludes the tube.
Why the emphasis? The drain is a conduit. If a suture pinches the drain shut, or if a suture is placed through the tube wall in a way that collapses the lumen, the drain becomes a foreign body that holds the wound open without draining it. In a closed suction system the same rule applies in a different form: the external tube must be adequately secured to minimize inadvertent displacement [6]. A dislodged drain is worse than no drain, because the exit tract remains and the pocket refills.
Step 7: Close the Primary Wound
Close the primary incision in layers, leaving the drain exiting through its own stab wound. Do not incorporate the drain into the primary closure. The primary closure should be a clean, separate line of tissue.
Step 8: Place the Bandage
Apply a bandage that absorbs fluid, protects the wound, and holds the drain in place. For elbow hygromas and similar pressure-point wounds, soft bedding and protective padding are used to protect the area from further impact trauma [6]. The primary layer should be absorbent and nonadherent. The secondary layer provides padding. The tertiary layer holds everything together and keeps the patient from licking.
Step 9: Label and Document
Record the drain type, width, and length. You cannot judge how far a drain has migrated without knowing its starting position. Note the exit site in the record so the next clinician can find it.
flowchart TD
    [Wound needs drainage] --> [Create dependent stab exit]
    [Create dependent stab exit] --> [Place drain in deepest pocket]
    [Place drain in deepest pocket] --> [Suture drain to skin only]
    [Suture drain to skin only] --> [Close primary wound]
    [Close primary wound] --> [Apply absorbent bandage]
    [Apply absorbent bandage] --> [Change bandage every 12 to 24 hours]
    [Change bandage every 12 to 24 hours] --> {Exudate low and serous}
    {Exudate low and serous} --> |Yes| [Remove drain]
    {Exudate low and serous} --> |No| [Continue bandage changes]
    [Remove drain] --> [Allow exit tract to close by second intention]
Management: Bandage Changes and Exudate Monitoring
The drain is only half the system. The bandage is the other half, and it must be changed before it saturates.
Frequency
Change the bandage every 12 to 24 hours while the drain is in place. Change it sooner if strike-through occurs, meaning fluid has soaked all the way to the outer layer. A simple rule with documentation to back it up: dogs discharged home with a Penrose drain in place less than 24 hours after surgery had similar complication rates (39.0%) and infection rates (16.2%) to dogs kept hospitalized for drain care (42.9% and 18.4%) and dogs hospitalized more than 24 hours before discharge with the drain in place (50.0% and 22.2%) [10]. In that study of 208 dogs, the overall complication rate was 40.9% and the overall infection rate was 16.9%, with most complications classified as minor [10]. Home management is a reasonable option, and it depends on the owner's ability to perform the changes.
Aseptic Technique at Each Change
- Prepare a clean work surface and wash hands. Use exam gloves at minimum, sterile gloves if handling the wound directly.
- Remove the old bandage slowly, supporting the limb or body part to avoid pulling the drain.
- Inspect the exit site, the surrounding skin, and the drain itself. Note swelling, redness, discharge character, and whether the drain has migrated.
- Clean the wound and exit site gently with sterile saline or the clinician's prescribed wound cleanser. Do not scrub the drain.
- Measure the exudate. Estimate volume from the soaked layers if a syringe or container is not practical. Record the color, consistency, and odor.
- Apply a fresh absorbent primary layer, then the secondary and tertiary layers as before.
- Secure the bandage and recheck the Elizabethan collar.
The primary layer does the work. It must contact the exit site and be thick enough that it does not strike through within 12 hours.
How to Read the Exudate
Exudate character is the best available indicator of wound trajectory, and it drives the removal decision.
| Exudate appearance | Interpretation | Action |
|---|---|---|
| Serosanguinous, thin, decreasing volume | Normal early postoperative drainage | Continue current bandage schedule |
| Serous, clear to pale yellow, small volume | Resolving cavity, close to removal | Plan removal within 24 hours if stable |
| Purulent, thick, opaque, malodorous | Infection or ongoing contamination | Reassess wound, culture if indicated, consider continued drainage and clinician review |
| Sudden increase in volume or change in character | New infection, drain migration, or cavity breakdown | Immediate veterinary reassessment |
| Bright red blood, sustained | Active hemorrhage | Immediate veterinary reassessment |
Volume matters as much as character. A drain producing 1 to 2 mL per day of serous fluid is near the end of its useful life. A drain producing 20 mL per day is still doing necessary work, even if the fluid is serous.
Removal Decision Points
Removal timing is the decision most often made incorrectly in both directions. Too early means the cavity refills with serum, creating a seroma and sometimes requiring a second drain. Too late means bacteria ascend along the drain tract and the wound becomes infected. The drain tract is a direct highway from the skin surface into the body.
The evidence supports a narrow window. In the osmidrosis surgery case series of 30 patients, white dermal erosions (an indicator of transient ischemia) occurred in 3, 1, and 0 axillae when drains were removed on postoperative day 3, 6, and 9 respectively, suggesting that drainage for at least 6 days optimized flap perfusion in that human procedure [11]. In the hematoma management report, the first case suffered delayed flap necrosis after premature removal of the drain, while the second case benefited from reintroducing the drain on postoperative day 6 to prevent toxic hematoma buildup [12]. These are human surgical contexts, and the tissue behavior and drainage volumes differ from most veterinary wounds, but the direction of the message is consistent: premature removal carries a real cost.
In veterinary practice the typical window is 3 to 5 days, judged by three criteria together:
- Exudate character. The fluid should be serous or serosanguinous, not purulent.
- Exudate volume. Output should be low, roughly under 1 to 2 mL per day for the size of the cavity being drained.
- Cavity behavior. The wound should look flat and the tissue should not refill when the drain is clamped or removed.
If the patient has no measurable output at all and the wound is flat, remove the drain. A drain with no output is a foreign body holding a wound open.
Do not remove a drain solely because a set number of days has passed. Do not leave a drain in solely because the wound still looks slightly swollen. Use the three criteria together, and document the reasoning.
Removal Technique
- Prepare the skin around the exit site with aseptic technique.
- Cut the anchoring suture or sutures. Never pull the drain without releasing the suture, because this tears the skin and can break the drain.
- Withdraw the drain in a single smooth motion. Do not drag it back and forth.
- Inspect the drain. Confirm that the full length has been removed and that no fragment remains in the wound. A retained fragment acts as a persistent foreign body and a nidus for infection.
- Clean the exit site and cover it with a light absorbent dressing. The exit tract will close by second intention over the following days.
- Continue bandaging for 24 to 48 hours after removal, then reassess.
If the wound refills after removal, the cavity is not ready. Do not simply replace the drain without reassessing why the fluid persists. Consider infection, incomplete debridement, a second pocket, or the need for an active drain [6].
Expected Results and How to Confirm the Drain Is Working
A working Penrose drain produces a progressive decrease in exudate volume over the first 24 to 48 hours. The fluid changes from bloody or serosanguinous to serous. The surrounding tissue softens rather than indurating. The wound edges stay clean and the primary closure holds.
A drain that is not working shows one or more of these patterns:
- Exudate volume stays high or rises
- The wound swells despite the drain
- Fluid leaks around the primary closure instead of the exit site
- The bandage is dry but the wound is tense
- The drain has migrated so that the internal end is no longer in the pocket
The single most common cause of a non-working drain is an exit point that is not dependent. Fluid in a cavity will find the lowest point by gravity. If that point is not the drain exit, the fluid goes elsewhere.
Troubleshooting
| Symptom | Likely cause | Fix |
|---|---|---|
| Drain not draining, wound swollen | Exit site not dependent, drain kinked, or drain occluded by tissue | Reposition the exit, straighten the drain, or replace with a properly placed drain |
| Bandage saturated within hours | High fluid production or inadequate primary layer | Increase absorbency, change more frequently, consider active drain |
| Drain missing or shortened | Suture failed, patient removed it, drain migrated inward | Locate the drain immediately, reassess whether a fragment is retained, do not pull on a drain that has migrated into the wound |
| Wound edges red, warm, purulent discharge | Ascending infection along drain tract | Remove drain if output criteria are met, reassess wound, culture if indicated |
| Skin maceration around exit site | Wet bandage left in contact with skin | Change bandage sooner, protect skin with a barrier, check fit |
| Wound refills after removal | Premature removal or persistent cavity | Reassess for infection or undrained pocket, consider a new drain or an active system [6] |
| Drain breaks during removal | Excessive force or drain degraded | Recover all fragments, radiograph if any fragment is unaccounted for |
| Patient chewing at the bandage | Bandage uncomfortable or poorly fitted, insufficient collar | Refit the bandage, verify Elizabethan collar size |
Variations and Special Situations
Multiple Penrose drains. In prostatic abscess management, multiple Penrose drains have been used, and a modified technique that avoided dissection dorsal to the prostate gland was associated with a decreased incidence of postoperative urinary incontinence in a study of 17 dogs [2]. Twelve dogs (71%) had an excellent result and 5 dogs (29%) had a good result after prostatic abscess drainage [2]. The technique detail matters: where the surgeon dissected influenced the complication rate, not just the drain itself.
Penrose drains as slings or stents. In a modified temporary tracheostomy in 21 dogs, a Penrose drain sling was placed dorsal to the trachea. There were no intraoperative complications or complications related to the placement of the drain, although postoperative complications included tube dislodgement in 6 dogs, obstruction in 1 dog, and subcutaneous emphysema with pneumomediastinum in 1 dog [1]. Tracheostomy tubes were maintained for 1 to 21 days, median 4 days, and tube dwell of 4 days or longer was associated with a higher complication rate [1]. This is a different application of the same material and is included because owners and clinicians may encounter it.
Drains in high-motion or pressure-point areas. The elbow is the classic problem site. In a retrospective review, 4 of 12 hygromas treated with Penrose drainage recurred, and one developed ulceration over the olecranon [8]. A closed suction drain has been used successfully to collapse a canine elbow hygroma over 3 weeks without recurrence at 18 months [6]. When the site is a pressure point, the bandage must include soft bedding and padding to protect the area from further impact trauma [6].
Drains as an adjunct to second intention healing. A Penrose drain placed in an inguinal wound was managed with open drainage, and the wound healed successfully by second intention [3]. In cases like this, the drain supports open drainage rather than closing a cavity.
Drains after abscess drainage. Penrose drains have been used after surgical drainage and debridement of abscessed mammary glands in a cat, with rapid improvement in clinical status [4]. They have also been used alongside antimicrobial therapy in a dog with panniculitis caused by Mycobacterium goodii, and the lesion resolved with no recurrence [5].
Clinical Relevance, Limitations and Common Mistakes
Penrose drains are simple, inexpensive, and widely available. Those advantages tempt clinicians to use them where they will not work. The most common mistakes are predictable.
Placing the exit at the wrong point. A drain in a cavity with a dependent pocket that is not drained is worse than useless because it keeps the wound open. The peritoneal drainage study showed that fluid disperses widely and drains slowly through a passive system, taking 24 to 48 hours compared with 6 hours for open drainage [7]. Gravity is not optional.
Suturing the drain shut. A suture through the lumen or a tight encircling suture collapses the drain. Suture only to the skin, catch only the outer wall, and verify patency before the bandage goes on.
Neglecting the bandage. A Penrose drain without an absorbent, frequently changed bandage is not a drainage system. It is a wet wound. The complication rate in the veterinary drain population is substantial (40.9% overall, 16.9% infection) even with management, so the margin for error is not large [10].
Leaving the drain too long. Every day beyond the point of low output adds ascending infection risk. The drain tract is a direct route from the skin surface into the body. A drain with no output should come out.
Removing the drain too soon. Premature removal leads to seroma and, in the flap surgery literature, delayed necrosis [12]. A wound that still produces meaningful fluid is not ready.
Forgetting to document drain length. Without a recorded starting length, migration cannot be detected, and a retained fragment cannot be identified.
Assuming home care is unsafe. Owners can manage Penrose drains. Dogs discharged home with a drain in place less than 24 hours after surgery had complication and infection rates similar to those kept hospitalized [10]. What matters is clear instruction, a written bandage schedule, and a correctly fitted collar.
Individual wounds behave individually, and a veterinarian who has examined the wound and knows the patient should make the final call on placement and removal.
Storage and Practical Notes
Store Penrose drain stock in its original packaging, protected from heat and sunlight. Latex degrades with age and with repeated exposure to disinfectants and oils. Check the tubing for cracks, stiffness, or discoloration before use. Discard any drain that has lost its flexibility, because a brittle drain can fracture during removal and leave a fragment in the wound.
Keep pre-cut drain lengths of common sizes available in the surgical pack area. Label the sizes. This reduces decision time during a procedure and prevents the use of an undersized drain in a large cavity.
Frequently Asked Questions
How long does a Penrose drain usually stay in?
Most veterinary Penrose drains are removed in 3 to 5 days. The decision depends on the exudate, not the calendar.
What does normal drain fluid look like?
Early fluid is typically bloody to serosanguinous and then becomes serous and clear to pale yellow. Volume should decline each day.
Can my dog go home with the drain in place?
Yes, in many cases. Dogs discharged home with a Penrose drain had complication and infection rates similar to dogs kept in the hospital for drain care, provided the owner manages the bandage correctly.
What happens if the drain falls out early?
The cavity can refill with serum and form a seroma. Call your veterinarian. Some wounds will need a new drain and others will not.
Can the drain be sutured closed to hold it in place?
No. The drain must stay open along its length. Sutures go through the skin and catch only the outer wall of the drain.
How often does the bandage need to be changed?
Every 12 to 24 hours, and sooner if fluid soaks through to the outer layer.
What if the wound swells while the drain is still in?
That suggests the drain is not at the lowest point of the cavity or has become blocked or dislodged. Have the wound reassessed.
Is a Penrose drain better than a closed suction drain?
Neither is universally better. A closed suction drain pulls fluid actively and does not depend on bandage absorption, while a Penrose drain relies on gravity and bandage changes. The right choice depends on the wound and the owner's ability to manage bandages.
Related Articles
- Surgical Drains: Types, Placement, and Management
- Calf Barn Drainage: Floor Slopes and Drain Placement
- Veterinary IV Catheter Placement and Care
- Tick Paralysis: Toxin Removal and Supportive Care Protocol
- Livestock Troughs: Types, Placement, and Winter Care
- Surgical Drains: Indications and Maintenance
- Overactive Thyroid in Cats: Signs and Management
- Fat Rabbit: Obesity Risks and Weight Management
- Megacolon in Cats: Causes, Symptoms and Management
Sources
- A modified temporary tracheostomy in dogs: outcome and complications in 21 dogs (2012 to 2017).
- Decreased incidence of postoperative urinary incontinence with a modified Penrose drain technique for treatment of prostatic abscesses in dogs.
- Inguinal enterocutaneous fistula in a dog.
- Management of mastitis and abscessation of mammary glands secondary to fibroadenomatous hyperplasia in a primiparturient cat.
- Panniculitis attributable to Mycobacterium goodii in an immunocompetent dog in Georgia.
- Successful closed suction drain management of a canine elbow hygroma.
- Intraperitoneal circulation and drainage in the dog.
- Complete surgical excision versus Penrose drainage for the treatment of elbow hygroma in 19 dogs (1997 to 2014).
- Fusion podoplasty provides favorable long-term outcomes in dogs with interdigital follicular cysts unresponsive to medical therapy: a retrospective study of 16 cases.
- Effect of hospitalisation on the rate of surgical site infection in dogs with Penrose drains.
- Timing of drainage tube removal and flap recovery after osmidrosis surgery: a case series.
- Optimizing hematoma management in axillary osmidrosis surgery: the role of timely drainage and prevention of flap necrosis.