How to Build a Henhouse: Planning and Steps
By Dr. Zubair Khalid, DVM, MS, PhD ·
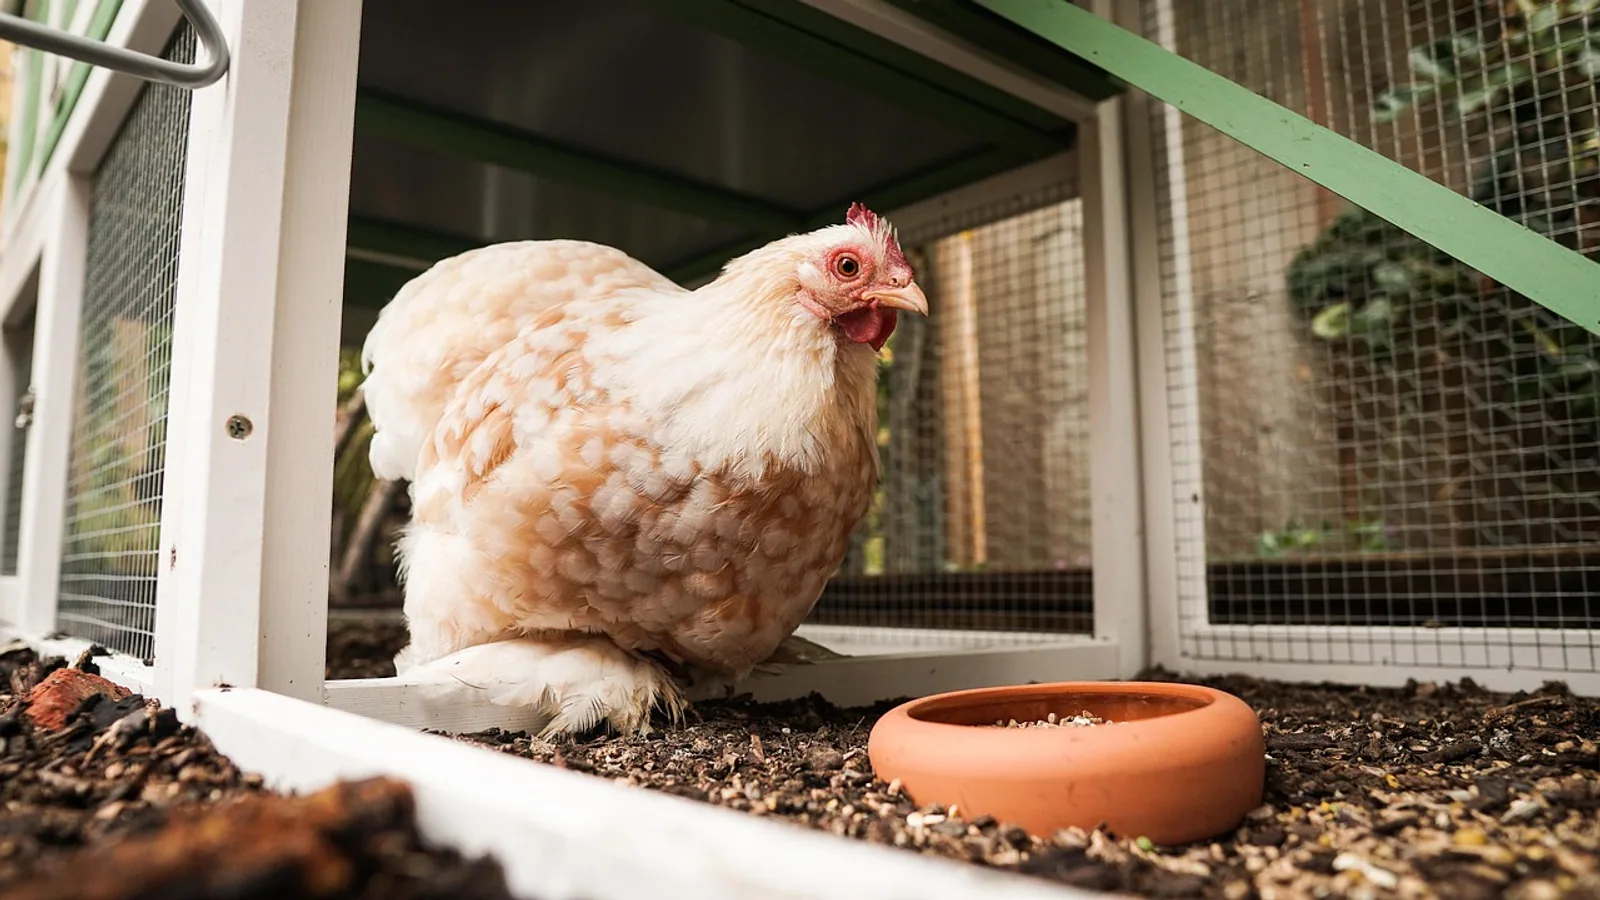
By the end of this guide you will be able to size a henhouse for your exact flock, lay out nest boxes and roosts correctly, cut ventilation that works without creating drafts, choose and manage litter, and follow a build sequence from site selection to first night. You will also know the numbers that matter, including 0.3 to 0.4 square meters per bird inside the coop, 1.1 to 1.4 square meters per bird in the run, one nest box per 4 to 5 hens at 30 by 30 by 30 cm elevated 45 to 60 cm, and 0.1 square meters of ventilation opening per bird placed above roost height.
On hand before you start: a tape measure, a level, a framing square, a circular saw, a drill, galvanized hardware cloth, exterior screws, a staple gun, and a notebook for your calculations. You do not need electrical service for a basic henhouse. You do need a plan that survives its first winter and its first predator.
This article is educational and is not a substitute for veterinary diagnosis or treatment.
Why Space and Layout Are Welfare Decisions, Not Preferences
A henhouse is not a box that holds birds. It is a housing system, and housing systems shape disease exposure, behavior, and injury risk. A review of hen welfare across housing systems found that environments with litter and soil, such as noncage and outdoor systems, give hens more opportunity to perform natural behaviors but also increase exposure to disease and parasites [1]. The same review noted that more complex environments are harder to clean, and that larger group sizes allow disease and parasites to spread more easily [1]. Those two findings pull in opposite directions. Your build plan is the compromise between them.
Space is the first variable you control. A kinematic study of Hy-Line W-36 hens measured the floor area each bird needed for specific behaviors. Hens required a mean area of 563 square centimeters to stand, 1,316 square centimeters to turn around, 318 square centimeters to lie down, and 1,693 square centimeters to wing flap [2]. The same study recorded mean heights of 34.8 cm for standing, 38.6 cm for turning, and 49.5 cm for wing flapping [2]. Those heights matter for roof clearance and for anything mounted above the birds.
Strain and body size change the numbers. Brown hens in one aviary study required on average 89.6 square centimeters more space for standing and 81.5 square centimeters more space for lying than white hens, while white hens used 572 square centimeters more space to wing flap [3]. A planimetric study using the KobaPlan color contrast method found Lohmann Brown hens occupied between 401 and 542 square centimeters depending on live weight, age, plumage condition, and body position, while Lohmann Selected Leghorn hens occupied between 353 and 445 square centimeters [4]. Heavier brown birds simply take up more floor.
The practical lesson is that a fixed number per bird is a floor, not a target. The 0.3 to 0.4 square meter figure in this guide is roughly 3,000 to 4,000 square centimeters per bird, which is several times the body space measured in these studies. That headroom is deliberate. It buys room for feeders, drinkers, movement between resources, and the social spacing that small flocks still negotiate. A behavioral study of ISA Brown hens in groups of six found that the relationship between the distance to the nearest neighbor and floor space allowance was asymptotic rather than a sharp break point, with the steepest part of the response between 600 and 4,800 square centimeters per hen [5]. In other words, hens keep spreading out and behaving differently as space increases across a wide range, and the benefit does not stop at some magic threshold.
Body surface area gives you a second way to think about it. One analysis recommended that minimum space for poultry should be no less than the equivalent of 50 percent of the bird's body surface area, on the principle that all birds in an enclosure should be able to rest at the same time without touching another bird or a wall [6]. That is a rest-space standard, not a whole-coop standard, but it explains why crowding shows up first at night, when every bird wants to sit down at once.
Sizing the Coop and Run: The Formula
Start with the number of adult hens you will actually keep, not the number you might keep someday. Pullets are added in groups, and a coop sized for six birds that holds twelve in October is a disease and behavior problem by December.
Use these two formulas.
Coop floor area in square meters = number of hens multiplied by 0.3 to 0.4
Run floor area in square meters = number of hens multiplied by 1.1 to 1.4
Worked example for six hens:
- Coop: 6 multiplied by 0.3 equals 1.8 square meters minimum. 6 multiplied by 0.4 equals 2.4 square meters for a more comfortable build.
- Run: 6 multiplied by 1.1 equals 6.6 square meters minimum. 6 multiplied by 1.4 equals 8.4 square meters for a more comfortable build.
A 1.8 square meter coop is about 1.2 by 1.5 meters. A 2.4 square meter coop is about 1.5 by 1.6 meters. Those are small buildings. If you want to walk inside to clean, you are building a walk-in coop and the footprint grows, so plan for a door height and interior headroom that lets you work without crouching.
Run the numbers for a larger flock:
- 10 hens: coop 3.0 to 4.0 square meters, run 11.0 to 14.0 square meters.
- 15 hens: coop 4.5 to 6.0 square meters, run 16.5 to 21.0 square meters.
- 20 hens: coop 6.0 to 8.0 square meters, run 22.0 to 28.0 square meters.
If your available footprint forces a smaller run, do not shrink the coop to match. Keep the coop at the higher end of its range so birds have indoor retreat space, and accept that a smaller run means more litter management and faster ground wear.
Table 1. Per-Bird Specifications at a Glance
| Element | Specification per bird | Notes |
|---|---|---|
| Coop floor area | 0.3 to 0.4 square meters | Use the higher figure for brown or heavy strains |
| Run floor area | 1.1 to 1.4 square meters | Use the higher figure if birds are confined to the run most days |
| Nest boxes | One box per 4 to 5 hens | 30 by 30 by 30 cm per box, elevated 45 to 60 cm |
| Roost length | 15 to 20 cm of linear roost per bird | Body width data support the upper end for brown hens |
| Roost height | 45 to 60 cm above the floor | Keep below ventilation openings |
| Ventilation opening | 0.1 square meters of opening | Position above roost height |
| Litter depth | 5 to 10 cm of wood shavings | Turn weekly, replace monthly |
| Headroom | At least 50 cm above the roost | Wing flapping used a mean height of 49.5 cm |
Roost Length and Body Width
Roost space is measured in linear centimeters, not floor area. Perch width recommendations have been debated for years because hen body width varies by strain. A study that photographed 156 Lohmann hens on a perch found mean body widths of 133.77 mm in Lohmann Selected Leghorn hens and 152.55 mm in Lohmann Brown hens, and the difference between hybrids was statistically significant even though small changes in body weight had no effect on body width [7]. That is 13.4 cm and 15.3 cm of body width respectively.
The commonly recommended 15 cm per hen sits right at the brown hen average, which means it is tight for a heavier bird. Plan 15 to 20 cm of roost length per bird, and use the upper end for brown strains or any flock where birds are large. A 2 meter roost bar comfortably holds 10 to 13 hens at that spacing.
Step-by-Step Build Outline
This sequence assumes a small to medium backyard flock and a stationary coop with an attached or adjacent run. Work through it in order. Skipping the site and drainage steps is the most common reason a new henhouse smells bad within a month.
Step 1. Choose and Prepare the Site
Pick a spot with the highest ground available and good air movement. Water that pools under a coop saturates the litter and drives ammonia and parasite problems. Orient the coop so the long side with the most ventilation faces away from prevailing winter wind, and so the pop door opens onto the run without crossing a low spot.
Clear vegetation, level the footprint, and set the coop on a base that keeps wood off soil. Concrete pavers, a gravel pad, or pressure-treated skids all work. Leave at least 60 cm of clearance on every side you need to reach for cleaning and repairs.
Step 2. Frame the Floor, Walls, and Roof
Build the floor frame first, then the wall frames, then raise and sheath them. Frame the walls at a height that gives you at least 50 cm of clearance above the roost, because wing flapping in one study used a mean height of 49.5 cm [2]. If you are building a walk-in coop, add a human door with a latch that a raccoon cannot open.
Sheath the exterior with solid material and seal gaps. Small gaps are entry points for rodents and for wild birds, and wild bird contact is a biosecurity concern in any flock. A review of infectious disease in free-range versus conventional production concluded that biosecurity, hygiene, and good management are important across many diseases, and that biosecurity is a critical tool for disease control particularly when disease challenge is high or the farm sits in a high poultry density area [8].
Step 3. Cut Ventilation Openings
Ventilation is the single most misunderstood part of henhouse construction. The target is 0.1 square meters of opening per bird, positioned above roost height. High openings let warm, moist, ammonia-laden air leave without blowing across the birds at roost level.
Worked example for six hens:
- 6 multiplied by 0.1 equals 0.6 square meters of total opening.
- Split that across two openings, one high on each gable end, at 0.3 square meters each.
- A 0.3 square meter opening is roughly 30 cm by 100 cm, or about 50 cm by 60 cm.
Cover every opening with galvanized hardware cloth, not chicken wire. Fasten it with staples plus a batten strip so it cannot be pushed loose.
Step 4. Install Roosts
Set roosts at 45 to 60 cm above the floor, running parallel to the long wall and away from the nest boxes. Use a bar with a flat top and rounded edges so feet grip without pressure points. Space parallel roosts at least 30 cm apart so birds on the back bar are not fouled by birds on the front bar.
Keep the roost below the lowest ventilation opening. Air moving above the birds is ventilation. Air moving across the birds at roost height is a draft, and a draft on a roost is how you get chilled birds in winter.
Step 5. Build and Mount Nest Boxes
Provide one nest box per 4 to 5 hens. Each box should be 30 by 30 by 30 cm, elevated 45 to 60 cm above the floor, and lined with bedding. A flock of 6 hens needs 2 boxes. A flock of 12 hens needs 3 boxes. A flock of 20 hens needs 4 to 5 boxes.
Mount boxes on the darkest wall, away from the pop door and away from the roost. Add a lip at the front to hold bedding in, and slope the roof so birds cannot roost on top of the boxes and foul them. Line each box with 5 to 10 cm of clean wood shavings and check daily for broken eggs and soiled bedding.
Step 6. Add Feeders, Drinkers, and Litter
Place feeders and drinkers so birds cannot defecate into them and so spilled water does not soak the litter under the roost. Raise drinkers slightly off the floor. Fill the coop floor with 5 to 10 cm of wood shavings, turn the litter weekly, and replace it monthly.
Litter management is not cosmetic. The welfare review found that litter and soil exposure increases opportunity for disease and parasites, and that more complex environments are harder to clean [1]. Fresh, dry, turned litter is your main tool against that tradeoff.
Step 7. Build the Run
Size the run at 1.1 to 1.4 square meters per bird. Cover the run so birds have shade and so wild bird droppings cannot fall into the space. Wild birds are a recognized biosecurity route, and the free-range disease review emphasizes biosecurity and hygiene as core control measures [8]. Provide a dust bathing area, because dust bathing is a behavior hens will perform when given the space, and brown hens in one study used 170.3 square centimeters more space for it than white hens [3].
Step 8. Inspect Before the First Night
Walk the structure once with a checklist. Every opening covered with hardware cloth. Every latch secure. No gap wider than a finger. Roost below the ventilation line. Nest boxes bedded and reachable. Litter at depth. Water and feed in place. Only then move birds in, and move them in during daylight so they can find the pop door and the roost before dark.
The Build Decision Path
The flowchart below shows the order of decisions that determines every dimension in your build.
flowchart TD
    A[Count adult hens] --> B[Calculate coop area]
    B --> C[Calculate run area]
    C --> D[Set roost length and height]
    D --> E[Size nest boxes]
    E --> F[Cut ventilation above roost]
    F --> G[Choose litter depth]
    G --> H[Frame and sheath]
    H --> I[Install hardware cloth]
    I --> J[Add feeders and drinkers]
    J --> K[Move birds in]
Ventilation, Ammonia, and Drafts
Ventilation does three jobs. It removes moisture from respiration and droppings, it removes ammonia, and it removes heat in summer. The 0.1 square meter per bird figure is a starting target, and cold-climate builders often add adjustable openings so they can close part of the ventilation in a storm and reopen it the next day.
The rule that separates ventilation from a draft is position. Openings above roost height let stale air rise and leave. Openings at or below roost height put moving air directly on resting birds. If you can feel air moving on the back of your neck while standing at roost height, your birds will feel it too.
Watch for these signs that ventilation is inadequate:
- Ammonia smell that stings your eyes when you open the door.
- Condensation on the underside of the roof or on window surfaces in cold weather.
- Damp litter that clumps instead of staying loose.
- Respiratory noise in the flock.
Each of these is a reason to increase opening area, not to add heat. If birds show respiratory signs, that is a veterinary question, not a construction question.
Litter and Waste Management
Litter is a living surface. Wood shavings at 5 to 10 cm depth absorb moisture, cushion feet, and dilute droppings. Turn the litter weekly with a fork to break up caked areas and expose wet spots to air. Replace it monthly, or sooner if it stays wet, smells strongly, or birds are showing foot or respiratory problems.
Deep litter that is turned and kept dry supports some composting action, which is why turning matters more than depth alone. Shallow litter that is never turned just accumulates droppings on a hard surface. The welfare review's finding that litter-based systems increase disease and parasite opportunity is a direct argument for disciplined litter management rather than for avoiding litter [1].
Compost spent litter away from the coop and away from the run. Do not spread fresh litter where birds range, and do not store it where runoff reaches the run.
Common Build Errors and How to Fix Them
Coop sized to the brooder, not the flock. Chicks look tiny in a 1.8 square meter coop. By 18 weeks they do not. Fix by sizing to adult body size from the start, and by using the pullet floor space data as a reminder that a 1.3 to 1.5 kg pullet already covers 349 to 467 square centimeters depending on strain and posture [9].
Ventilation installed at bird height. Fix by moving openings up. If the wall is already built, add gable vents or a ridge vent rather than cutting low openings.
Roost too short. Fix by measuring body width, not by guessing. Brown hens average about 15.3 cm wide on a perch [7], so 15 cm per bird leaves no margin.
Nest boxes too few or too low. Fix by adding boxes to reach one per 4 to 5 hens and raising them to 45 to 60 cm. Boxes on the floor collect litter and get used as roosts.
Hardware cloth replaced by chicken wire. Fix by replacing it. Chicken wire keeps chickens in. It does not keep predators out.
Litter never turned. Fix by putting litter turning on a weekly schedule with the same priority as feeding.
How to Check the Build Is Right
Run these checks after the first week and again after the first cold snap.
- Measure the coop floor and divide by the number of birds. The result should be 0.3 to 0.4 square meters.
- Measure the run and divide by the number of birds. The result should be 1.1 to 1.4 square meters.
- Count nest boxes and divide the flock by the box count. The result should be 4 to 5 hens per box.
- Measure total ventilation opening area and divide by the number of birds. The result should be at least 0.1 square meters.
- Smell the air at roost height in the morning. If it stings, add ventilation.
- Check litter depth with a ruler and check for caking. Turn or replace as needed.
- Watch the flock at dusk. Birds should settle onto the roost without piling or fighting for space.
If birds pile on top of each other instead of spreading along the roost, the roost is too short or too high. If birds sleep in the nest boxes, the roost is too high, too low, or too crowded. If birds sleep on the floor, the roost is too high or too narrow.
Health and Biosecurity Considerations for the Build
Your construction choices set the ceiling on your biosecurity. The free-range disease review concluded that an infectious dose of a pathogen is important in determining outcomes in terms of health and productivity, and that biosecurity, hygiene, and good management are important across many diseases [8]. A henhouse that is easy to clean, easy to dry out, and hard for wild birds and rodents to enter lowers the dose your flock faces every day.
Practical build-level biosecurity:
- Cover the run to block wild bird droppings.
- Seal gaps that let rodents in, since rodents move pathogens and feed.
- Use materials you can scrub, and avoid porous surfaces where litter and droppings collect.
- Provide a boot change or footbath at the coop door if you keep multiple flocks or visit other poultry.
- Keep a dedicated set of tools for the coop.
The welfare review also noted that environments limiting movement can lead to osteoporosis, while more complex environments expose hens to increased bone fracture risk [1]. That finding argues for a middle path: enough space for movement and perching, but roosts and nest boxes positioned so birds are not jumping down onto hard surfaces from excessive heights. Keep roosts at 45 to 60 cm and keep landing areas bedded.
Limitations and When to Contact a Veterinarian
This guide covers construction and management specifications. It does not diagnose or treat disease, and it cannot tell you why a specific bird is sick. Individual cases need a veterinarian who can examine the bird and, when indicated, submit samples.
Contact a veterinarian promptly if you see any of the following:
- Respiratory signs such as sneezing, rattling, or open-mouth breathing that persist beyond a day.
- A sudden drop in egg production across the flock.
- Diarrhea, especially with blood or with a sudden onset in multiple birds.
- Swollen eyes, facial swelling, or dark discoloration of the comb or wattles.
- Lameness, reluctance to roost, or a bird that stays on the floor at night.
- Unexplained deaths, especially more than one in a short period.
- External parasites visible on birds or in the coop.
- Any bird that stops eating or drinking for more than 24 hours.
Bring the flock history with you: number of birds, age, recent additions, recent weather, litter condition, and any change in feed or water. Construction details matter to your veterinarian too, because ventilation, litter, and stocking density all influence the diseases a flock is likely to face.
Frequently Asked Questions
How many hens can a 2 by 3 meter coop hold?
A 2 by 3 meter coop is 6 square meters, which supports 15 to 20 hens at 0.3 to 0.4 square meters per bird. Use the lower number for brown or heavy strains and the higher number if birds spend most of their time indoors.
How many nest boxes do I need for 12 hens?
You need 3 nest boxes for 12 hens at one box per 4 to 5 hens. Each box should be 30 by 30 by 30 cm, elevated 45 to 60 cm, and lined with bedding.
How much ventilation does a henhouse need?
Provide 0.1 square meters of opening per bird, positioned above roost height. For 6 hens that is 0.6 square meters total, which you can split across two high openings.
What is the best litter for a henhouse?
Wood shavings at 5 to 10 cm depth are the standard choice. Turn the litter weekly and replace it monthly, or sooner if it stays wet or smells strongly.
How high should roosts be?
Set roosts 45 to 60 cm above the floor and keep them below the lowest ventilation opening. Provide 15 to 20 cm of roost length per bird.
Can I keep hens in the coop all day?
Hens can be housed indoors, but they need the floor area, litter, perching, and nest boxes described here. Litter-based housing increases exposure to disease and parasites, so cleaning discipline matters more, not less.
Do I need electricity in the henhouse?
A basic henhouse does not require electrical service. Focus on ventilation, dry litter, and shelter from wind and rain.
How do I know my henhouse is too small?
If birds pile at night, fight over nest boxes, or the litter stays wet and smells, the space is insufficient. Measure the floor, divide by the number of birds, and compare against 0.3 to 0.4 square meters in the coop and 1.1 to 1.4 square meters in the run.
Related Articles
- How to Build a Journal Shortlist in 5 Steps
- Planning Livestock Facilities: A Step-by-Step Guide
- How to Build a Spaced Repetition Schedule for Biology: A Step-by-Step Plan
- How to Build a Reproducible RNA-seq Analysis Pipeline with Snakemake: A Step-by-Step Guide
- How to Build a Thesis Support Group: A Step-by-Step Guide for Biology Students
- Dairy Barn Expansion Planning: Steps and Considerations
- Removing Surgical Stitches: Step-by-Step Guide
- Cephalic Venipuncture in Dogs and Cats: Steps
Sources
- Hen welfare in different housing systems.
- Determination of space use by laying hens using kinematic analysis.
- Space use by 4 strains of laying hens to perch, wing flap, dust bathe, stand and lie down.
- Spatial requirements of poultry assessed by using a colour-contrast method (KobaPlan).
- Behavioural responses to different floor space allowances in small groups of laying hens.
- Body surface area, a reference for space allowance in confinement.
- [[Discussion of actual legal minimum requirements for feeder space and perch length in laying hen husbandry in the light of the body widths measured in Lohmann Selected Leghorn and Lohmann Brown laying hens].](https://pubmed.ncbi.nlm.nih.gov/23540200/)
- Infectious diseases in free-range compared to conventional poultry production.
- [[Planimetric measurement of floor space covered by pullets].](https://pubmed.ncbi.nlm.nih.gov/23540199/)