How to Create a Research Report Template in Google Docs
By Dr. Zubair Khalid, DVM, MS, PhD ·

By the end of this guide you will have a reusable research report template in Google Docs, complete with IMRAD headings (Introduction, Methods, Results, and Discussion), a working table of contents, consistent styles, page numbers, a title block, and a sharing setup that lets teammates write in the same file at the same time. You will also know how to reuse the template for every future report, how to export it, and how to avoid the formatting problems that cost students and researchers hours.
You need three things on hand: a free Google account, a modern web browser such as Chrome, Firefox, Edge, or Safari, and a rough idea of the report structure your course, journal, or supervisor expects. If you have already received a style guide or rubric, keep it open in another tab while you build. Nothing needs to be installed.
Why Use Google Docs for a Research Report Template
Cloud-based writing tools have changed how research teams work. In one published account from emergency medicine training, residents combined Google Docs, Dropbox, and other cloud applications with a traditional study group, letting learners share and refine material across locations over an 18-month period [1]. The same advantages apply to report writing. A template stored in Google Docs lives in one place, updates in real time, and keeps a complete version history without anyone pressing save.
Google Docs also fits into the wider data workflow of a real research project. Research groups have used the Google Docs form function to build validated survey questionnaires for a web-based study [2], and the German Society of Plastic, Reconstructive and Aesthetic Surgeons has run its ongoing research funding registry through a Google Forms database for years, feeding successive published funding reports [3][4]. In other words, the same cloud family covers data collection, collaboration, and the final written report, which keeps your whole project in one ecosystem.
A template makes this repeatable. Instead of rebuilding headings, spacing, and the title block for every new report, you build the structure once and duplicate it.
What a Research Report Template Should Contain
Most scientific reports follow the IMRAD structure, which stands for Introduction, Methods, Results, and Discussion. Before and after those core sections, a complete template usually includes:
- A title block with the report title, author names, affiliations, course or grant information, and date
- An abstract or summary paragraph
- A table of contents
- Introduction, ending in a clear statement of the research question or hypothesis
- Methods, written so another person could repeat the work
- Results, with numbered tables and figures
- Discussion, covering interpretation, limitations, and implications
- References in a numbered citation style
- Optional appendices for raw data or protocols
Check the specific expectations for your report before you build. A lab report for an undergraduate biology course needs fewer front matter elements than a grant progress report, but the underlying skeleton is the same.
Research Report Template in Google Docs, Step by Step
The walkthrough below builds a clean, reusable template from a blank document. Follow the numbered steps in order. Menu names reflect the current Google Docs web interface.
Step 1. Create and Name the Document
Open your browser and go to Google Drive (drive.google.com) or use the direct shortcut below in the address bar.
docs.newThis creates a new untitled Google document instantly. Click the words "Untitled document" in the top left and rename the file using a pattern that will stay sortable for years.
TEMPLATE-ResearchReport-[YourLastName]-v1.0Expected result: the tab title and the Drive listing both show the new name. Naming the master copy with the word TEMPLATE prevents the most common reuse error, which is typing your real report into the master file itself.
Step 2. Set Page Layout and Spacing
Open the File menu and choose "Page setup". Set the following values, which match the default requirements of most course rubrics and many journal instructions:
Paper size:     Letter (8.5 x 11 in)
Margins:        Top 1 in, Bottom 1 in, Left 1 in, Right 1 in
Apply to:       Whole document
Then set line spacing. Open Format, choose "Line & paragraph spacing", and select Double for a draft manuscript. Double spacing gives reviewers room to write comments. For a final formatted report you can switch back to 1.15 or 1.5 without touching anything else, because spacing is applied through paragraph styles.
Expected result: the text cursor sits on a Letter-sized page with one-inch margins. When you later type a test line, the lines fall at double spacing.
Step 3. Build the Heading Hierarchy with Paragraph Styles
This is the single most important step, because the table of contents, the document outline in the left sidebar, and any future reformatting all depend on styles rather than on manually bolded text.
Type the full section list first, one section per line, in plain text:
Abstract
1. Introduction
2. Methods
3. Results
4. Discussion
5. Conclusion
6. References
Appendix A
Now apply styles. Select the word "Abstract", then open the styles dropdown in the toolbar (it currently reads "Normal text") and choose Heading 1. Repeat for every main section. For subsections, such as "2.1 Study design" under Methods, apply Heading 2. For sub-subsections apply Heading 3.
To control how each heading looks, format one example the way you want (for example, Heading 1 set to Arial 12 pt bold, black, with 24 pt space above), select it, open Format, choose "Paragraph styles", then "Heading 1", then "Update 'Heading 1' to match". Finally, open Format, "Paragraph styles", "Options", and choose "Save as my default styles" so every future document starts with your conventions.
Expected result: the left sidebar (View, then "Show outline") lists every heading, and clicking one jumps straight to that section.
Step 4. Add the Title Block and Metadata Table
At the very top of the document, above the Abstract heading, insert a small table to hold the metadata. Open Insert, choose Table, and select a 2 by 6 grid. Fill it like this, with the labels in the left column:
| Field | Example entry |
|---|---|
| Report title | Effects of salt concentration on yeast fermentation rate |
| Authors | A. Rivera, B. Chen |
| Affiliation | Department of Biology, State University |
| Course or grant | BIO 2010 Lab Section 4 |
| Date | 2026-11-11 |
| Version | 1.0 |
After filling it in, select the table, right-click, and choose "Table properties" to set border width to 0 pt if you want an invisible metadata block, or keep the borders for a formal course report. Add the report title above the table as plain centered text in 16 pt bold, since the title itself should not be a Heading 1 (the table of contents would otherwise list the title as a section).
Step 5. Insert the Table of Contents
Place the cursor just under the title block. Open Insert, choose "Table of contents", and pick the page-numbers version. Google Docs builds it from your Heading styles.
Expected result: a populated table of contents appears with dotted leaders and page numbers. When you edit the document later, hover over the table of contents and click the circular refresh arrow that appears on its left to update entries and page numbers. A link-only version is also available, which works better for documents that are mostly read on screen.
Step 6. Add Page Numbers and a Running Header
Open Insert, choose "Page numbers", and select the option that numbers pages in the bottom right corner starting on page 1. Then open Insert, "Header & footer", and type a short running label into the header, for example:
Rivera & Chen - Research Report - 2026Expected result: the number 1 appears in the bottom right of page 1 and increments on every page. The header text repeats on all pages.
Step 7. Insert Skeleton Text Under Each Heading
A good template contains prompts, not blank space. Under each heading, type guidance text in italic gray font so that whoever uses the template knows what belongs there and can delete it. For example, under Methods:
*State the study design. List materials and equipment with concentrations
and model numbers. Describe the procedure in numbered steps written so a
classmate could repeat it exactly. State how data were analyzed.*
Under Results, include a pre-built numbered table and caption so figure and table numbering starts correctly. Open Insert, Table, and create the layout you need. Number tables and figures separately in the order they are mentioned, and put the caption above tables but below figures, which is the convention in most scientific styles.
Step 8. Set Up a Results Section with a Worked Example
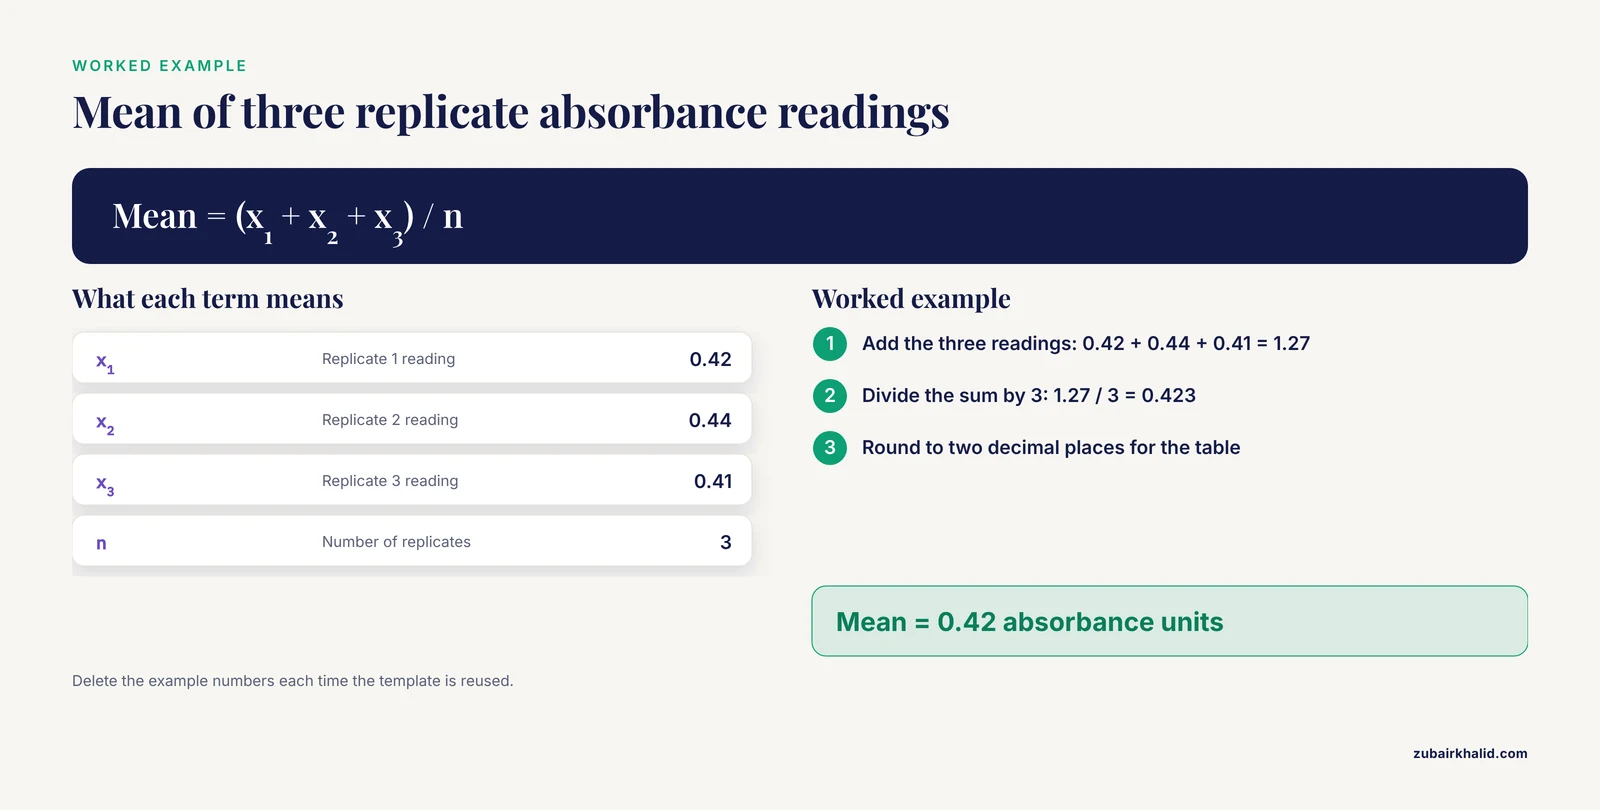
Include one small example results table in the template to show the expected format, then delete the example numbers each time the template is used. Here is a worked example of the kind of calculation the Results table should summarize, using three replicate absorbance readings from a spectrophotometer:
Replicate 1:  0.42 absorbance units
Replicate 2:  0.44 absorbance units
Replicate 3:  0.41 absorbance units

Mean = (0.42 + 0.44 + 0.41) / 3
     = 1.27 / 3
     = 0.423 (report as 0.42, two decimal places)
The template table would then show:
| Replicate | Absorbance (600 nm) |
|---|---|
| 1 | 0.42 |
| 2 | 0.44 |
| 3 | 0.41 |
| Mean | 0.42 |
Step 9. Prepare the References Section
Under the References heading, add the first entry as a formatting model. If your course uses numbered citations, the body of the report cites sources with bracketed numbers and the reference list runs in citation order:
[3] Author surname, Initials. (Year). Article title. Journal Name,
    Volume(Issue), pages.
Google Docs has a built-in citation tool for common styles. Open Tools and choose Citations to add sources one by one and insert in-text citations with a click. For large bibliographies, most writers pair Google Docs with a dedicated reference manager and paste formatted entries, so leave the section structured and empty in the template.
Step 10. Add Collaboration Settings
Click the Share button in the top right. Add collaborators by email address and assign roles deliberately:
Viewer     can read only
Commenter  can read and leave comments
Editor     can change the document
For co-writing, editors work in real time, and the document records each person's cursor. For review stages, assign supervisors or peers as Commenters rather than Editors so suggested changes arrive as comments. Comments attach with the keyboard shortcut Ctrl+Alt+M (Cmd+Option+M on a Mac), and you can resolve each thread once addressed. This is the workflow that makes a shared cloud document outperform email attachments for group reports [1].
Step 11. Lock in Version History and Test the Template
Before anyone writes in it, open File, choose "Version history", then "Name current version", and label it "Clean template". Google Docs keeps this snapshot permanently, so you can restore the pristine template even after months of use.
Then run a two-minute test: create a copy (described in the next section), type a fake sentence under each heading, refresh the table of contents, and confirm that headings, page numbers, and captions all behave. Fix anything odd in the master file, update the version name, and the template is ready.
Key Template Settings at a Glance
| Element | Where to set it | Suggested setting |
|---|---|---|
| Margins and paper size | File, then Page setup | Letter, 1 in margins all around |
| Line spacing | Format, then Line & paragraph spacing | Double for drafts, 1.15 for final |
| Heading styles | Toolbar styles dropdown | Heading 1 for sections, Heading 2 and 3 for subsections |
| Table of contents | Insert, then Table of contents | Page numbers for print, links for screen |
| Page numbers | Insert, then Page numbers | Bottom right, start at 1 |
| Citations | Tools, then Citations | Match the style your instructor or journal requires |
| Collaboration | Share button | Editor for co-authors, Commenter for reviewers |
| Master copy protection | File, then Version history | Name a clean "Clean template" version |
Reusing the Template Without Corrupting It
Never type a real report into the master file. Two reuse methods work reliably.
Method 1, make a copy. Open the master template, open File, and choose "Make a copy". Name the copy for the actual project. The copy inherits all styles, the table of contents, and the header.
Method 2, a forced-copy link. Share the template with a class or team using a link that forces Google to create a copy for each person instead of letting them edit your master. Copy the shareable link and change the ending:
Before:  https://docs.google.com/document/d/EXAMPLE_ID/edit
After:   https://docs.google.com/document/d/EXAMPLE_ID/copy
Anyone who opens the "copy" link is prompted to make a copy into their own Drive, and your master stays untouched. If your organization uses Google Workspace, you can also submit the document to your domain's template gallery from the Google Docs homepage so colleagues can start from it directly.
Pairing the Template with a Research Template and Lab Notebook
A research report is the final written product, but it draws on earlier research templates in the project workflow. Many projects collect data through structured forms rather than free text. As a concrete example, a cross-sectional web-based study of research professionals built its validated questionnaire with the form function in Google Docs and distributed it through a web link [2]. A long-running national registry has likewise collected funding applications year after year through a shared online form and evaluated the records to produce successive published funding reports [3][4]. If your project uses a form-based research template, design the Results section of your report template around the fields the form actually captures, so numbers flow from collection to writing without reformatting.
For hands-on laboratory work, keep a separate lab notebook. A lab notebook template PDF is typically a printable grid or ruled page set with preprinted fields for the date, experiment title, objective, materials, a hand-drawn observation area, and a signature line for witnessing. The report template and the notebook serve different purposes. The notebook is the contemporaneous, chronological record of what you did at the bench, and the report is the analyzed, polished product derived from it. When you build your report template, mirror the notebook's section names in the Methods and Results prompts so transcription is mechanical rather than interpretive. Scan or photograph notebook pages and attach them as an appendix in the report where course or journal rules allow.
Common Mistakes and Limitations
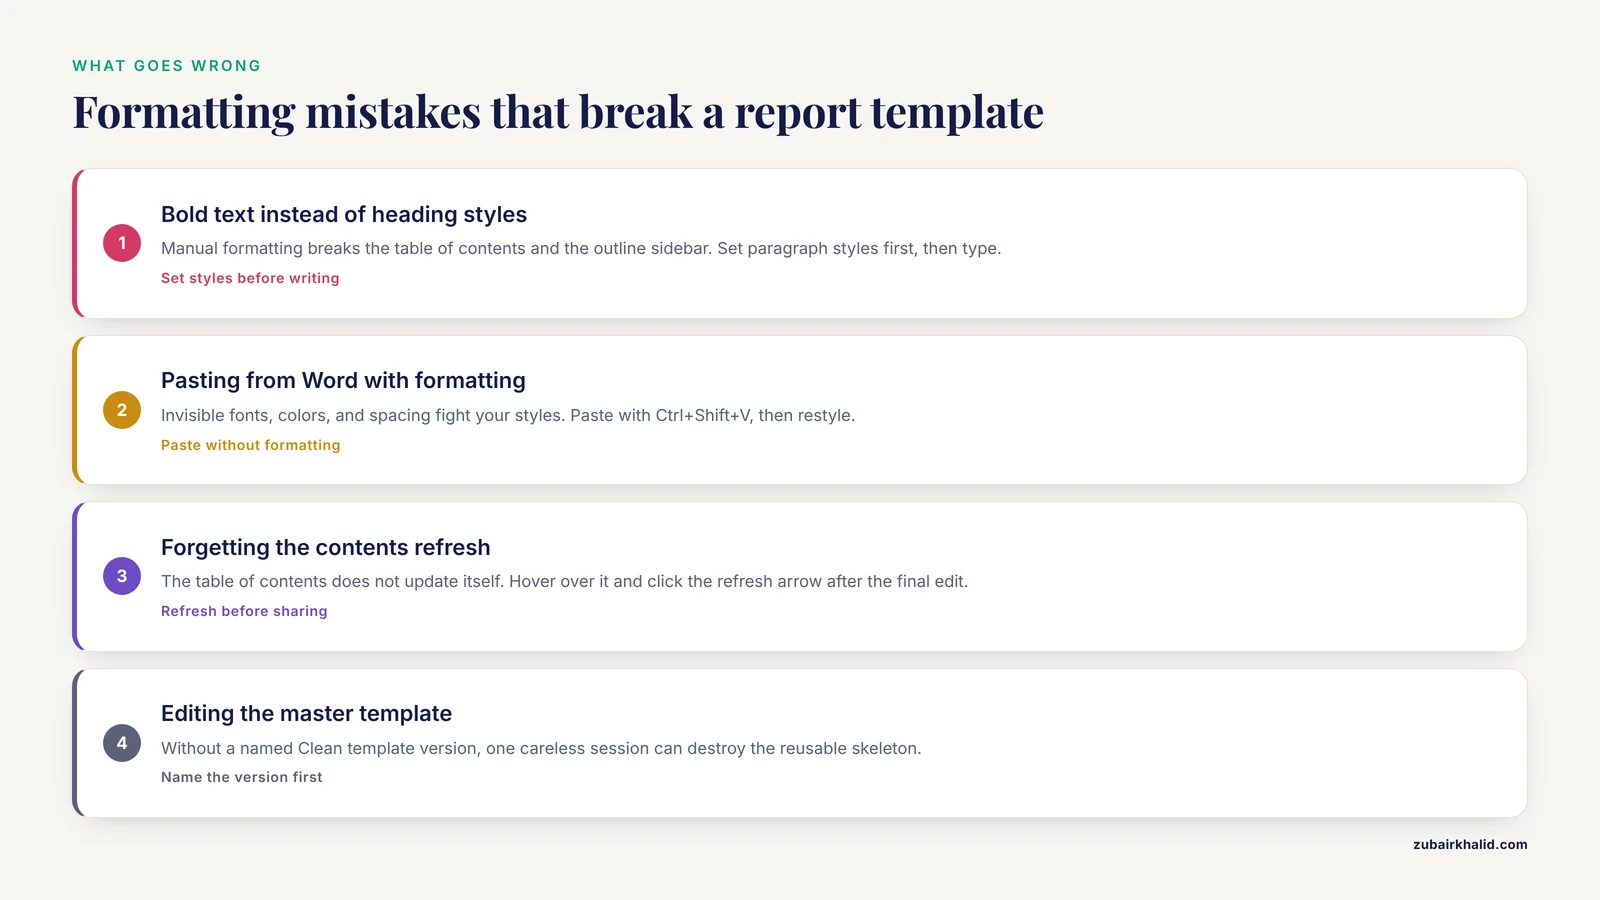
Writing before setting styles. The most frequent error is typing the whole report in Normal text and applying bold and size changes by hand. Manual formatting breaks the table of contents and the outline sidebar. Always set paragraph styles first, then type.
Pasting from Word with formatting intact. Pasting directly brings invisible fonts, colors, and spacing that fight your styles. Paste with Ctrl+Shift+V, which pastes without formatting, then restyle.
Forgetting the table of contents refresh. The table of contents does not update itself. After your final edit, hover over it and click the refresh arrow, or readers will see stale page numbers.
Editing the master template. Without a named "Clean template" version, one careless session can destroy the reusable skeleton. Name the version in Step 11 before sharing anything.
Treating Google Docs as the archive. A document that lives only in one account is a single point of failure. Download periodic PDF snapshots and store them alongside your data.
Export quirks with figures. Downloading to Microsoft Word format (File, then Download, then Microsoft Word) preserves most structure, but complex images, custom fonts, and multi-column tables can shift. Always open the exported file and check the figures and captions before submission deadlines.
Sharing with "Anyone with the link" set to Editor. This lets anyone who finds the link rewrite your report. Share by named email addresses during writing, and switch link access to Viewer only if you need a broadly readable review copy.
Overwriting collaborators in real time. When two editors work on the same paragraph simultaneously, text can interleave confusingly. Split sections among co-authors, or use Suggesting mode (the pencil icon in the top right) so edits appear as tracked suggestions rather than silent replacements.
One general limitation applies to all templates. A template produces a correctly shaped document, not a correct one. Scientific accuracy, honest statistics, and proper interpretation remain the author's responsibility, and individual reports may need supervisory or institutional review before they are submitted anywhere.
Research Report Template in Google Docs Tips
- Modify styles before writing, using the "Update to match" command, so a single style change propagates through the whole document.
- Use the outline sidebar (View, then "Show outline") as a navigation map during writing. If a section is missing from the outline, you used manual bold instead of a heading style.
- Keep prompts in italic gray text and delete them section by section as you write, so no prompt accidentally survives into a submitted report.
- Use Tools, then "Word count" (Ctrl+Shift+C on Windows) to track length against assignment limits as you draft.
- Comment on your own template with instructions, such as "Replace with your hypothesis", then resolve each comment as the report is completed.
- Version-name the file at each milestone ("Draft 1", "Submitted to supervisor") so you can compare or restore any stage later.
- Match your results table structure to your data collection form from the start, which is the same principle that lets a registry team evaluate years of consistently formatted submissions [3].
Exporting and Archiving
When the report is complete, open File, then Download. PDF preserves layout exactly and is the right choice for submission and archiving. Microsoft Word (.docx) is the right choice when a journal or instructor requires an editable file. Google Docs also supports plain text, EPUB, and web page export if a specific workflow needs them.
For long-term archiving, keep the master template, one PDF snapshot per submitted report, and the underlying data files in clearly named Drive folders. Because Google Docs retains full version history for collaborators working in the cloud, your collaboration record survives even when team members change [1].
Frequently Asked Questions
Is Google Docs acceptable for formal research reports?
Yes. Google Docs handles formal reports well when you use proper heading styles, consistent citation formatting, and PDF export for submission. Many journals and courses accept PDF output, which locks in your formatting exactly as designed.
How do I let other people use my template without seeing my master file?
Change the end of the share link from /edit to /copy. Each person who opens that link is prompted to create their own copy in their own Drive, and your master file stays private and unmodified.
Can I manage citations inside Google Docs?
Yes. The built-in tool under Tools, then Citations, supports common styles and lets you insert in-text citations and generate a reference list. For larger projects, many writers use a dedicated reference manager and paste the final formatted entries into the References section.
What is the difference between a report template and a research template for data collection?
A report template structures the written document, while a data collection research template, usually a form or spreadsheet, captures raw observations in consistent fields. Build the report's Results section around the data template's fields so transcription is straightforward.
How do I convert my template to Word or PDF?
Open File, then Download, then choose Microsoft Word (.docx) or PDF Document (.pdf). Check the exported file afterward, because complex figures, custom fonts, and multi-column tables occasionally shift during conversion.
Should I keep a lab notebook template PDF as well as this report template?
Yes. The lab notebook records what happened at the bench in real time, and the report template structures the analyzed write-up. Keeping both, with matching section names, makes the path from raw observation to finished report clear and auditable.
How do I recover an earlier version of my report?
Open File, then Version history, then "See version history". You can preview any saved point and restore it with one click. Naming versions at milestones makes recovery much faster.
Can several people write one report at the same time?
Yes. Everyone with Editor access can type simultaneously and sees each other's cursors live. For smoother collaboration, assign each co-author specific sections and use Suggesting mode for review passes so changes are visible before they are accepted.
Sources
- Studying with the cloud: the use of online Web-based resources to augment a traditional study group format.
- Awareness and Opinions of Research Professionals on India's New Drug and Clinical Trials Regulations: Protocol for a Cross-Sectional Web-Based Survey Study.
- [[Registry Research Funding of the German Society of Plastic, Reconstructive and Aesthetic Surgeons (DGPRÄC) and Research Funding Report 2019/2020].](https://pubmed.ncbi.nlm.nih.gov/32977347/)
- [[Registry Research Funding of the German Society of Plastic, Reconstructive and Aesthetic Surgeons (DGPRÄC) and Research Funding Report 2017/2018].](https://pubmed.ncbi.nlm.nih.gov/30536256/)