How to Practice Mock Vet Exams at Home
By Dr. Zubair Khalid, DVM, MS, PhD ·
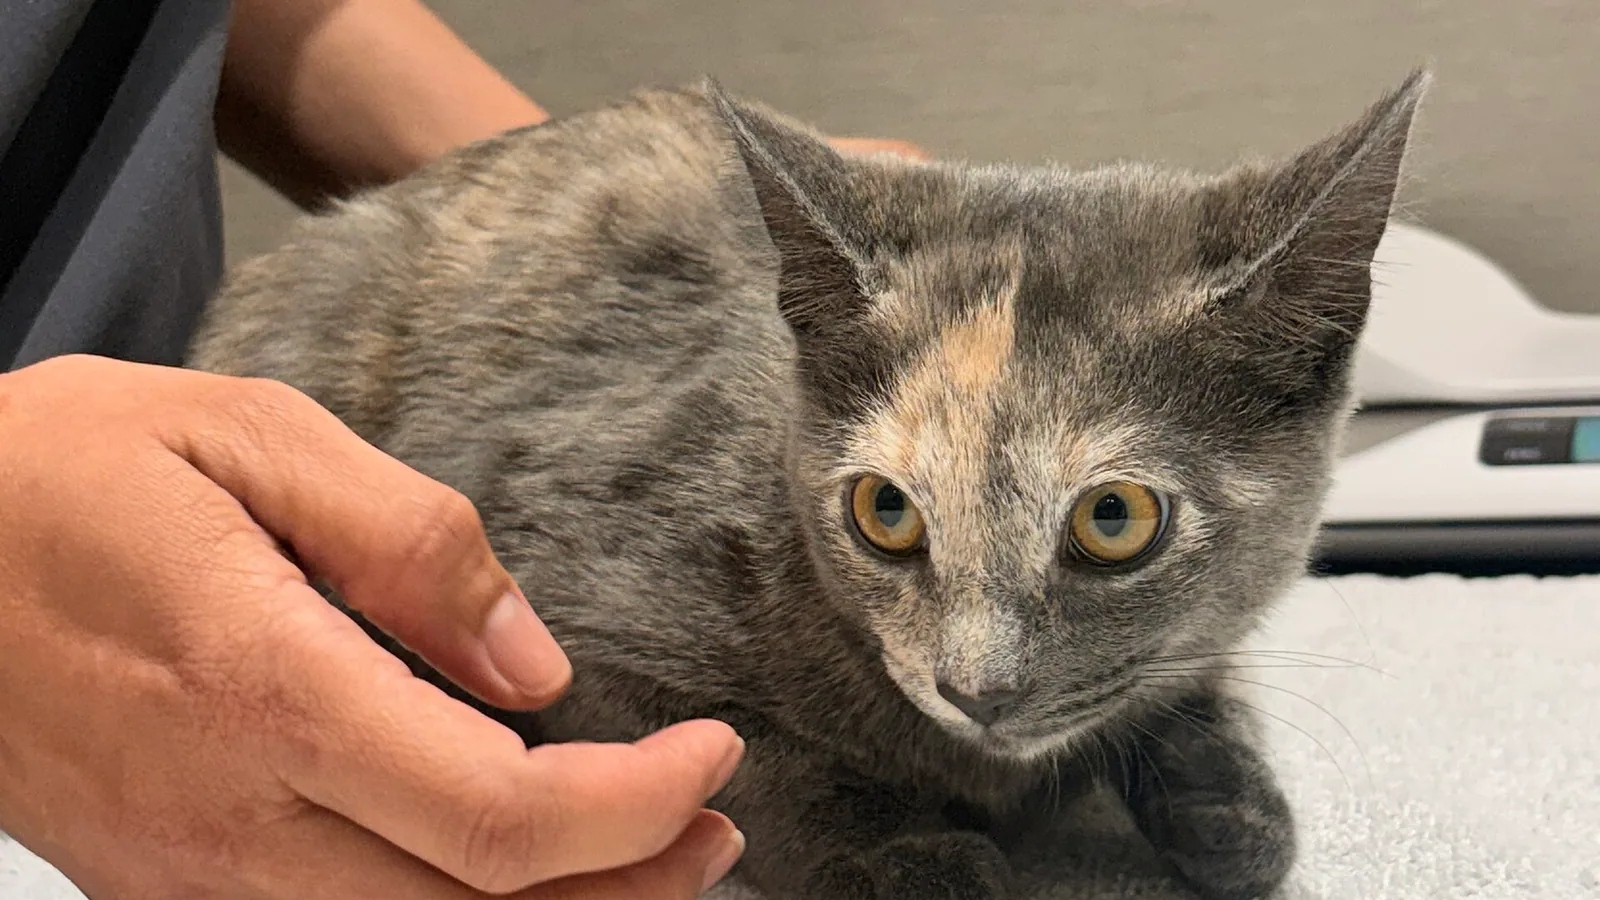
You practice mock vet exams at home by running short, calm, reward-based sessions in which you touch your cat the way a veterinarian would, examine each body region for a few seconds, pair every step with something your cat enjoys, and stop well before your cat becomes stressed. Done over several weeks, this desensitization work lowers fear at real veterinary visits and makes routine handling easier for grooming, medicating, and daily monitoring. Stress during clinic visits is a recognized welfare concern in cats, and veterinary organizations encourage owners to prepare cats for handling and travel rather than reserve these experiences for stressful firsts at the clinic.
This guide walks through the full process: why it works, a step-by-step plan, supplies, mock vet exam cat desensitization tips, common mistakes, troubleshooting, and a home health checklist you can fold into your sessions as part of routine cat preventive care.
What a Mock Vet Exam Is and Why It Works
A mock vet exam is a rehearsal. You simulate the parts of a veterinary visit that upset cats most: being handled by unfamiliar hands, having body parts lifted, having a stethoscope or otoscope touched against the fur, being gently held on a table, and being confined in a carrier.
The principle behind desensitization is straightforward. Cats learn through repetition whether an experience predicts something bad. If the only time your cat is handled around the ears, mouth, and paws is during illness or an unpleasant clinic visit, handling predicts stress. If gentle handling predicts treats, warmth, and calm company, the prediction changes. Behavior guidance for pets from the AVMA emphasizes that early, positive exposure to handling and routine care reduces fear-related behavior problems later. The AAHA guidelines on preventive healthcare likewise stress that wellness visits work best when cats arrive as calm as possible, because fear interferes with both the examination and the owner-veterinarian conversation.
Desensitization at home gives you something a clinic cannot: unlimited repetitions at low intensity, on your cat's schedule.
At a Glance: Your First Two Weeks of Practice
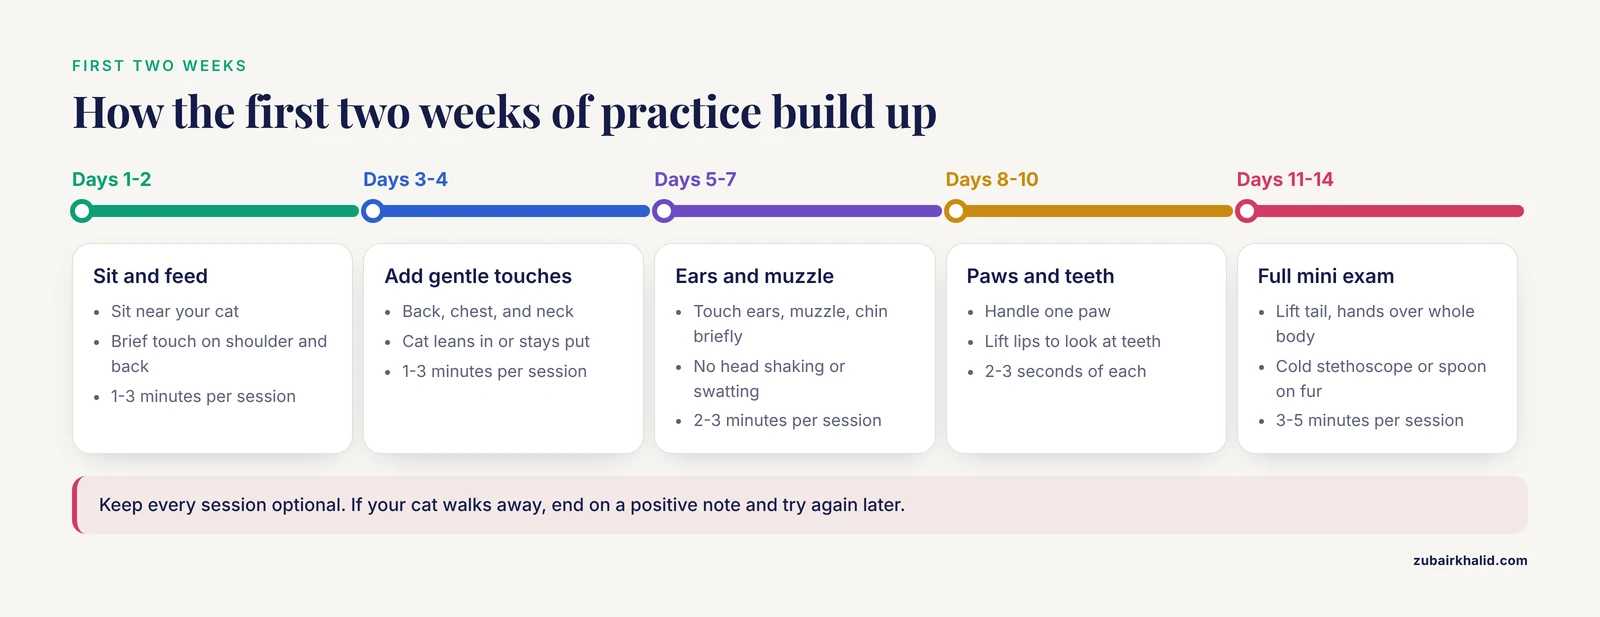
| Day | Session focus | Session length | Success marker |
|---|---|---|---|
| 1-2 | Sit near your cat, feed a treat, briefly touch the shoulder and back | 1-3 minutes | Cat stays relaxed and takes the treat |
| 3-4 | Add gentle touches along the back, chest, and neck | 1-3 minutes | Cat leans in or stays put, tail relaxed |
| 5-7 | Touch ears, muzzle, and chin briefly | 2-3 minutes | No head shaking away or swatting |
| 8-10 | Briefly handle one paw, then lift lips to look at teeth | 2-3 minutes | Cat tolerates 2-3 seconds of each |
| 11-14 | Lift tail, run hands over the whole body in one flow, introduce a cold stethoscope or spoon against the fur | 3-5 minutes | Cat accepts a full "mini exam" sequence |
Keep every session optional. If your cat walks away, end on a positive note and try again later.
Mock Vet Exam Cat Desensitization Step by Step
This progression takes most cats two to six weeks, and fearful or previously traumatized cats may need months. The sequence below is the core mock vet exam cat desensitization step by step plan.
Step 1: Choose the Right Setting
Practice where your cat already feels safe: a favorite room, a couch arm, a bed, or a low table near a window. Avoid bathrooms and laundry rooms if your cat associates them with unpleasant events like medication or nail trims. The exam table at the clinic is elevated and unfamiliar, so once your cat is comfortable, practice on a table or counter with a non-slip mat so the surface itself loses its novelty.
Step 2: Establish a Positive Association Before Any Handling
Before touching, teach your cat that this activity means good things. Sit at your cat's level. Offer a small piece of a favorite food, let your cat approach, and end the session while your cat is still engaged. VCA Animal Hospitals' behavior resources describe this pairing of low-intensity exposure with rewards as the foundation of teaching cats to accept handling calmly. Two or three days of these "do nothing but feed treats" sessions pay off across every later step.
Step 3: Touch and Retreat
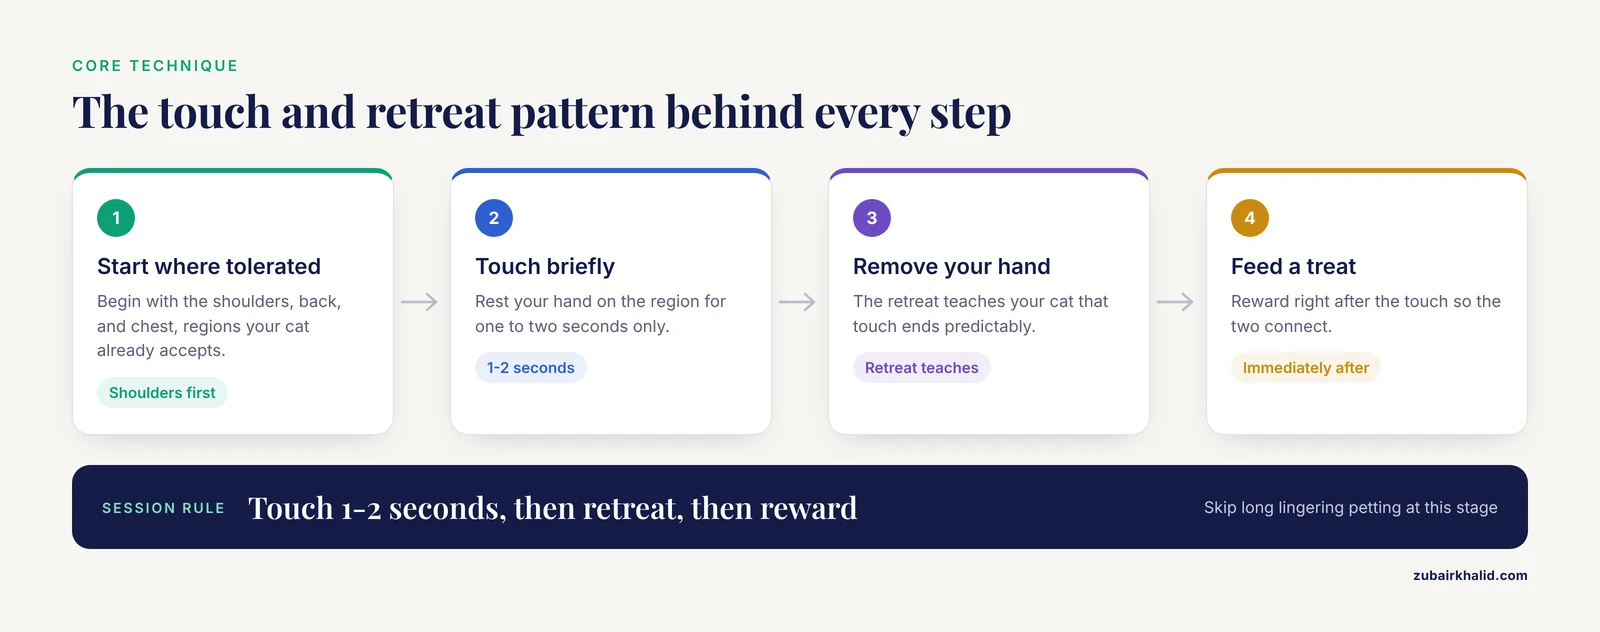
Begin with regions your cat already tolerates, usually the shoulders, back, and chest. Touch for one to two seconds, then remove your hand, then feed a treat. The retreat is what teaches your cat that touch ends predictably and is followed by something good. Long, lingering petting at this stage works against you because it teaches nothing about the brief, businesslike contact a vet uses.
Step 4: Work Through Exam Regions in a Fixed Order
The goal is a complete simulated physical exam covering the regions a veterinarian examines during a routine wellness visit, which the AAHA preventive healthcare guidelines describe as head-to-tail, system by system. Work through the list in order, mastering each region before adding the next.
- Head and face. Rest a hand gently over the muzzle for two seconds. Touch around the eyes and whisker pads.
- Ears. Lift the ear flap briefly. Later, look inside. Later still, rub the ear base the way you would before applying ear medication.
- Mouth. Lift the lips on both sides and look at the teeth. This skill pays off directly, because home dental checks are part of the Cornell Feline Health Center's guidance on monitoring your cat's oral health between visits.
- Neck and scruff. Gently gather loose skin at the neck without lifting, since jugular blood draws happen at this site.
- Chest. Place a flat hand on each side of the ribcage. Later, press lightly to simulate the feeling of a stethoscope exam.
- Abdomen. Slide a flat hand along the belly from ribs to hind legs.
- Paws and nails. Hold one paw for two seconds, then press a toe pad so the nail extends. Do one paw per session at first, since cats commonly guard all four feet.
- Tail and hindquarters. Lift the tail briefly and touch the area around it.
- Full-body hold. Cradle your cat loosely, then practice the gentle restraint positions a veterinary team uses, such as wrapping your cat in a towel with one limb accessible.
Step 5: Add Exam Tools
Once your cat accepts hands on every region, introduce objects. A cold metal spoon pressed briefly against the chest mimics a stethoscope. A penlight flashed briefly near the eyes mimics an eye exam. Let your cat sniff each object first, touch it against a shoulder or back where tolerance is already high, then move it toward the sensitive regions. Every introduction follows the same pattern: show, touch briefly, reward, retreat.
Step 6: Build a Whole-Exam Sequence
After each region is tolerated individually, chain them together in one smooth pass, head to tail, in under a minute. This mirrors a real exam, where a veterinarian moves continuously from one body system to the next. Reward after the sequence rather than after each touch once your cat is confident.
Step 7: Add the Carrier and Table Elements
A mock exam is incomplete without the two things that precede it in real life: the carrier ride and the table. The Cornell Feline Health Center recommends leaving the carrier out permanently in a lived-in area of the home, lining it with familiar bedding, and feeding meals or treats inside it so the carrier becomes neutral furniture rather than a signal of bad news. Practice closing the door for a few seconds, then lifting the carrier briefly, then carrying it around the house, then a short car ride to nowhere, ending at home with a meal. These small rehearsals are the single most effective preparation for real visits, because most of a cat's clinic stress accumulates before the exam even begins.
Step 8: Keep Sessions Short and Always End Early
Two to five minutes per session, several times a week, outperforms one long weekly session. Stop each session at a moment of success, not after a struggle. Ending early is not cheating. It is the mechanism.
Mock Vet Exam Cat Desensitization Tips
These are the tips that most reliably separate smooth progress from stalled progress.
- Pair a distinct cue with each touch. A soft word like "ears" or "paws" before you touch lets your cat predict what happens next. Predictability is calming.
- Use a food your cat rarely gets. The reward must outcompete the mild worry of being handled. Small licks of a soft treat or tiny pieces of plain cooked chicken work for most cats.
- Practice after play or a meal. A slightly tired or food-motivated cat learns faster than an overstimulated one.
- Invite a second person. A vet exam involves a stranger's hands plus a restrain-the-cat reality. Once your cat tolerates you everywhere, have a calm family member repeat the sequence while you feed treats. Then swap roles.
- Practice with unfamiliar textures. Run a cotton ball over the ears, a spoon over the chest, a hairdryer running in another room at low volume. Real exams involve novel sensations.
- Keep a simple log. Note the date, the regions covered, and your cat's reaction. Progress across weeks is motivating, and the log doubles as a health record if you ever spot changes.
- Match the clinic environment. Some clinics use towel wraps, Elizabethan-style collars, or scales. Weigh your cat on a bathroom scale by weighing yourself, then yourself holding the cat, and subtracting. Weight records at home are genuinely useful data for your veterinarian.
- Use synthetic feline facial pheromone sprays on the carrier and towel if your cat responds to them. Consult with your own veterinarian about which products they recommend, since response varies between individual cats.
Common Mistakes That Set Training Back
Most failed desensitization attempts trace back to a handful of predictable errors. These are the mock vet exam cat desensitization common mistakes to watch for.
- Going too fast. Moving to the paws or the mouth before the shoulders are solid is the most common error. Each region needs to feel boring before the next one starts.
- Sessions that run too long. A ten-minute session that ends in a struggle erases three good three-minute sessions.
- Holding on when the cat wants out. If you restrain a cat past the point of comfort, you teach that handling is inescapable, which raises fear next time. The AVMA's pet-owner guidance on low-stress handling emphasizes giving animals a sense of control during handling practice.
- Punishing or scolding. Never correct a cat for growling, swatting, or leaving. Those behaviors are communication, and punishing them teaches your cat to skip the warning and go straight to escalation.
- Skipping the carrier. Many owners practice body handling and forget that the carrier and car ride cause more fear than the exam itself.
- Practicing only when calm is convenient. Irregular practice slows learning. Short daily or near-daily sessions work best.
- Forcing the mouth open. Lifting the lips is the goal at first. Actually opening the jaw is an advanced skill best left to your veterinary team unless your cat is already cooperative.
- Rewarding at the wrong moment. Feed the treat during or immediately after the touch, not thirty seconds later, or the cat will not connect them.
Supplies You Need
The equipment list is short and inexpensive. Selection criteria matter more than brands.
- High-value food rewards. Something soft, smelly, and reserved exclusively for training sessions.
- A non-slip mat or towel. Cats lose confidence on slick surfaces, and a towel doubles as a restraint wrap.
- A stethoscope substitute. A chilled metal spoon replicates the cold-contact sensation without any cost.
- A penlight or phone flashlight. For brief eye-touch simulations.
- A bathroom scale. For weight monitoring, which is a cornerstone of cat preventive care because weight loss in cats is often the first detectable sign of disease.
- A comb or brush. Coat condition during handling sessions gives you a daily look at skin, fleas, and matting.
- The carrier, kept out year-round. Not stored in a closet. This single change is among the most repeated recommendations in feline veterinary behavior guidance.
Using Mock Exams for Cat Preventive Care: A Home Health Checklist
Every mock exam session doubles as a monitoring opportunity. Regularly handled cats let you catch changes early, and early detection is the central argument for preventive veterinary care in the AAHA and AVMA wellness frameworks. Fold this cat health checklist into your sessions and record anything abnormal.
- Weight. Track monthly. Unexplained weight loss or gain warrants a veterinary call.
- Appetite and thirst. Changes in how much your cat eats or drinks are among the most medically meaningful owner observations you can report.
- Coat and skin. Look for flaking, redness, hair loss, mats, fleas, or flea dirt during your full-body pass.
- Eyes. Clearness, equal pupils, no squinting or discharge.
- Ears. Clean, no head shaking, no dark debris or odor.
- Mouth and teeth. Lift the lips and look for tartar, red gums, broken teeth, or drooling. Cornell's feline health guidance encourages routine home observation of the mouth because dental disease is common and painful in cats.
- Nose. Free of thick discharge or crusting.
- Breathing. Count relaxed breathing at rest when your cat is asleep. Know your cat's normal pattern so you recognize an increase.
- Body condition. Feel along the ribs. You should feel them easily under a thin fat layer.
- Lumps and swellings. Run hands over the whole body during each mock exam and note anything new or growing.
- Nails and paws. Check for overgrown nails, split claws, or tenderness.
- Litter box habits. Changes in urination, defecation, or litter box use are report-worthy findings, not training failures.
The Companion Animal Parasite Council recommends year-round parasite prevention and regular screening discussions with your veterinarian, and your home coat checks feed directly into that conversation.
Troubleshooting a Stuck Session
If your cat freezes, leaves, growls, or swats, drop back to the last level that felt boring and rebuild from there. A few specific fixes cover most problems.
- Cat leaves the moment training supplies appear. Feed the special treat at random times of day, not just during sessions, for a few days to break the association.
- Cat accepts touch but refuses the mouth or paws. Start those regions with the softest possible contact, the back of a knuckle for a fraction of a second, and build duration before adding pressure or tools.
- Cat does well alone but panics with a second person. Have the second person sit across the room, feed treats, and approach over multiple sessions.
- Progress reverses after a bad clinic visit. Rebuild from the easiest steps. One stressful visit does not undo months of work, but it does mean slowing down temporarily.
- Cat will not eat during sessions. Skip food and use affection, play, or a calm voice as the reinforcer. Some cats are too worried to eat, which itself is a signal that the session intensity is too high.
Welfare and Safety Points
- Never restrain a cat to the point of struggling. Fear, freezing, and aggression are welfare signals, and the AVMA's animal welfare guidance recognizes that handling practices which minimize fear are part of responsible care.
- Scruff-hanging adult cats is outdated practice and is discouraged in modern low-stress handling guidance. Support the body instead.
- Watch for the earliest signs of stress: tail flicking, skin rippling, ears rotating back, dilated pupils, a low crouch, or a slow head turn away. End the session when you see them.
- Keep practice sessions free of other pets and children unless the other participants are calm and part of the plan.
- If your cat shows persistent fear or aggression during handling that does not improve over weeks, ask your veterinarian about a behavior referral. Chronic handling problems are treatable, and refusing treatment because handling is difficult has real health consequences.
Limitations and When to Contact a Veterinarian
Home mock exams build cooperation and let you monitor your cat, but they do not replace professional examination, diagnostics, or treatment. Every individual case requires a veterinarian. Your cat needs a professional wellness exam on the schedule your veterinarian recommends, because a stethoscope, an ophthalmoscope, bloodwork, and a trained examiner detect things hands at home cannot.
Contact your veterinarian promptly if any of the following occur, whether you find it during a mock exam or at any other time:
- Any new lump, swelling, or mass, or a lump that changes in size.
- Unexplained weight loss, weight gain, or loss of appetite lasting more than a day or two.
- Increased thirst or urination.
- Vomiting or diarrhea that persists, or repeated vomiting in a short period.
- Difficulty urinating, straining in the litter box, or crying in the box, which in a male cat is an emergency.
- Labored breathing, open-mouth breathing, or a resting breathing rate that feels abnormal for your cat.
- Sudden behavior change, hiding, aggression, vocalizing at night, or confusion.
- Pain signs such as reluctance to jump, hunched posture, or flinching when touched.
- Pale gums, yellowed gums or eyes, or bleeding that does not stop.
- Any eye injury, squinting, or sudden vision change.
For urgent, life-threatening signs such as collapse, open-mouth breathing, seizures, or a blocked male cat, contact an emergency veterinary hospital immediately.
Frequently Asked Questions
How long does mock vet exam cat desensitization take?
Most relaxed cats progress through the full sequence in two to six weeks with short sessions several times a week. Fearful or rescue-background cats may need several months, and that timeline is normal.
How often should I run a mock exam session?
Two to five minutes daily or every other day works best. Short, frequent sessions build learning faster than occasional long ones, and you should end each session before your cat tires of it.
Can mock exams replace real veterinary visits?
No. Mock exams prepare your cat for handling and give you monitoring data, but they do not replace professional wellness exams, vaccinations, parasite screening, or diagnostics. Organizations such as the AAHA and AVMA recommend regular preventive care visits even for healthy indoor cats.
What if my cat never accepts being handled?
Slow the plan down, shorten sessions, and increase the value of the rewards. If progress stalls for weeks, ask your veterinarian for help, since persistent handling fear can improve with structured behavior plans and, in some cases, veterinary-guided anxiety support.
Should I use treats during every step?
Yes, especially early on. Food is the clearest way to tell your cat that each touch predicts something good. Fade the treats to intermittent rewards only after an entire exam sequence feels routine.
What should I check during a home exam?
Run through a cat health checklist each session: weight trend, coat and skin, eyes, ears, mouth and gums, nails, breathing at rest, body condition over the ribs, and any new lumps. Report anything new or changing to your veterinarian.
How do I get my cat into the carrier calmly?
Leave the carrier out permanently, line it with familiar bedding, feed meals inside it, and practice short door-closed and carrying exercises weeks before an appointment. Cornell's feline health resources recommend exactly this approach to reduce carrier and travel stress.
What findings during a home exam mean I should call the vet right away?
Call promptly for straining to urinate, open-mouth or labored breathing, collapse, seizures, unrelenting vomiting, a rapidly growing lump, sudden hiding with no appetite, or pale or yellow gums. When in doubt, call your veterinary clinic and describe what you observed.
This article is educational and is not a substitute for veterinary diagnosis or treatment.