How to Prepare Your Barn for an Equine Vet Visit
By Dr. Zubair Khalid, DVM, MS, PhD ·
Preparing your barn for a vet visit comes down to five jobs: have the horse caught and clean before the truck arrives, gather your records and written questions, set up a clean and bright exam space with power and water, secure the other animals on the property, and decide in advance what you want from the appointment. None of these take long. Together they turn a rushed farm call into a productive one, because the veterinarian spends the visit examining your horse instead of hunting for a halter, an outlet, or a vaccine date.
This guide walks through the preparation step by step. It includes a checklist you can act on today, a horse health record template you can copy, the mistakes owners make most often, and the warning signs that mean you should call the clinic before your scheduled appointment.
This article is educational and is not a substitute for veterinary diagnosis or treatment.
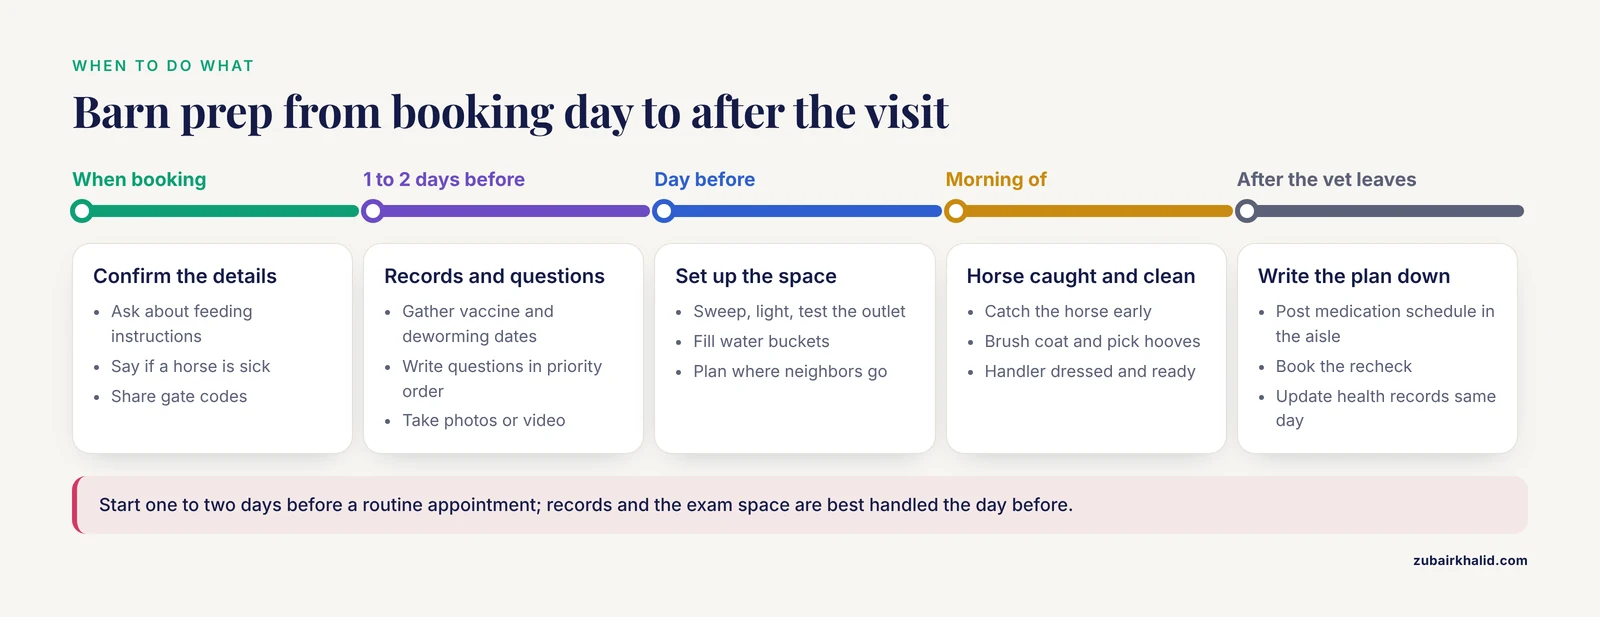
At a Glance: Barn Prep Checklist
| Task | When to do it | Why it matters |
|---|---|---|
| Confirm appointment details and feeding instructions | When you book | Sedation and some procedures require an empty stomach |
| Gather health records and write your questions | 1 to 2 days before | Accurate dates prevent repeat vaccines and missed history |
| Record your concerns, plus photos or video | 1 to 2 days before | Lameness and skin problems can look different once the horse leaves home |
| Catch, brush, and pick out the hooves | Before the vet arrives | Saves appointment time and gives a clear view of skin and soles |
| Clear, sweep, and light the exam area | The day before | Good footing and light make the exam safer and more thorough |
| Test the outlet, fill water buckets, clear truck access | The day before | Equipment needs power, and the truck needs room to park and turn |
| Secure other horses, dogs, and cats | 30 minutes before | Fewer distractions mean safer handling |
| Isolate any sick horse and tell the clinic | As soon as you notice | Protects the rest of the barn and lets the vet plan biosecurity |
Why Preparation Matters
Farm call time is finite, and the clock starts when the veterinarian pulls through the gate. Every minute spent catching a horse, digging for records, or moving wheelbarrows is a minute not spent on the exam. Preparation changes that math.
It also changes what the veterinarian can see. A clean, dry, well-lit space allows proper evaluation of eyes, teeth, wounds, and hooves. A horse that is caught and settled before arrival has a calmer baseline than one that just sprinted away from the halter three times. Records prevent errors, because a guessed vaccine date can lead to a skipped booster or an unnecessary repeat.
Preparation protects the herd as well. Separating sick horses from healthy ones and controlling traffic around them is the core of the biosecurity guidance the American Association of Equine Practitioners publishes for horse owners. Telling the clinic about a horse with a fever or diarrhea when you book lets the veterinarian bring protective gear, schedule appropriately, and examine that horse last.
Finally, preparation improves the plan you leave with. Owners who write down questions and take notes get clearer discharge instructions and better follow-up.
How to Prepare Your Barn for a Vet Visit, Step by Step
Step 1: Confirm the Details When You Schedule
Call the clinic a few days ahead if you can, not the morning of. During scheduling, cover these points:
- The reason for the visit. A wellness exam, a lameness workup, a dental appointment, and an emergency each need different preparation and different amounts of time.
- Feeding instructions. Ask whether to withhold feed and for how long. Sedation, some diagnostic tests, and certain colic workups go better on an empty stomach, and the answer depends on the procedure.
- Where the horse should be. Ask whether to keep the horse stabled, turned out, or in from the night before.
- Logistics. Ask how long the visit will run, whether the vet needs an electrical outlet, and whether a second handler is needed.
- Paperwork. If you plan to travel or compete, ask whether the visit is the right time for a Coggins test and health certificates.
If any horse on the property has a fever, diarrhea, a cough, or neurologic signs, say so during the call. The clinic may adjust the schedule or the protocol.
Step 2: Pull Together Your Horse's Health Records
Put everything the veterinarian might need in one folder, physical or digital:
- Vaccination history with products and dates. The AAEP considers rabies, tetanus, Eastern and Western equine encephalomyelitis, and West Nile virus core vaccines that all horses should receive. Exact dates matter because boosters are timed.
- Parasite control history. List each dewormer, the dose, the date, and the result of the most recent fecal egg count if your barn follows targeted deworming.
- Dental history. The date of the last oral exam and float, plus notes on dropping feed or bit discomfort. The AAEP recommends a comprehensive oral examination at least annually, with some horses needing more frequent checks.
- Farrier history. Trim and shoe dates and any hoof problems.
- Medical history. Prior illnesses, injuries, surgeries, hospital stays, and lab results.
- Medications and supplements. Product names, doses, frequency, the last dose given, and any past reactions.
- Identification and administrative papers. Registration papers, microchip number, insurance details, and the date and result of the most recent Coggins test. Most states require a current negative Coggins test for equine infectious anemia before horses cross state lines, and many shows, sales, and boarding barns ask for proof as well.
If you use the template below, this step takes minutes instead of an afternoon of phone calls to previous owners.
Step 3: Write Down What You Have Observed
Write a one-page summary of why the vet is coming. Describe the primary concern, when you first noticed it, whether it is improving or worsening, and what seems to affect it. Note appetite, water intake, and manure output over the last day or two, because these details shape nearly every workup.
Capture what only you can see at home:
- A short video of the gait, the cough, or the behavior in question. Veterinary-reviewed owner resources, including The Horse, recommend home video because horses often move differently once they leave their familiar setting.
- Photos of wounds, swellings, rashes, or hoof abnormalities, taken in good light with something for scale.
- A temperature reading if you can take one safely. Ask your veterinarian to show you how, and record the number. The Merck Veterinary Manual notes that normal temperature, pulse, and respiration vary with the individual, so your horse's own baseline is the comparison that matters.
Finish with your questions in priority order, and be honest about your budget. Vets can build a plan around a spending limit when they know it exists, but only if you say so.
Step 4: Have Your Horse Caught, Clean, and Ready
Catch the horse well before the appointment time, not when you hear the truck in the driveway. Horses notice patterns, and one that is routinely caught only for vet and farrier visits learns to avoid people with halters.
Check your equipment. Use a sturdy, well-fitting halter and a lead rope without frayed spots or a stiff clip. Many owners prefer a breakaway leather crown for turnout safety, so have a plain, secure halter ready for handling.
Clean the horse enough for an exam. Brush off dried mud, dry a wet coat, and pick out all four hooves. The vet will look at soles, frog, and hoof wall, and packed mud hides all three.
Ask the clinic whether to hand-walk or stable the horse beforehand. A short hand-walk can settle a fresh horse, but skip the hard workout, because fatigue changes how a horse moves and can distort a lameness evaluation.
Know your horse's quirks and disclose them when you book: needle shy, ear shy, pulls back when tied, needs a confident handler. Mention any special needs too, such as a young horse still learning to stand tied or a stiff senior horse who needs extra time and sure footing. A competent handler in closed boots and gloves should be on the ground for the whole visit.
Step 5: Set Up the Examination Area
Choose the space the vet will work in and set it up the day before.
Pick a clean, dry, level area with room to move around the horse: a swept aisle, an empty stall, a round pen, or an arena. Remove hay piles, wheelbarrows, tools, and buckets. Check the footing for holes, wet spots, and ice.
Light it well. Eye exams, dental work, and wound evaluation all depend on the vet actually seeing the tissue. Overhead barn lighting plus a flashlight or headlamp as backup covers most situations.
Confirm power and water. Plug something into the outdoor outlet you plan to offer and make sure it works. Dental equipment, clippers, and lights draw real current, and an outlet on a tripped breaker wastes visit time. Fill buckets or drag out the hose.
Clear the path. Unlock the gates, open the driveway, move vehicles so the vet truck can park close and turn around, and share any gate codes when you confirm the appointment. If the visit involves sedation, make sure the space has secure latches and no open route back to a field.
Set a few supplies by the door: a digital thermometer, which reads faster and more safely than a glass one, a hoof pick, clean towels, a clipboard with your records and questions, and your payment method and insurance paperwork.
Step 6: Manage the Rest of the Barn
The exam goes better when the rest of the barn is quiet. Stall or turn out the neighbors so they cannot crowd the fence line or charge past the exam area. Confine dogs and cats, because a dog underfoot during an injection is a genuine hazard.
If a horse on the property is sick, isolate it now and tell the clinic before the vet arrives. The AAEP's biosecurity guidance for owners centers on separating sick horses from the herd and controlling who and what moves between them. The veterinarian may plan to examine that horse last, bring protective clothing, or ask you to handle the visit differently.
Bring a list of every horse on the property with age, sex, and use. Vets often spot something on a companion horse, and a ready list makes that conversation quick.
Step 7: Plan for After the Visit
Before the truck leaves, get the plan in writing. Ask the veterinarian to note the diagnosis or working diagnosis, each medication with dose and frequency, anything you should stop or start, and the recheck timing. Book the follow-up before the vet drives away, because rechecks scheduled on the spot actually happen.
Post the plan where everyone who cares for the horse can see it. A whiteboard in the aisle with the medication schedule, dose, and an initials column prevents double dosing in a barn with several caregivers.
Update your health record file the same day while the details are fresh. File the invoice, the Coggins certificate if one was drawn, and any lab results. Ask how prescriptions will be handled, because in the United States many equine medications can only be dispensed when a veterinarian has an established relationship with you and your horse.
Horse Health Record Template
Copy this structure into a binder page, a spreadsheet, or a notes app. Keep a paper copy in the barn and a digital copy off the property, and update it after every vet visit, farrier appointment, and vaccine.
| Field | What to record | Why the vet needs it |
|---|---|---|
| Identification | Registered name, barn name, age, breed, sex, color, microchip number, photos of markings | Confirms the right patient on a multi-horse farm and speeds up paperwork |
| Baseline vitals | Temperature, pulse, and respiration taken when the horse is healthy and calm | A fever or elevated heart rate only means something against the horse's own normal |
| Vaccinations | Product, date given, and who administered each vaccine | Prevents missed boosters and unnecessary repeats |
| Parasite control | Dewormer, dose, date, and the most recent fecal egg count result | Supports targeted deworming instead of guessing by calendar |
| Dental care | Date of the last oral exam and float, notes on chewing, dropping feed, or bit issues | Dental disease often explains weight loss and behavior under saddle |
| Farrier care | Trim and shoe dates, hoof notes, current shoeing style | Hoof balance and timing matter in most lameness workups |
| Medical history | Illnesses, injuries, surgeries, hospitalizations, lab results, imaging reports | Today's findings have to be read against yesterday's |
| Medications and supplements | Product, dose, frequency, last dose given, past adverse reactions | Prevents interactions and duplicated therapy |
| Diet | Hay type and source, concentrate type and amount weighed rather than scooped, pasture hours, salt and supplement routine | Diet is part of nearly every case, from colic to skin disease |
| Administrative | Coggins date and certificate number, insurance policy, registration papers, emergency contacts | Travel paperwork and claims move faster with this on hand |
On the diet line, weigh the feed. Kentucky Equine Research feeding resources recommend describing rations by weight rather than by scoop, including forage, because scoops and flakes vary more than owners assume. Photograph feed tags and hay as well, since the vet may want the exact product names.
Horse Care Checklist for the Day Before and the Day Of
Use this horse care checklist around any scheduled appointment.
Day before:
- Confirm the appointment time, arrival window, and what paperwork the practice needs.
- Re-read feeding instructions and set an alarm if feed must be withheld.
- Print or pull up your records and finish your question list.
- Charge your phone and the flashlight or headlamp.
- Sweep and light the exam space and test the outlet.
- Fill water buckets and check the footing.
- Plan where the neighbor horses will be and secure the pets.
Morning of:
- Catch the horse early and keep it somewhere easy to reach.
- Brush the coat, dry any sweat, and pick out all four hooves.
- Have the handler dressed and ready fifteen minutes ahead.
- Unlock gates, clear the driveway, and put the dogs inside.
- Set the clipboard, payment method, and insurance papers by the door.
- Double-check that any sick horse is isolated and that the clinic knows.
Common Mistakes When Preparing for a Vet Visit
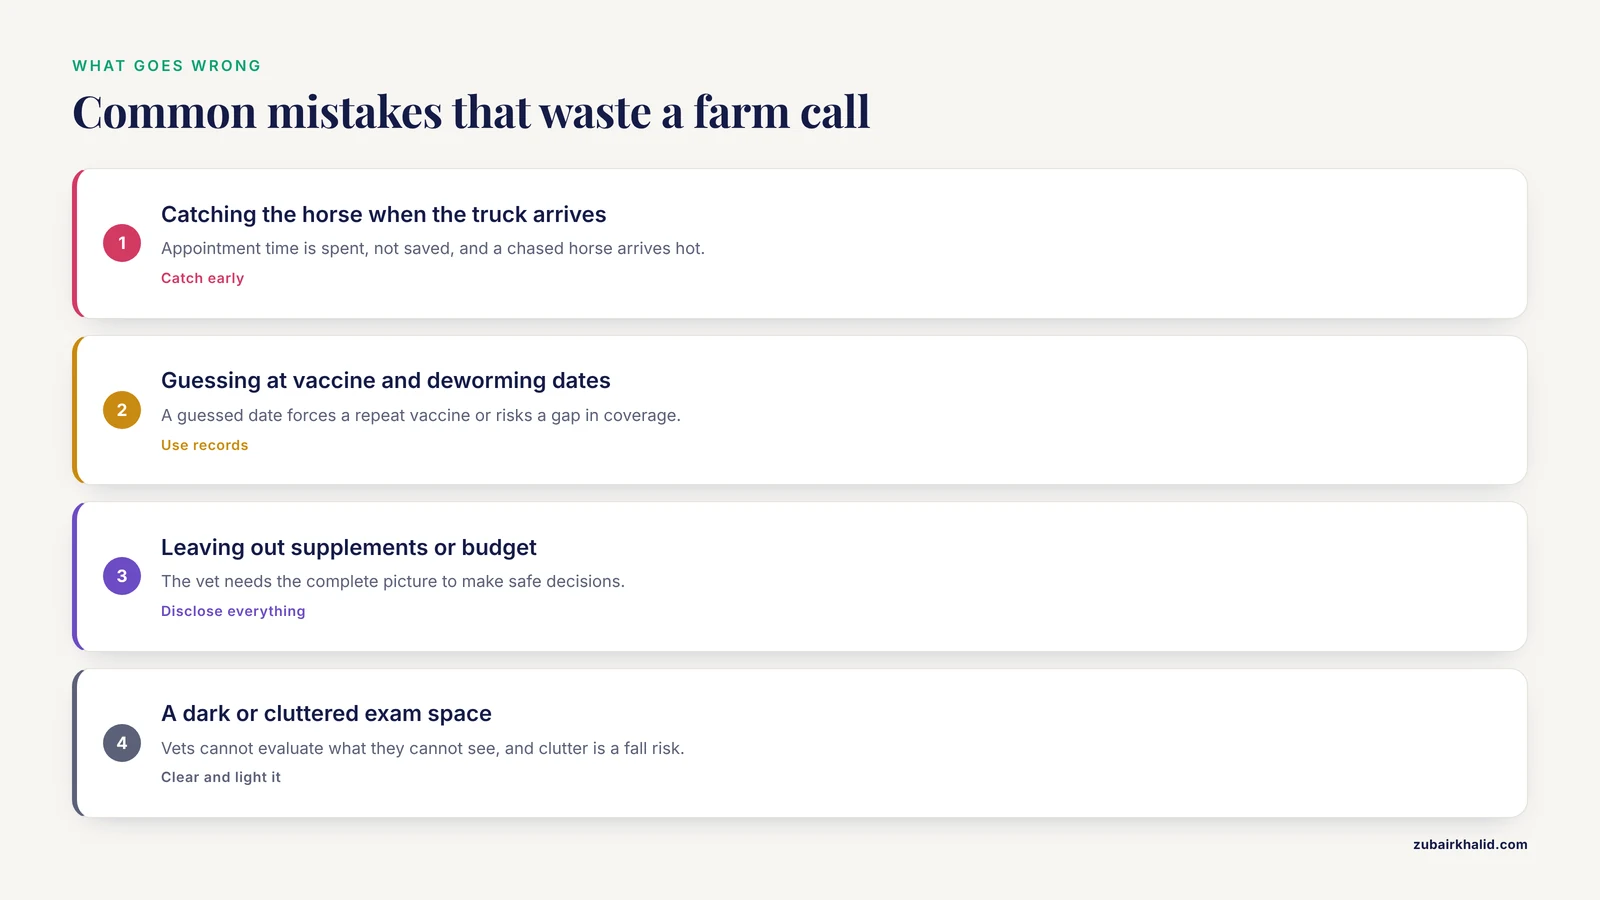
- Catching the horse when the truck arrives. Appointment time is spent, not saved, when the horse is still in the field. A horse chased around the paddock also arrives hot, which muddies the exam findings.
- Guessing at dates. "I think he had his shots in the spring" forces the vet to either repeat a vaccine or risk a gap in coverage. Records solve this.
- Hiding information. Owners sometimes leave out supplements, treatments from a previous barn, or the real budget. The veterinarian needs the complete picture to make safe decisions, and surprises mid-visit waste time.
- A dark or cluttered exam space. Vets cannot evaluate an eye, a tooth, or a wound they cannot see, and clutter underfoot is a fall risk for everyone.
- Feeding when you were told to withhold feed. Sedation and some procedures require an empty stomach for safety. If you do not understand the instruction, call the clinic and ask rather than quietly ignoring it.
- Working the horse hard before a lameness exam. Fatigue changes gait and can make a subtle lameness disappear or a sound horse look off. Ask the clinic what level of exercise is appropriate.
- Not mentioning a sick horse when booking. The vet may have come from a hospital case or another farm and needs time to plan biosecurity.
- No handler on the ground. Most vets expect an owner or handler present, and many will not begin certain procedures without one.
- Loose horses and free-roaming pets in the aisle. They distract the horse, crowd the vet, and create real risk during injections and dental work.
- Relying on memory for discharge instructions. Medication schedules given verbally at the truck window get misremembered. Get everything in writing before the visit ends.
Troubleshooting Difficult Situations
The horse will not be caught. Spend a few days on this before the visit rather than an hour on the morning itself. Feed meals in the area where you need to catch, use the person the horse catches best, and ask the clinic whether light sedation for the appointment makes sense.
The horse is needle shy or head shy. Say so when you book. The vet can schedule extra time, plan sedation, or use a different approach. A disclosed problem is a manageable problem, and the vet would rather know than be surprised.
The horse rears, strikes, or kicks. Disclose the history and ask what the vet wants. Some will request a specific handler, a particular space, or a plan for restraint. Never tie a horse with a rearing history without discussing it first, because pulling back over a solid tie is how necks and withers get injured.
There is no power at the barn. Tell the clinic in advance. Some tasks can be done with battery-powered equipment, while others may need to happen where power exists. An outlet you assumed worked but does not is a common and avoidable delay.
The weather is bad. Have an indoor option ready, or reschedule non-urgent work. Examining a wet, shivering horse in open wind gives the vet poor information and the horse a bad experience.
You have many horses and one visit. Send the list ahead with the reason for each horse, prioritize the one with the actual problem, and book enough time instead of squeezing five horses into a slot meant for two.
Something changes before the visit. If colic signs, a fever, or a new injury appears, call the clinic immediately rather than waiting for the scheduled appointment. Clinics reshuffle schedules for emergencies every day, and one phone call can turn a routine visit into an urgent one.
Safety and Welfare Points
Calm, unhurried handling lowers stress for the horse and gives the vet more reliable findings. Speak normally, move predictably, and avoid crowding the horse with a wall of people.
Tie safely. Use quick-release knots, use cross ties only for horses already trained to stand in them, and never leave a tied horse unattended. Hold from the side at the shoulder rather than directly in front of or behind the horse, and wear gloves and closed boots.
After sedation, keep the horse in a quiet, enclosed space until it is steady on its feet. Follow the veterinarian's instructions on feed, water, and turnout before you resume the normal routine.
Keep children and pets away from the exam area. Ask before offering treats, especially when sedation or an oral exam is planned, because treats can interfere with both.
Limitations and When to Contact a Veterinarian
This article offers general guidance, and individual cases differ. Your veterinarian's instructions for your horse and your barn always take precedence over a general checklist.
Call the clinic before the scheduled visit, or seek emergency care, if any of the following appear:
- Signs of colic, such as pawing, flank watching, repeated lying down or rolling, or absent manure output. The Merck Veterinary Manual lists these among the signs that warrant prompt veterinary attention.
- Profuse or watery diarrhea, especially with lethargy.
- A fever, or a horse that will not eat or drink.
- Severe lameness, a non-weight-bearing limb, or a hot, painful hoof.
- A painful, tearing, or clouded eye, or a horse that squints and will not open the eye.
- Feed material or saliva coming from the nostrils, which suggests choke.
- Difficulty breathing, or a down horse that cannot rise.
- Foaling that is not progressing normally.
When you are unsure whether something is urgent, call and describe what you see. Clinic staff triage calls like these constantly, and a two-minute phone call settles the question.
Frequently Asked Questions
How far in advance should I prepare my barn for a vet visit?
Start one to two days before a routine appointment. Records, questions, and the exam space are best handled the day before, while catching and cleaning the horse can happen on the morning of the visit.
Should I withhold feed or water before the appointment?
Ask when you book, because the answer depends on the procedure. Sedation and some diagnostic tests work best on an empty stomach, and your veterinarian will give exact instructions for your horse.
What records should I have ready for the vet?
Vaccination and deworming dates, dental and farrier history, current medications and supplements, prior lab work, the most recent Coggins test, and a full description of the diet, ideally by weight.
Do I need to catch and hold my horse, or can the vet do it?
Catch the horse before the vet arrives. Most vets expect a handler on the ground, and time spent chasing an uncaught horse comes out of the appointment.
Should I bathe my horse before the visit?
A full bath is not necessary. Brush off dried mud, dry a wet coat, and pick out the hooves so the vet can see the skin, limbs, and soles clearly.
What if my horse is needle shy or hard to handle?
Tell the clinic when you book. The vet can schedule extra time, plan sedation, or bring help, which is far safer than discovering the problem mid-visit.
Can other horses stay turned out during the visit?
Calm, quiet horses can often stay turned out, but many exams go more smoothly when neighbors are stalled or in a distant paddock where they will not crowd the fence line.
What should I do after the vet leaves?
Write down the diagnosis, medication schedule, and recheck date, post the plan where the whole barn can see it, and update your health records the same day.