Minipreps: How They Work and When to Use Them
By Dr. Zubair Khalid, DVM, MS, PhD ·
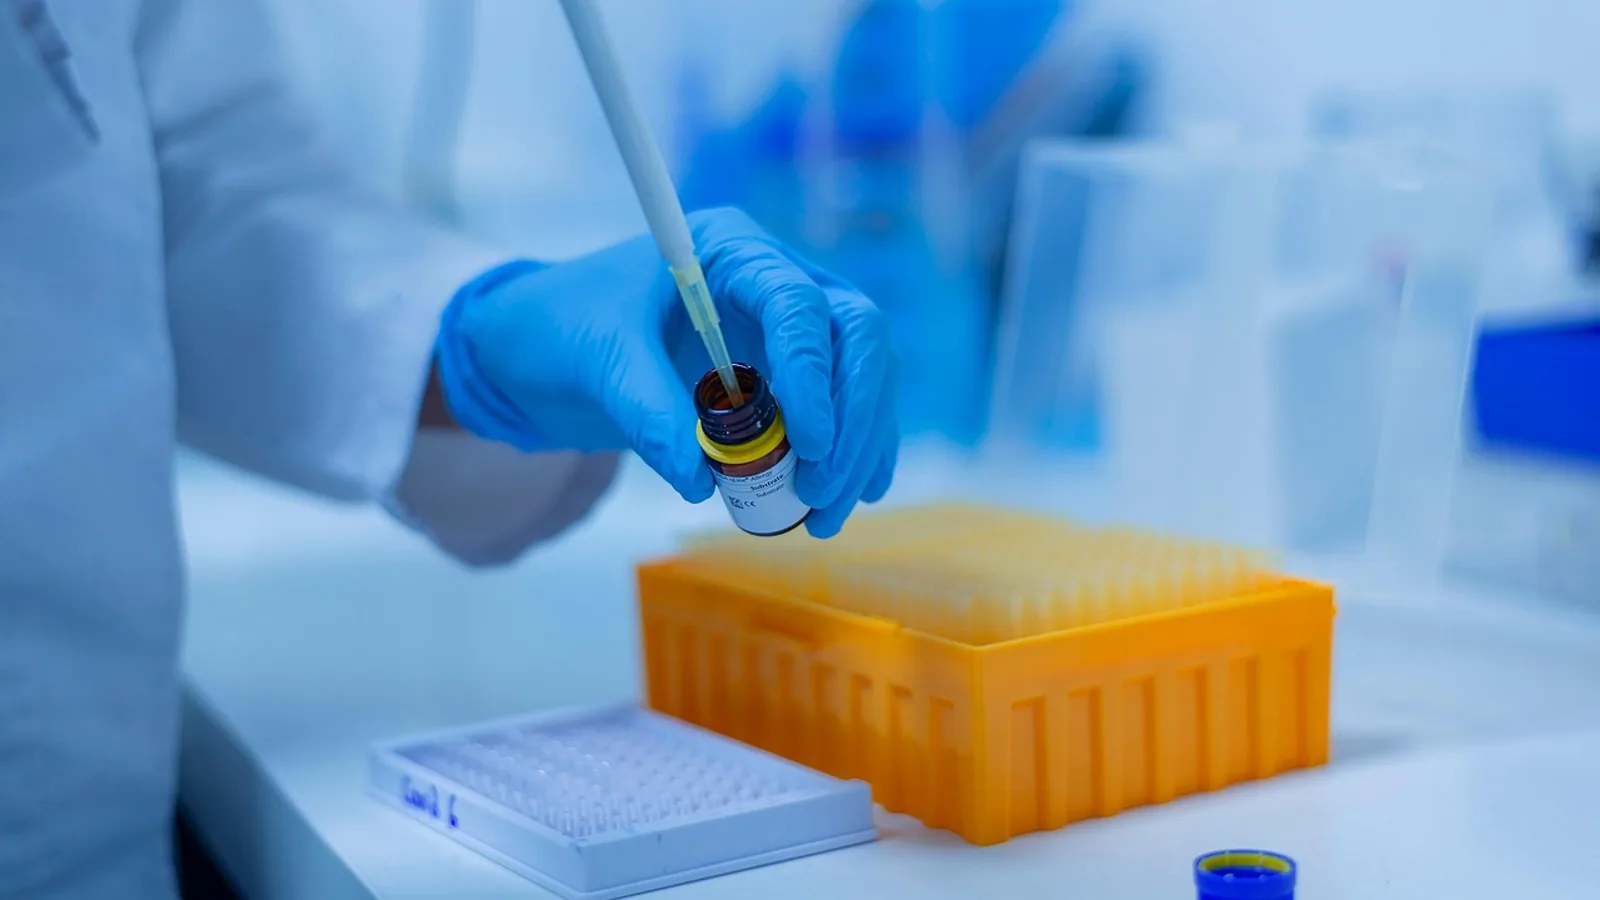
A miniprep is a small-scale plasmid DNA purification. You grow a few milliliters of bacteria, lyse the cells with detergent and alkali, and recover the plasmid while most of the chromosomal DNA, protein, and RNA are left behind. The result is a tube of plasmid DNA that is clean enough for restriction digestion, polymerase chain reaction, and most cloning steps. The whole procedure takes roughly 2 hours of elapsed time, with perhaps 20 to 30 minutes of actual hands-on work, and yields anywhere from a few micrograms to about 30 micrograms of DNA depending on plasmid copy number [1][2].
The name comes from "mini preparation," and it sits at the bottom of a three-tier scale. Minipreps handle 1 to 5 mL of culture. Midipreps handle a larger volume and produce 100 to 350 micrograms. Maxipreps handle the largest volumes and produce 0.5 to 2.5 milligrams. The chemistry is the same at every scale. What changes is the culture volume, the buffer volumes, the format of the purification matrix, and the amount of time you spend.
This article covers the chemistry that makes alkaline lysis work, the bench procedure with the reason behind each step, expected yields and how to read a gel, a troubleshooting table, the differences between miniprep, midiprep, and maxiprep formats, and the mistakes that quietly ruin plasmid preps.
What a Miniprep Actually Achieves
A bacterial cell contains two kinds of DNA. The chromosome is a single large circular molecule, and the plasmid is a much smaller circular molecule that replicates independently. When you grow a culture overnight, both are present in every cell. The goal of a miniprep is to keep the plasmid and discard the chromosome.
The separation is not based on size in the way a gel or a column fractionation would work. It is based on a physical difference in how the two molecules behave when they are denatured and then renatured. The plasmid is small, circular, and covalently closed. The chromosome is enormous and, in practice, breaks into linear fragments during handling. When you raise the pH with sodium hydroxide, both molecules denature into single strands. When you drop the pH back down with potassium acetate, the small covalently closed plasmid strands find each other again and snap back into a double helix. The chromosomal strands cannot do this cleanly. They aggregate with denatured protein and precipitate out of solution [3].
That single trick, differential renaturation, is the core of every alkaline lysis plasmid prep ever published. Everything else, the columns, the washes, the elution buffers, is cleanup around that core.
A miniprep is the right choice when you need to screen colonies after a ligation, check an insert by restriction digest, prepare template for a sequencing reaction, or supply plasmid for a small transfection. It is the wrong choice when you need milligrams of DNA for a large-scale transfection, an animal study, or a clinical-grade preparation. For those, you scale up.
The Chemistry of Alkaline Lysis


Alkaline lysis uses three solutions, usually called P1, P2, and P3. Each has a specific job, and each job depends on the chemistry of the molecule it targets.
Solution P1: Resuspension
P1 is a buffered solution, typically 50 mM Tris at pH 8.0, 10 mM EDTA, and sometimes RNase A. Its job is to resuspend the bacterial pellet completely. EDTA chelates magnesium and calcium ions, which destabilizes the outer membrane of Gram-negative bacteria and inhibits nucleases that would otherwise chew up the plasmid once the cells open. Complete resuspension matters more than most people realize. If clumps of bacteria remain, the lysis buffer cannot reach the cells inside them, and you lose yield. The RNase A, when included, digests RNA during the lysis so that the final prep is not contaminated with ribosomal RNA.
Solution P2: Lysis
P2 contains sodium hydroxide and sodium dodecyl sulfate, usually 200 mM NaOH and 1 percent SDS. SDS is an anionic detergent. It inserts into lipid membranes and dissolves them, and it binds to and denatures proteins, stripping them of their folded structure. The sodium hydroxide raises the pH to around 12.5. At that pH, the hydrogen bonds holding the two strands of the DNA double helix together break, and both the plasmid and the chromosome separate into single strands [3].
The lysis step is where the prep is won or lost. The cells must be exposed to the alkali long enough for lysis to complete, but not so long that the plasmid itself is damaged or that the chromosomal DNA shears into small fragments that are harder to remove. Gentle mixing is essential. The standard instruction is to invert the tube a handful of times rather than vortex. A controlled study found that inverting the tube five times, extending the lysis time to 10 minutes, and performing lysis at 25 degrees Celsius each produced the best plasmid preparations based on yield, quality, and downstream performance [4]. The same study found that high-frequency, small-amplitude mixing generated more genomic fragments, while low-frequency, large-amplitude mixing produced more open circular plasmid, which is a nicked form that runs differently on a gel and can reduce transfection efficiency [4]. Lysis at 4 degrees Celsius led to genomic contamination and reduced lysis efficiency, so cold lysis is counterproductive [4].
Solution P3: Neutralization and Precipitation
P3 is potassium acetate, usually 3 M at pH 5.5. When you add it, two things happen at once. The acetate neutralizes the sodium hydroxide, dropping the pH back to around neutral, which allows the plasmid strands to reanneal into a double helix. The potassium ions, meanwhile, meet the SDS. Potassium dodecyl sulfate is insoluble, so it precipitates, and as it comes out of solution it drags denatured protein and long chromosomal DNA strands with it [3].
The plasmid stays in solution because it is small and covalently closed. Its two complementary strands are held in close proximity even after denaturation, so they reanneal quickly and correctly when the pH drops. The chromosomal DNA, being much longer, has strands that are physically entangled with each other and with protein. When the SDS-protein complex precipitates, the chromosome goes with it. This is the differential partitioning that the whole method depends on [3].
After adding P3, you see a white precipitate form. That precipitate is the SDS-protein-chromosome complex. You spin it down, and the plasmid remains in the cleared supernatant.
Why the Supernatant Is Not Pure Enough Yet
The cleared supernatant still contains RNA, residual protein, salts, and some small chromosomal fragments. The next step, depending on your format, is either a silica column, an anion exchange column, or a traditional phenol-chloroform extraction followed by ethanol precipitation [3]. Silica binds DNA in the presence of chaotropic salts such as guanidinium hydrochloride. The DNA sticks to the silica while proteins and polysaccharides flow through. Wash steps remove residual salts and contaminants, and a low-salt buffer elutes the DNA off the membrane [3].
Materials and Reagents
| Reagent or Material | Working Concentration | Purpose |
|---|---|---|
| Resuspension buffer (P1) | 50 mM Tris pH 8.0, 10 mM EDTA, optional RNase A | Resuspend pellet, chelate ions, digest RNA |
| Lysis buffer (P2) | 200 mM NaOH, 1 percent SDS | Denature DNA, dissolve membranes, denature protein |
| Neutralization buffer (P3) | 3 M potassium acetate pH 5.5 | Neutralize pH, precipitate SDS and protein |
| Wash buffer | Ethanol or guanidinium-based, per format | Remove salts and residual contaminants |
| Elution buffer | 10 mM Tris pH 8.0 or nuclease-free water | Release DNA from the matrix |
| Bacterial culture | 1 to 5 mL overnight, antibiotic selection | Source of plasmid |
| Microcentrifuge tubes | 1.5 to 2 mL | Hold lysis and clearing spins |
| Silica or anion exchange column | Per format | Bind and purify plasmid |
| Isopropanol or ethanol | 100 percent and 70 percent | Optional precipitation for concentration |
Safety note: sodium hydroxide at 200 mM is caustic and can cause serious eye damage. Wear goggles and gloves and work in a ventilated area. SDS is a respiratory and skin irritant in powder form. Potassium acetate is less hazardous but still an irritant. Never add P2 and P3 to a tube without mixing gently, and never vortex a tube that contains lysed bacteria.
Step-by-Step Miniprep Procedure
The following is a generic alkaline lysis miniprep with silica column cleanup. Volumes are typical for a 1.5 to 5 mL culture. Follow the ratios, not the exact numbers, when scaling.
- Harvest the bacteria. Transfer 1.5 to 5 mL of overnight culture to a microcentrifuge tube and spin at 8,000 to 12,000 x g for 1 to 2 minutes. Remove the supernatant completely. Reason: residual medium contains nucleases and salts that interfere with lysis and binding.
- Resuspend the pellet in P1. Add 200 to 250 microliters of P1 and pipette or vortex until no clumps remain. Reason: cells trapped in clumps will not lyse, and you lose their plasmid.
- Add P2 and mix gently. Add 200 to 250 microliters of P2 and invert the tube 5 times. Do not vortex. Incubate at room temperature for up to 10 minutes, but do not exceed the time your protocol specifies. Reason: alkali denatures both plasmid and chromosome, and SDS dissolves membranes and denatures protein [4][3].
- Add P3 and mix gently. Add 300 to 350 microliters of P3 and invert several times until a white precipitate forms. Reason: potassium acetate neutralizes the pH, allowing the plasmid to renature, and precipitates SDS, protein, and chromosomal DNA [3].
- Clear the lysate. Centrifuge at maximum speed (12,000 to 16,000 x g) for 10 minutes. Reason: the precipitate must be pelleted so the plasmid-containing supernatant can be removed cleanly.
- Bind the plasmid to the column. Transfer the supernatant to a silica or anion exchange column and spin or apply vacuum per the format. Reason: DNA binds to silica in high salt, while proteins and polysaccharides flow through [3].
- Wash the column. Apply wash buffer and spin. Repeat if your protocol specifies. Reason: washes remove salts, residual protein, and any traces of the lysis buffers that would inhibit downstream enzymes.
- Dry the membrane. Spin the column once more to remove residual ethanol. Reason: ethanol carryover inhibits restriction digests and sequencing reactions.
- Elute the plasmid. Add 30 to 50 microliters of elution buffer or nuclease-free water, let it sit for 1 minute, and spin into a clean tube. Reason: low-salt conditions release the DNA from the silica.
- Measure and store. Read concentration on a spectrophotometer or fluorometer. Store at 4 degrees Celsius for short-term use or at minus 20 degrees Celsius for long-term storage.
The whole procedure fits in under 2 hours, and column-based formats can finish in less than that [2].
Workflow Overview
The following diagram shows the main decision path from culture to purified plasmid, including the point where the plasmid and chromosome separate.
flowchart TD
    A[Harvest bacterial culture] --> B[Resuspend pellet in P1]
    B --> C[Add P2 and mix gently]
    C --> D[Add P3 and mix gently]
    D --> E[Spin to clear lysate]
    E --> F{Plasmid in supernatant}
    F --> G[Bind to silica column]
    G --> H[Wash away salts and protein]
    H --> I[Elute plasmid DNA]
    I --> J[Measure yield and purity]
    J --> K[Store at 4 or minus 20]
Reading Expected Results
A good miniprep produces a clear, colorless to slightly cloudy eluate with a concentration that depends on plasmid copy number. High-copy-number plasmids such as pUC-based vectors typically give the highest yields. Low-copy-number plasmids, such as many BACs and some expression vectors, give far less. Yields from a 1 to 2 mL culture range between about 5 and 30 micrograms for typical high-copy plasmids, and the range reflects copy number differences [1]. A hot alkaline lysis method has been reported to yield over 20 micrograms from a 5 mL overnight culture, with greater than 96 percent success in automated sequencing from those substrates [5].
Purity is measured as the ratio of absorbance at 260 nm to absorbance at 280 nm. A clean plasmid prep usually falls between 1.8 and 2.0. A ratio below 1.8 suggests protein or phenol contamination. A ratio above 2.0 can suggest RNA contamination, since RNA absorbs strongly at 260 nm.
On an agarose gel, a clean miniprep shows a dominant supercoiled band, sometimes a faint open circular band above it, and little to no visible RNA if RNase was used. If you see a bright low-molecular-weight smear, that is RNA. If you see a high-molecular-weight band near the well, that is chromosomal DNA contamination.
Comparing Miniprep, Midiprep, and Maxiprep
The three scales share the same chemistry. They differ in culture volume, purification format, yield, time, and the downstream applications they support.
| Feature | Miniprep | Midiprep | Maxiprep |
|---|---|---|---|
| Culture volume | 1 to 5 mL | 25 to 100 mL | 100 to 500 mL or more |
| Typical yield | 5 to 30 micrograms | 100 to 350 micrograms | 0.5 to 2.5 milligrams |
| Typical format | Microcentrifuge tube and spin column | Vacuum or spin column, larger bed | Large column, vacuum, or CsCl gradient |
| Elapsed time | Under 2 hours | 2 to 4 hours | 3 to 6 hours or overnight for gradient methods |
| Hands-on time | 20 to 30 minutes | 30 to 60 minutes | 1 to 2 hours |
| Typical use | Colony screening, restriction digest, sequencing template | Transfection, larger digests, cloning stock | Large transfections, animal studies, bulk plasmid stock |
| Endotoxin removal | Usually not included | Optional | Often included for transfection-grade |
The yield figures reflect the general range across formats. A CsCl gradient maxiprep yields roughly 3 to 5 micrograms of DNA per milliliter of original culture for high-copy plasmids, and slightly less for recombinant plasmids carrying large inserts [6]. That per-milliliter figure is a useful way to estimate what any scale should produce, since it normalizes for culture volume.
The choice of scale is driven by how much DNA the downstream step needs. A restriction digest uses a fraction of a microgram. A sequencing reaction uses a few hundred nanograms. A single transfection into a well of a six-well plate uses 1 to 2 micrograms. A large-scale transfection or an animal dosing study can require milligrams, which pushes you to maxiprep scale.
Variations on the Standard Method
Several variations exist for specific situations.
Hot alkaline lysis. A hot alkaline method avoids enzymes and organic solvents and produces plasmid DNA free of RNA contamination, with yields over 20 micrograms from a 5 mL culture and high success in automated sequencing [5].
Fractional precipitation with isopropanol. A modified alkaline lysis method uses two successive isopropanol precipitations at 0.33 and 0.36 volumes to separate plasmid from total RNA and most lipopolysaccharides. Plasmids prepared this way showed superior quality compared to spin-column commercial kits in quality control tests [7].
Scale-flexible microcentrifuge formats. Some protocols cover both miniprep and midiprep scale in a single microcentrifuge format, processing up to 20 mL of cells carrying 3 to 10 kilobase plasmids in under 10 minutes, with purity sufficient for restriction digestion and fluorescent sequencing [8].
Electroextraction. A method based on membrane electroporation has been compared directly with alkaline lysis. Electroextraction produced a higher concentration of extracted plasmid than alkaline lysis in that comparison [9]. This is a specialized approach and not a routine bench method.
Alternative lysis for difficult matrices. When bacteria are captured on filters for industrial-scale processing, standard alkaline lysis is difficult to apply directly, and alternative lysis chemistries using lysozyme, Triton, and guanidinium hydrochloride have been developed for those formats [10].
Troubleshooting
| Symptom | Likely Cause | Fix |
|---|---|---|
| Low yield | Incomplete resuspension, poor lysis, or low-copy plasmid | Resuspend until no clumps remain, check P2 freshness, confirm copy number |
| Low 260/280 ratio | Protein contamination | Increase wash steps, ensure complete P3 mixing and clearing |
| High 260/280 ratio | RNA contamination | Add RNase A to P1 or use an RNase-containing lysis buffer |
| Chromosomal DNA band on gel | Vortexing after lysis or overloading the column | Mix by inversion only, reduce culture volume or split across columns |
| Open circular plasmid band | Rough mixing or extended lysis | Mix gently, keep lysis time within protocol limits |
| No DNA at all | Cells did not grow, or antibiotic selection failed | Check culture density and antibiotic, verify plasmid selection marker |
| Sheared DNA smear | High-frequency mixing during lysis | Invert the tube gently, avoid vortexing at every step after P2 |
| Column flow-through slow | Overloaded column or incomplete clearing | Reduce lysate volume, spin longer before loading |
Common Mistakes and Limitations
The single most common mistake is vortexing after adding P2 or P3. Once the cells are lysed, the chromosomal DNA is exposed and vulnerable. Vortexing shears it into fragments that are small enough to stay in solution and co-purify with the plasmid. The result is a prep that looks fine by concentration but fails in downstream applications that require clean plasmid, such as sequencing or transfection. Controlled work has shown that high-frequency, small-amplitude mixing generates more genomic fragments [4]. Mix by inversion only.
Overloading the column is the second most common mistake. Every silica or anion exchange column has a binding capacity. If you load more lysate than the column can bind, plasmid flows through and you lose yield, and the DNA that does bind is more likely to carry contaminants. When you have a large culture, split it across multiple columns rather than pushing everything through one.
A third mistake is ignoring copy number. A miniprep of a low-copy plasmid will never give the yield of a high-copy plasmid, no matter how carefully you work. If you need more DNA from a low-copy plasmid, scale up the culture volume and use a larger format.
A fourth mistake is skipping the dry spin before elution. Residual ethanol from the wash buffer inhibits restriction enzymes and polymerases. The dry spin takes 1 minute and prevents a failed digest.
A fifth mistake is assuming a miniprep is sequencing-grade. Miniprep DNA is sufficient for many enzymatic reactions, but further purification is required if the plasmid is used as the substrate in sequencing reactions [1]. If you plan to sequence, either purify further or use a method validated for sequencing, such as the hot alkaline method that achieved greater than 96 percent sequencing success [5].
Endotoxin is a limitation for any prep intended for transfection into mammalian cells. Endotoxin, also called lipopolysaccharide, is a component of the Gram-negative bacterial outer membrane. It is a potent inflammatory stimulus and can kill transfected cells or trigger an immune response. Standard minipreps do not remove it. If you plan to transfect, use an endotoxin-free column or an additional endotoxin removal step. Pharmaceutical-grade plasmid production uses multi-step chromatography to bring endotoxin below 10 EU per milligram of plasmid [11].
The physical entrapment of plasmid in cell debris is a recognized drawback of alkaline lysis, and it can lower recovery [9]. Gentle handling and complete clearing reduce this loss.
Storage and Stability
Plasmid DNA in elution buffer or nuclease-free water is stable at 4 degrees Celsius for weeks and at minus 20 degrees Celsius for years. Repeated freeze-thaw cycles can nick the DNA and convert supercoiled plasmid to open circular form, so aliquot if you plan to use the prep many times. Avoid storing plasmid in water if you will freeze it, because the lack of buffering can lead to pH-driven depurination over long periods. Tris at pH 8.0 is a better long-term storage buffer.
Frequently Asked Questions
How much DNA does a miniprep yield?
A typical miniprep from a 1 to 2 mL culture yields 5 to 30 micrograms of plasmid DNA, with the exact amount depending on plasmid copy number [1]. High-copy plasmids give the most, and low-copy plasmids give far less.
Can I use miniprep DNA for sequencing?
Miniprep DNA works for many enzymatic reactions, but sequencing reactions generally require further purification [1]. Some specialized methods, such as hot alkaline lysis, produce sequencing-grade template directly with high success rates [5].
Why do I see a high-molecular-weight band on my gel?
A high-molecular-weight band near the well is chromosomal DNA contamination. It usually comes from vortexing after lysis or from overloading the column. Mix by inversion and reduce the amount of lysate you load.
What is the difference between a miniprep and a maxiprep?
The chemistry is identical. A miniprep uses 1 to 5 mL of culture and yields micrograms of DNA, while a maxiprep uses 100 to 500 mL and yields milligrams [6]. The difference is scale, format, and time.
Do I need to add RNase to my prep?
RNase A in the resuspension buffer digests RNA during lysis and keeps the final prep free of RNA contamination. Without it, you will see a bright low-molecular-weight smear on your gel and an inflated concentration reading.
How long does a miniprep take?
A column-based miniprep takes under 2 hours from start to finish, with about 20 to 30 minutes of hands-on work [2]. The rest of the time is centrifugation and incubation.
Can I use a miniprep for transfection?
You can, but endotoxin contamination can reduce transfection efficiency and harm cells. For transfection, use an endotoxin-free prep or add an endotoxin removal step. Pharmaceutical-grade plasmid keeps endotoxin below 10 EU per milligram [11].
Why did my restriction digest fail?
The most common causes are ethanol carryover from an incomplete dry spin, salt carryover from insufficient washing, or a buffer mismatch. Do the dry spin, use the recommended wash buffer, and elute in a buffer compatible with the enzyme.
Related Articles
- Biosafety Cabinet Principles: How They Work and How to Use Them Effectively
- AAV Vectors Explained: How They Work and Their Uses
- Peer Review Metrics: What They Are and How to Use Them
- Lentiviral Vectors: How They Work and Their Uses in Gene Therapy
- Negative Controls in Bacterial Staining: Why They Matter and How to Use Them
- Negative Controls in Western Blotting: Why They Matter and How to Use Them
Sources
- Preparation of Plasmid DNA by Alkaline Lysis with Sodium Dodecyl Sulfate: Minipreps.
- Purifying plasmid DNA from bacterial colonies using the QIAGEN Miniprep Kit.
- Preparing Plasmid DNA from Bacteria.
- Optimized plasmid extraction through controlled temperature, prolonged alkaline lysis, and gentle mixing.
- A hot alkaline plasmid DNA miniprep method for automated DNA sequencing protocols.
- Preparation of Plasmid DNA by Alkaline Lysis with Sodium Dodecyl Sulfate: Maxipreps.
- Simple, inexpensive and RNase-free purification of plasmid DNA by fractional precipitation with isopropanol.
- Flexprep: scale-flexible rapid plasmid preparation for analysis of recombinant clones.
- Comparison of alkaline lysis with electroextraction and optimization of electric pulses to extract plasmid DNA from Escherichia coli.
- Integration of bacteria capture via filtration and in situ lysis for recovery of plasmid DNA under industry-compatible conditions.
- Large-scale purification of pharmaceutical-grade plasmid DNA using tangential flow filtration and multi-step chromatography.