How Often Should You Clean Your Pipettes?
By Dr. Zubair Khalid, DVM, MS, PhD ·

Cleaning removes contamination from the outside and inside of a pipette, while calibration verifies that the volumes it delivers are still accurate, and the two jobs run on completely different schedules. A practical rule of thumb for how often to clean pipettes: wipe the exterior with 70 percent ethanol or an equivalent disinfectant every day you use it, perform a full internal clean roughly every three months or immediately after any spill or aggressive liquid reaches the piston area, and put the pipette on a calibration check schedule set by your lab or manufacturer rather than by cleaning events.
That simple answer hides a more interesting question, because the right cleaning frequency depends on what you pipette, how sensitive your assay is to contamination, and how much the pipette is handled. This article walks through the main cleaning frequency options with their pros and cons, the criteria that actually decide the choice, worked scenarios from real lab situations, and the mistakes that ruin pipettes even when people clean them diligently.
Cleaning Versus Calibration: Two Different Jobs
The most common confusion in pipette maintenance is treating cleaning and calibration as one activity. They are not.
Cleaning is a contamination-control task. Its goal is to remove residues, aerosols, salts, nucleic acids, dyes, or infectious material from the pipette body, the nose cone, the piston assembly, and the seal area. Cleaning protects your samples from carryover and protects the pipette's mechanical parts from corrosion and wear.
Pipette calibration is a metrology task. Its goal is to measure how much liquid the pipette actually delivers, usually gravimetrically, and compare that against the nominal volume and the manufacturer's tolerance. Calibration protects your data, not your samples. If a 100 microliter setting actually delivers 94 microliters, no amount of cleaning will fix that, and a spotless pipette can still be out of specification.
Why does this distinction matter for cleaning frequency? Because people often skip cleaning and justify it by pointing to a recent calibration sticker. A calibrated pipette can still be a contamination reservoir. Conversely, an immaculately clean pipette can still be inaccurate. The two schedules must be tracked separately, and neither substitutes for the other.
There is also a third related task worth naming: maintenance, which includes seal and O-ring inspection, piston lubrication, and part replacement. Maintenance usually piggybacks on internal cleaning sessions because the pipette is already disassembled.
What Cleaning a Pipette Actually Involves
Before choosing a frequency, you need to know what each level of cleaning physically entails, because the deeper levels cost more time and carry more risk of damaging the instrument.
External cleaning
External cleaning means wiping the pipette body, plunger, ejector button, and especially the nose cone with a suitable disinfectant or detergent solution, then drying. Common choices include 70 percent ethanol or isopropanol, mild detergent solution followed by water, and, where the manufacturer permits it, dilute bleach solutions followed by a water wipe. The nose cone deserves the most attention because it is the part that comes closest to samples and aerosols.
Internal cleaning
Internal cleaning requires partial disassembly. A typical sequence, adjusted to your specific model's manual, looks like this:
- Set the volume to its maximum to relax the spring assembly.
- Remove the nose cone or ejector collar as the manual directs.
- Inspect the piston for corrosion, deposits, or dried residue.
- Wipe or rinse the piston and cavity with distilled water or a manufacturer-approved cleaning solution. Never submerge the whole pipette, because liquid entering the body displaces air and ruins accuracy.
- Dry everything completely.
- Apply a thin film of the manufacturer's specified piston grease if the manual calls for it. Wrong grease or too much grease is a common cause of sticky plungers and leaking seals.
- Reassemble and check function by pipetting water several times.
Decontamination versus cleaning
Decontamination is a stronger intervention aimed at killing or removing biological agents, and it often involves bleach, UV exposure, or autoclaving. Autoclaving deserves a warning: only pipettes and only the specific components the manufacturer labels autoclavable should go through an autoclave, and they usually need to be autoclaved partially disassembled with the piston removed or protected, then dried thoroughly and re-greased before use. UV exposure hardens plastics and can degrade the pipette body over repeated cycles, so UV-based decontamination should follow the manufacturer's exposure guidance rather than being improvised.
What cleaning does not fix
Cleaning will not restore worn seals, a bent piston, a cracked shaft tip cone, or a miscalibrated mechanism. If you notice volume inconsistencies, a plunger that does not return smoothly, or liquid visible where it should never be, that is a repair and calibration problem, and the pipette should come out of service until it is checked.
How Often to Clean Pipettes: The Main Options Compared
Here is the core decision laid out side by side. The right answer for a given pipette is usually a combination of rows, for example daily external wipes plus quarterly internal cleaning.
| Option | What it involves | Best for | Pros | Cons |
|---|---|---|---|---|
| After every use (external wipe) | Quick wipe of body and nose cone with 70 percent ethanol or approved disinfectant between tasks or users | Shared pipettes, sterile work, infectious or hazardous samples | Lowest carryover risk, takes under a minute, protects the next user | Alcohol wipes will not reach internal deposits, adds small consumable cost |
| Daily external cleaning | Full exterior wipe-down and nose cone inspection at start or end of each day | Any regularly used pipette in an active lab | Catches residue before it dries and hardens, builds a routine | Does not address internal contamination at all |
| Weekly to monthly internal check | Quick look at the nose cone interior and shaft for deposits or liquid ingress | Medium-use pipettes, pipettes used with salts, dyes, or sticky solutions | Catches problems before corrosion starts, cheap in time | Requires comfort with partial disassembly, easy to skip when busy |
| Quarterly internal clean and maintenance | Full disassembly, cleaning, seal inspection, piston greasing per manual | Standard schedule for most research pipettes | Removes internal residue before it damages the piston or seals, pairs naturally with maintenance | Takes 15 to 30 minutes per pipette, small risk of reassembly error, overkill for rarely used pipettes |
| Event-driven deep clean | Immediate internal cleaning and decontamination after a spill, clog, or aggressive-liquid exposure | Any pipette, immediately when triggered | Prevents permanent corrosion and carryover, no waiting for a schedule | Useless unless staff actually report the event, requires clear lab rules |
| Pre-calibration cleaning | Internal clean before sending the pipette for calibration or performing an in-house check | All pipettes, every calibration cycle | Gives the calibration service clean, representative conditions, pairs cleaning with pipette calibration on one calendar | Cleaning can disturb a freshly greased assembly if done carelessly, so timing and reassembly matter |
When people search for the best how often to clean pipettes options, this table is the honest answer: no single frequency is best in the abstract. A pipette used to aliquot buffer for a teaching class and a pipette used to handle lysate containing infectious material have completely different risk profiles, and the frequency should scale with the risk.
Option 1: External Wipe After Every Use
Wiping the exterior between tasks or between users is the highest-frequency, lowest-effort option, and it is the right default for shared pipettes and any work involving biological or hazardous liquids. A single evaporating aerosol can deposit nucleic acids, enzymes, or dyes on the nose cone, and the next user's sample can pick that up. A ten-second wipe with 70 percent ethanol interrupts that chain.
The pros are speed and consistency. The cons are that exterior wipes never touch the inside of the shaft, that alcohol alone does not remove dried protein or salt deposits well, and that the habit can create false confidence. A wiped pipette is not a decontaminated pipette if liquid ever aspirated past the tip filter or into the cone.
Option 2: Scheduled External Cleaning, Daily or Weekly
A daily wipe-down at the end of the workday, or a weekly session in lower-intensity labs, keeps residues from drying and polymerizing on the nose cone and ejector. Dried deposits are much harder to remove than fresh ones, and repeated alcohol exposure without removal of the underlying residue can bake material into the plastic.
The pros are routine and early detection. While wiping, you naturally notice cracks, a loose shaft, or a sticky ejector. The cons are that a schedule decoupled from actual use can waste time on a pipette nobody touched that week, and it still ignores the interior.
Option 3: Periodic Internal Cleaning
Internal cleaning on a monthly to quarterly cycle is where pipette longevity is actually decided. Residues that migrate into the shaft attack the piston finish and the seals. Corroded pistons and degraded O-rings produce erratic volumes, and erratic volumes only show up later, either as failed pipette calibration or as unexplained assay variability.
The pros are substantial: this is the intervention that prevents expensive repairs, and pairing it with seal inspection and light lubrication keeps the pipette feeling and performing like new. The cons are the time cost per unit, the small risk of reassembly mistakes, and the need for the correct grease. For a molecular biology lab with a rack of daily-driver pipettes, a quarterly rotation, where a few pipettes are cleaned and inspected each month so every pipette gets attention two to four times a year, is a workable pattern that avoids shutting down the whole rack at once.
Option 4: Deep Decontamination
Deep decontamination, through autoclaving of rated components or manufacturer-approved chemical treatment, applies when the pipette must be rendered free of biological agents or when materials that no surface wipe can fully remove have been used, such as radioactive solutions. This is the least frequent option, reserved for documented need rather than routine.
The pros are that it addresses contamination categories surface cleaning cannot. The cons are real: heat and radiation degrade plastic components and seals over repeated cycles, autoclaving a non-autoclavable pipette destroys it, and every autoclave cycle adds downtime for drying, reassembly, and a functional check. Because of that wear, deep decontamination should be an exception-triggered event, not a standing schedule.
Option 5: Event-Driven Cleaning
The most underused option is cleaning triggered by events rather than dates. The trigger list is short and worth posting at the bench:
- Any visible liquid inside the nose cone or shaft beyond the tip seat.
- A spill of corrosive, volatile, or sticky liquid on or into the pipette.
- Pipetting concentrated salts, strong acids or bases, detergents, phenol, or viscous solutions, all of which should be followed by an internal rinse check even if nothing looks wrong.
- Any contamination event in the downstream assay that points back at liquid handling.
- A drop of the pipette onto the bench or floor, which can misalign internal parts even when nothing looks broken.
The pros are that event-driven cleaning catches the exact moments that destroy pipettes. The cons are that it depends on honest reporting in a busy lab, so it works only when the culture allows a student to say "I aspirated phenol with the lab's P200" without fear.
How to Choose Your Frequency: The Criteria That Matter
With the options on the table, four criteria decide the best cleaning schedule for a given pipette.
First, the hazard level of the liquids. Buffers and distilled water are forgiving. Infectious material, radioactivity, phenol, and strong corrosives are not. The harsher the liquid, the more the schedule shifts toward after-every-use and event-driven cleaning.
Second, the contamination sensitivity of your assays. This criterion is easy to underestimate. Trace-level analytical work is unforgiving of background contamination, and analysts studying analytes that leach from plastic and packaging materials must design their handling specifically to obtain reliable results at ultra-trace concentrations [1]. In that setting, a pipette is part of the contamination surface, and cleaning frequency should be set by the assay's contamination budget, not by convenience. Anyone who has chased a mysterious signal in a bisphenol or endocrine-disruptor assay knows that a contaminated liquid-handling tool can look identical to a contaminated reagent, and both cost a full repeat [1].
Third, usage intensity and sharing. A pipette used 40 hours a week by five people accumulates exposure far faster than one used weekly by one person. Sharing multiplies both contamination sources and the value of the after-every-use wipe.
Fourth, your lab's quality framework. Labs operating under formal quality systems must follow their documented maintenance schedule, and those schedules typically pair internal cleaning with the pipette calibration cycle so that a clean, inspected instrument is the one being verified. If you are setting a schedule from scratch, align internal cleaning to happen before each calibration check, and let the calibration interval anchor the calendar.
Worked Scenarios
Scenario A: Undergraduate teaching lab, pipettes used with dyes and buffer
Fifty pipettes, hundreds of students, loading dye and colored buffers. Dyes are not dangerous, but they stain, dry hard, and reveal nothing about invisible residues from earlier classes. The sensible schedule is a quick external wipe when each set comes back, a weekly external clean and inspection during the semester, and a full internal clean at the end of each term, with any pipette that took a dye aspiration into the cone cleaned immediately. Calibration happens on a yearly cycle, with cleaning beforehand.
Scenario B: Molecular biology lab doing PCR and next-generation sequencing work
Aerosolized amplicon is the enemy. The pipettes dedicated to post-PCR steps carry amplified DNA that can contaminate future reactions at vanishingly small copy numbers. The schedule here is strict: dedicated pipettes per workflow zone, aerosol-resistant filter tips, an external wipe between every task, and monthly internal cleaning. Even so, many labs eventually conclude that for pre-PCR work the best contamination control is physical separation plus filter tips, with cleaning as the backstop rather than the primary defense.
Scenario C: Trace analytical chemistry, for example bisphenols in milk
An assay measuring bisphenols at ultra-trace levels in complex matrices such as sweetened condensed milk or breast milk, following sample clean-up by dispersive solid-phase extraction, demands that the analyst control every contamination source, because the analytes of interest themselves migrate from plastics and packaging into samples [1]. Here the pipettes should be treated as potential analyte sources. Glass or carefully vetted plastic tips, dedicated pipettes for standards versus samples, external cleaning before each analytical session, and internal cleaning whenever the pipette touched a high-concentration standard are reasonable defaults. The cleaning frequency is driven by the assay's background, not by a calendar.
Scenario D: Electrophysiology with glass patch pipettes
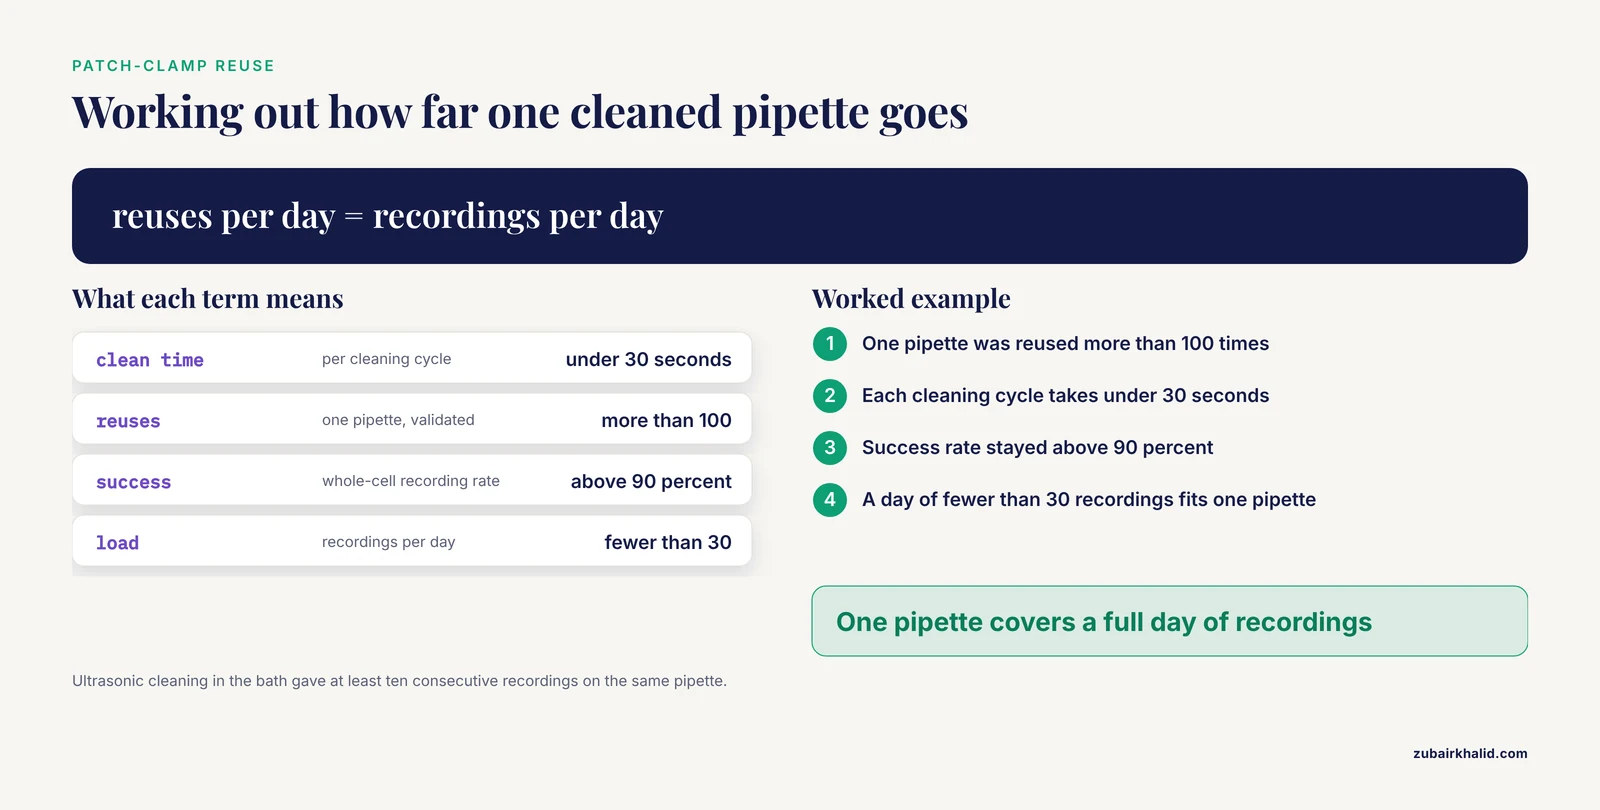
Patch-clamp pipettes are a different technology, glass capillaries pulled fresh for recordings, and they illustrate how cleaning frequency follows function. Traditionally, a patch pipette was replaced after every single recording attempt, which limited throughput badly. Researchers then showed that a glass pipette can be cleaned between recordings and reused: an optimized enzymatic cleaning protocol takes under 30 seconds per cycle and achieved a whole-cell recording success rate above 90 percent across more than 100 reuses of a single pipette, meaning one pipette could cover an entire day of experiments for labs doing fewer than 30 recordings per day [2]. A separate ultrasonic approach cleans the pipette tip directly within the bath solution where the cells sit, avoiding detergent contamination of the bath or the pipette's internal solution, and showed the same pipette performing at least ten consecutive recordings without harming the brain slices or neighboring patched cells [3]. The lesson for the broader question is that cleaning frequency is a design variable, and when the cleaning method is fast, validated, and demonstrably harmless to the downstream use, cleaning can move from monthly to between-every-use without penalty [3][2].
Pipetting Technique and Contamination: Why Cleaning Alone Is Not Enough
Cleaning frequency and pipetting technique are linked, because technique determines how much contamination reaches the pipette in the first place. A few technique habits directly reduce cleaning burden:
- Keep the pipette vertical or near-vertical when loaded. Holding a loaded pipette at an angle lets liquid run toward the shaft, and that is how the interior gets contaminated in the first place.
- Release the plunger smoothly. Aspirating too fast generates aerosols and bubbles, and aerosols are what carry material up into the nose cone.
- Use aerosol-resistant filter tips for sensitive or biohazardous work. A filter tip is a disposable barrier that takes the contamination instead of the pipette. If your technique and tip choices are good, the pipette interior stays clean much longer, and quarterly internal cleaning is genuinely enough.
- Pre-rinse the tip when dispensing viscous or volatile liquids. A consistent film on the tip wall improves accuracy and reduces residue splatter.
- Never force the plunger past its stops, and never pipette with the tip in liquid while repeatedly actuating, which sprays sample into the cone.
Poor technique shortens the interval between cleanings that the pipette actually needs. Good technique is the cheapest way to stretch the schedule safely.
Common Mistakes and Limitations
These are the errors that appear again and again in real labs:
- Confusing a calibration sticker with a clean pipette. Calibration says nothing about contamination. Track the two on separate logs.
- Autoclaving a pipette that is not rated for it, or autoclaving without disassembly where required. Heat warps the housing and degrades seals, and the pipette will fail its next calibration.
- Cleaning with bleach and skipping the rinse. Chloride residues corrode stainless steel pistons over time. Any bleach contact must be followed by a thorough water wipe and drying.
- Submerging the pipette or holding it under a tap. Liquid inside the housing displaces the air cushion the mechanism depends on, and corrosion follows within weeks.
- Over-greasing the piston. Excess grease migrates onto the seals and shaft, attracts debris, and causes the very sticky-plunger problems it was meant to prevent. Use the specified grease, thinly.
- Storing pipettes hanging on a rack with tips still mounted or after liquids have entered the cone. Pipettes should be stored clean, dry, and set at their maximum volume, which relaxes the spring.
- Ignoring a small spill because "it was just buffer." Buffer salts crystallize on the piston, and crystallized salt abrades seals every time the plunger moves.
- Treating cleaning as a substitute for repair. If the plunger scrapes, the volume drifts, or liquid appears where it should not, disassemble and inspect, and replace seals or the piston if needed.
One limitation belongs in its own sentence. This article gives general scheduling logic for standard laboratory air-displacement pipettes, but your specific manufacturer's manual and your institution's biosafety or quality policies always take precedence, and anything involving biohazardous, radioactive, or clinical materials must follow your local institutional procedures and applicable professional guidance.
A Practical Schedule You Can Copy
Pulling the options together, here is a defensible default schedule for a typical molecular biology lab, to be adjusted upward for hazard and downward for light use:
- Every day of use: external wipe of body, plunger, ejector, and nose cone with 70 percent ethanol or approved disinfectant, with special attention to the nose cone.
- Weekly: visual inspection of nose cone interior and shaft for deposits, cracks, or liquid, on every pipette in active rotation.
- Monthly: internal cleaning for pipettes used with salts, detergents, viscous liquids, or biohazardous materials.
- Quarterly: internal cleaning, seal inspection, and piston greasing per the manual for all regularly used pipettes, staggered across months so the whole rack is never down at once.
- Immediately, any time: event-driven cleaning after spills, aggressive liquids, visible internal liquid, or a drop.
- Before each calibration check: internal clean so the instrument verified is the instrument used, then recalibrate or send out for pipette calibration on the interval your manufacturer and quality system specify.
This layered schedule answers how often should you clean your pipettes at several scales at once, which is exactly how real labs survive. The high-frequency layer is cheap and automatic, the low-frequency layer is thorough and scheduled, and the event layer catches the disasters.
Frequently Asked Questions
How often should you clean your pipettes?
Wipe the exterior daily on any day of use, inspect the nose cone weekly, clean the interior roughly every one to three months depending on what you pipette, and clean immediately after any spill, aggressive liquid, or visible internal contamination, with a full internal clean before every calibration check.
Is cleaning the same as calibration?
No. Cleaning removes contamination while calibration measures whether the delivered volumes match the set volume within tolerance. A pipette needs both, on separate schedules, and neither replaces the other.
Can I autoclave my pipette?
Only if the manufacturer explicitly rates the pipette, or the specific components in question, as autoclavable, and then usually partially disassembled with drying and re-greasing afterward. Autoclaving a non-autoclavable pipette ruins it, so check the manual first.
What solution should I use to clean a pipette?
For external cleaning, 70 percent ethanol or isopropanol or a mild detergent solution is standard, and dilute bleach can be used for decontamination where the manufacturer permits it, always followed by a water wipe and drying. For internal cleaning, use distilled water or the manufacturer's recommended cleaning solution, never solvents or abrasives that can damage the piston or seals.
How often should pipettes be calibrated?
Calibration intervals are set by the manufacturer's guidance and your lab's quality requirements, and common practice for research pipettes falls in the range of every six to twelve months, shortened for heavy use, corrosive liquids, or formal quality-system settings. Schedule internal cleaning shortly before each calibration so the verified instrument is clean.
How do labs that reuse patch-clamp pipettes clean them between recordings?
Specialized protocols clean the glass tip in seconds between recordings, either with rapid enzymatic cleaning or with ultrasonic cleaning performed directly in the recording bath, which allows one pipette to serve many consecutive recordings, and these validated between-use cycles coexist with the same external and internal maintenance schedules that ordinary laboratory pipettes follow.
Sources
- Method Development for Selected Bisphenols Analysis in Sweetened Condensed Milk from a Can and Breast Milk Samples by HPLC-DAD and HPLC-QqQ-MS: Comparison of Sorbents (Z-SEP, Z-SEP Plus, PSA, C18, Chitin and EMR-Lipid) for Clean-Up of QuEChERS Extract.
- Method for Rapid Enzymatic Cleaning for Reuse of Patch Clamp Pipettes: Increasing Throughput by Eliminating Manual Pipette Replacement between Patch Clamp Attempts.
- Immediate reuse of patch-clamp pipettes after ultrasonic cleaning.