Adjustable vs. Fixed-Volume Pipettes
By Dr. Zubair Khalid, DVM, MS, PhD ·

An adjustable-volume pipette delivers any volume within a printed range, such as 2 to 20 microliters, while a fixed-volume pipette delivers a single volume that never changes, such as exactly 100 microliters. The difference between adjustable and fixed volume pipettes comes down to flexibility against repeatability: the adjustable model is the general-purpose tool for varied work, and the fixed model is the specialist tool for one volume done all day long. A good rule of thumb is to choose adjustable when your protocol list spans many volumes, and choose fixed when a single volume dominates your workload and you want the fastest, most error-proof setting on the bench.
This article explains how each type works, compares them on the criteria that actually decide a purchase, walks through pipetting technique and pipette calibration that apply to both, gives worked scenarios, and lists the mistakes that cost people the most time and samples.
Adjustable vs. Fixed-Volume Pipettes at a Glance
The table below summarizes the core comparison. Each row is expanded in the sections that follow.
| Criterion | Adjustable-volume pipette | Fixed-volume pipette |
|---|---|---|
| Volume setting | Continuously variable within a range (for example, 2 to 20 µL) | One engraved or printed volume (for example, 100 µL) |
| Best suited for | Mixed protocols, method development, serial dilutions, teaching labs | High-repetition workflows with one volume, quality control, sample-heavy clinical or diagnostic runs |
| Setting errors | Possible. Users can dial a wrong volume or fail to lock the dial | Essentially eliminated. The volume cannot be changed by accident |
| Speed at the bench | Fast once set, slightly slower when volumes change constantly | Fastest possible. No display to read, no dial to turn |
| Precision at a given volume | Typically best near the upper half of the range | Manufacturer-optimized for that single volume across the full dispensing cycle |
| Upfront cost | Higher per unit, but one unit replaces many | Lower per unit, but you need one unit per volume you use |
| Calibration burden | Calibrate at the volumes you actually use, which may be several points | Calibrate at one volume, a simpler check |
| Training value | Higher, because users learn range selection and setting discipline | Lower, because a novice cannot mis-set it |
One unit of volume in all cases is the microliter, abbreviated µL, which is one millionth of a liter. Molecular biology work almost always happens in this range, from 1 µL of a restriction enzyme up to 1000 µL of buffer.
How a Pipette Actually Works
To compare the two types fairly, you first need the shared machinery underneath them. Both adjustable and fixed-volume pipettes used in routine molecular biology are almost always air-displacement pipettes. In an air-displacement pipette, a spring-loaded piston sits inside a sealed barrel, and a disposable plastic tip holds the liquid. When you release the plunger after pressing it, the piston moves up, a cushion of air expands inside the barrel, and the drop in pressure draws liquid into the tip. The piston never touches the liquid. The volume of liquid drawn in equals the volume swept by the piston, which is set either by a dial (adjustable) or by a fixed mechanical stop (fixed).
The plunger on an air-displacement pipette has two positions, called stops:
- First stop. Pressing to the first stop displaces exactly the set or fixed volume of air. This is the position you use to aspirate and to dispense most liquids.
- Second stop. Pressing past the first stop adds extra travel that forces out the residual droplet clinging to the inside of the tip, known as the blow-out volume.
Getting the two stops right is the single most consequential element of pipetting technique, and it is covered in detail below.
The alternative design, the positive-displacement pipette, uses a piston that sits inside the tip itself and directly pushes the liquid. It is the tool of choice for viscous, volatile, or dense liquids such as glycerol, but it is a separate instrument class, not a variant of the adjustable versus fixed question. Both adjustable and fixed models exist in positive-displacement form too, and the same flexibility-versus-repeatability logic applies.
The Adjustable-Volume Pipette
An adjustable-volume pipette, sometimes called a variable-volume pipette, has a volume-setting mechanism, usually a thumbwheel or a push-button dial, connected to a digital or window display. Turning the dial moves a mechanical stop that limits how far the piston travels, and therefore how much air is displaced and how much liquid is drawn.
Key features define the category:
- A printed range. Every adjustable pipette covers roughly a tenfold range. Common single-channel models follow a naming convention: a P10 covers about 0.5 to 10 µL, a P20 covers about 2 to 20 µL, a P200 covers about 20 to 200 µL, and a P1000 covers about 100 to 1000 µL. Setting a P200 to 20 µL is legal but sits at the very bottom of the range, where performance degrades.
- A volume-lock. Most modern models include a lock button or collar that freezes the dial. Locked settings survive pipette-to-hand-to-rack contact. Unlocked dials drift, which is a classic cause of a whole plate being pipetted at the wrong volume.
- A digital display with digit windows. Read the display from the top window down. A common convention uses the top digit for the largest unit, with the last window often filled red or marked to indicate decimals. Read the manufacturer's diagram for your specific model, because color coding differs between brands.
- Tip-ejector mechanics. A collar-mounted ejector discards the tip without hand contact, which matters for both speed and contamination control.
The adjustable pipette is the default instrument of molecular biology because protocols rarely use one volume. Setting up a 20 µL restriction digest, for example, might involve dispensing 2 µL of buffer, 0.5 µL of enzyme, 1 µL of DNA, and water to volume, all with the same P20 within a few minutes.
The concept is old and well established in laboratory practice. In 1979, Sundaram described the "Impette," an immobilized-enzyme pipette built by fixing disposable nylon tips, with enzymes covalently bound to their inner surface, onto the stem of an automatic, adjustable-volume pipette holder, and applied the device to blood urea determination using bound urease [1]. That design choice is telling: even for a specialized clinical application, the inventor started from an adjustable-volume holder, because the holder was already the familiar, flexible platform on the bench.
The Fixed-Volume Pipette
A fixed-volume pipette is factory-set to dispense one volume. There is no dial, no display, and no way for the operator to change the delivery volume. The piston travel is set by a machined stop, and the nominal volume is engraved or molded into the body. Common fixed volumes include 25 µL, 50 µL, 100 µL, 200 µL, and 1000 µL, depending on the workflow the pipette was bought for.
The case for fixed rests on three things:
- No setting errors. A fixed pipette cannot be mis-set. The most common catastrophic pipetting error in a busy lab, pipetting an entire plate or an entire sample series at the wrong volume, is physically impossible.
- No lock to forget. Because there is no dial, there is no unlocked dial to drift between dispenses.
- Speed and rhythm. With no display to verify, an experienced operator develops a fast, continuous rhythm, which matters when processing hundreds of tubes.
The case against fixed is equally simple. One pipette equals one volume. If your work tomorrow needs 30 µL instead of 25 µL, the fixed pipette is the wrong tool, and the only alternatives are an adjustable pipette or serial deliveries, such as dispensing 100 µL four times to make 400 µL, which multiplies hands-on time and adds cumulative variation.
Fixed-volume pipettes also fit naturally into workflows where the disposable element carries the chemistry. The Impette described by Sundaram used disposable enzyme-bound nylon tips fixed to a pipette holder so that each tip served as a single-use reaction chamber, an arrangement well suited to repeated deliveries of the same reaction setup [1]. Workflows of that shape, same volume, same chemistry, sample after sample, are exactly where fixed instruments shine.
Choosing Between Adjustable or Fixed Volume Pipettes
The difference between adjustable and fixed volume pipettes becomes concrete when you weigh them on the criteria that decide real purchases. Five criteria matter most: performance across the volume range, precision and accuracy, ergonomics and throughput, cost structure, and calibration burden.
Performance Across the Volume Range
Manufacturers rate accuracy and precision across a pipette's full range, and both types share a fundamental behavior: performance is best in the upper half of the range and degrades near the bottom. The reason is physical. Air-displacement pipettes push a cushion of air, and the mass of liquid that enters the tip must overcome surface tension and the elasticity of that air cushion. At the bottom of the range, the liquid slug is small relative to the air volume behind it, so small variations in tip fit, temperature, and operator handling produce proportionally larger errors.
This has a direct practical consequence for the adjustable versus fixed decision. If your target volume sits at the very bottom of an adjustable pipette's range, say 2 µL on a P20, a dedicated fixed-volume pipette at that low volume, or a smaller-range adjustable model, will generally outperform it. If your target volume sits mid-range or high in the range, a well-maintained adjustable pipette performs essentially as well as a fixed one.
Precision and Accuracy
Two words get used interchangeably in casual bench talk but mean different things:
- Accuracy, sometimes called trueness, is how close the delivered volume is to the intended volume on average.
- Precision is how tightly repeated deliveries cluster together, regardless of whether the cluster is centered on the target.
Manufacturer specification sheets list both for adjustable pipettes, typically at several points across the range, and for fixed pipettes at their single volume. The qualitative pattern is consistent across the industry. Fixed-volume specifications are usually quoted for the one volume the instrument was built to deliver, and adjustable specifications show tighter numbers near the top of the range than near the bottom. Manufacturer documentation for your specific model is the correct reference for exact tolerance values, because tolerances differ by brand, model, and volume class.
For most molecular biology work, the practical takeaway is that a properly maintained and calibrated pipette of either type is accurate enough. The exceptions are exacting applications, quantitative real-time PCR standards, next-generation sequencing library quantification, and volumetric steps in analytical chemistry, where instrument specifications and calibration records deserve a closer look.
Ergonomics and Throughput
Pipetting is a repetitive-motion activity, and hand strain is a genuine occupational concern in labs where a single person may dispense thousands of times per day. Adjustable pipettes tend to be heavier and have more moving parts, including the dial mechanism and lock. Fixed-volume pipettes are lighter with fewer parts. Lighter weight and a smooth plunger action reduce thumb load over a long run.
Throughput cuts the other way in mixed work. If a protocol needs five different volumes, one adjustable pipette that covers all five beats a drawer of five fixed pipettes, because switching instruments costs time and attention. If a protocol needs one volume five hundred times, the fixed pipette wins, because there is nothing to read, nothing to set, and nothing to lock.
Cost and Inventory
A single adjustable pipette covers a tenfold range, so a basic set of four, roughly a P10, P20, P200, and P1000, covers nearly all routine molecular biology. A fixed-volume strategy needs one instrument per volume, so the inventory grows with the number of distinct volumes in your protocols. For a new lab or a teaching lab, adjustable models are almost always the economical starting point. For a production or diagnostic workflow with a locked-down protocol, the per-unit cost of fixed instruments is offset by their simplicity and low failure surface, since there are no dial mechanisms to wear, leak, or drift.
Calibration Burden
Calibration effort tracks the number of settings you must verify. An adjustable pipette used at several volumes needs a multi-point check, for example at the bottom, middle, and top of its working range. A fixed pipette needs one point. Neither is laborious, but multi-point verification takes longer and produces more data to record. This is a real, if modest, factor when a lab maintains dozens of instruments.
Pipetting Technique: The Shared Skill Set
Most pipetting errors blamed on the instrument are actually technique errors, and the technique is the same for adjustable and fixed models. Getting it right matters more than the choice between the two types.
The Standard Forward Pipetting Cycle
- Set or confirm the volume. On an adjustable pipette, dial to the target volume and engage the lock. On a fixed pipette, confirm you are holding the right instrument for the volume your protocol calls for.
- Fit a fresh tip. Press the pipette firmly into the tip in the rack with a slight twist. A poor seal between the tip cone and the shaft is a leading cause of under-delivery, because air escapes past the seal during aspiration.
- Pre-wet the tip. Aspirate and dispense the liquid two or three times before the real draw. Pre-wetting equilibrates the air cushion to the liquid's temperature and humidity, which reduces the systematic under-delivery that otherwise occurs on the first dispense, especially with volatile or warm liquids.
- Aspirate. Press the plunger to the first stop, hold, and immerse the tip 2 to 3 millimeters below the liquid surface for small volumes, a bit deeper for larger volumes. Keep the pipette vertical or near vertical. Release the plunger smoothly and steadily. Do not release abruptly, because the liquid can surge up into the barrel.
- Dispense. Touch the tip against the wall of the receiving vessel, ideally just above the liquid surface or at a shallow angle into the liquid. Press smoothly to the first stop, pause about one second, then press to the second stop to blow out the residual droplet.
- Eject. While the tip is still over the waste container or out of the receiving vessel, press the ejector. The residual droplet that exits on the second stop is the reason to keep the tip away from anything you do not want contaminated.
The Two Stops, Stated Plainly
The single most common technique error is pressing to the second stop when aspirating. Aspirating from the second stop draws in more liquid than the set volume, and the excess has nowhere defined to go, so delivery becomes inconsistent. The rule is simple and absolute: second stop to aspirate is wrong, second stop to dispense is right. The only routine exception is reverse pipetting, described next.
Reverse Pipetting for Viscous and Foaming Liquids
For liquids that cling, foam, or evaporate quickly, such as glycerol-containing enzyme stocks, protein solutions, and detergents, standard forward pipetting leaves too much liquid behind or loses too much to foam. Reverse pipetting solves this:
- Press the plunger all the way to the second stop.
- Aspirate. The tip now holds the set volume plus the blow-out volume.
- Dispense by pressing only to the first stop. The excess remains in the tip.
- Discard the excess by pressing to the second stop into waste, or return it to the source if the liquid is precious and uncontaminated.
Reverse pipetting deliberately over-fills and delivers by subtraction, so the residual film problem works in your favor instead of against you.
Variables That Corrupt Any Pipette
Regardless of instrument type, four physical factors shift delivered volumes:
- Temperature differences. Cold liquid drawn into a warm pipette, or the reverse, changes the density of the air cushion. This is a major reason to pre-wet.
- Tip angle. Holding the pipette at an angle during aspiration draws in extra liquid. Keep it vertical.
- Immersion depth. Deep immersion adds hydrostatic pressure and liquid film on the outside of the tip. Shallow immersion risks drawing air. Aim for just enough depth to keep the tip orifice submerged.
- Release speed. Fast plunger release creates bubbles and aerosols inside the tip, both of which distort the delivered volume and create contamination risk.
Pipette Calibration
Pipette calibration is the process of measuring what a pipette actually delivers and adjusting it so that delivered volume matches the set volume within the manufacturer's tolerance. Calibration is not optional. Pipettes drift with use, with wear of the piston and seals, and after mishandling such as a drop onto the bench or liquid entering the barrel.
How Gravimetric Calibration Works
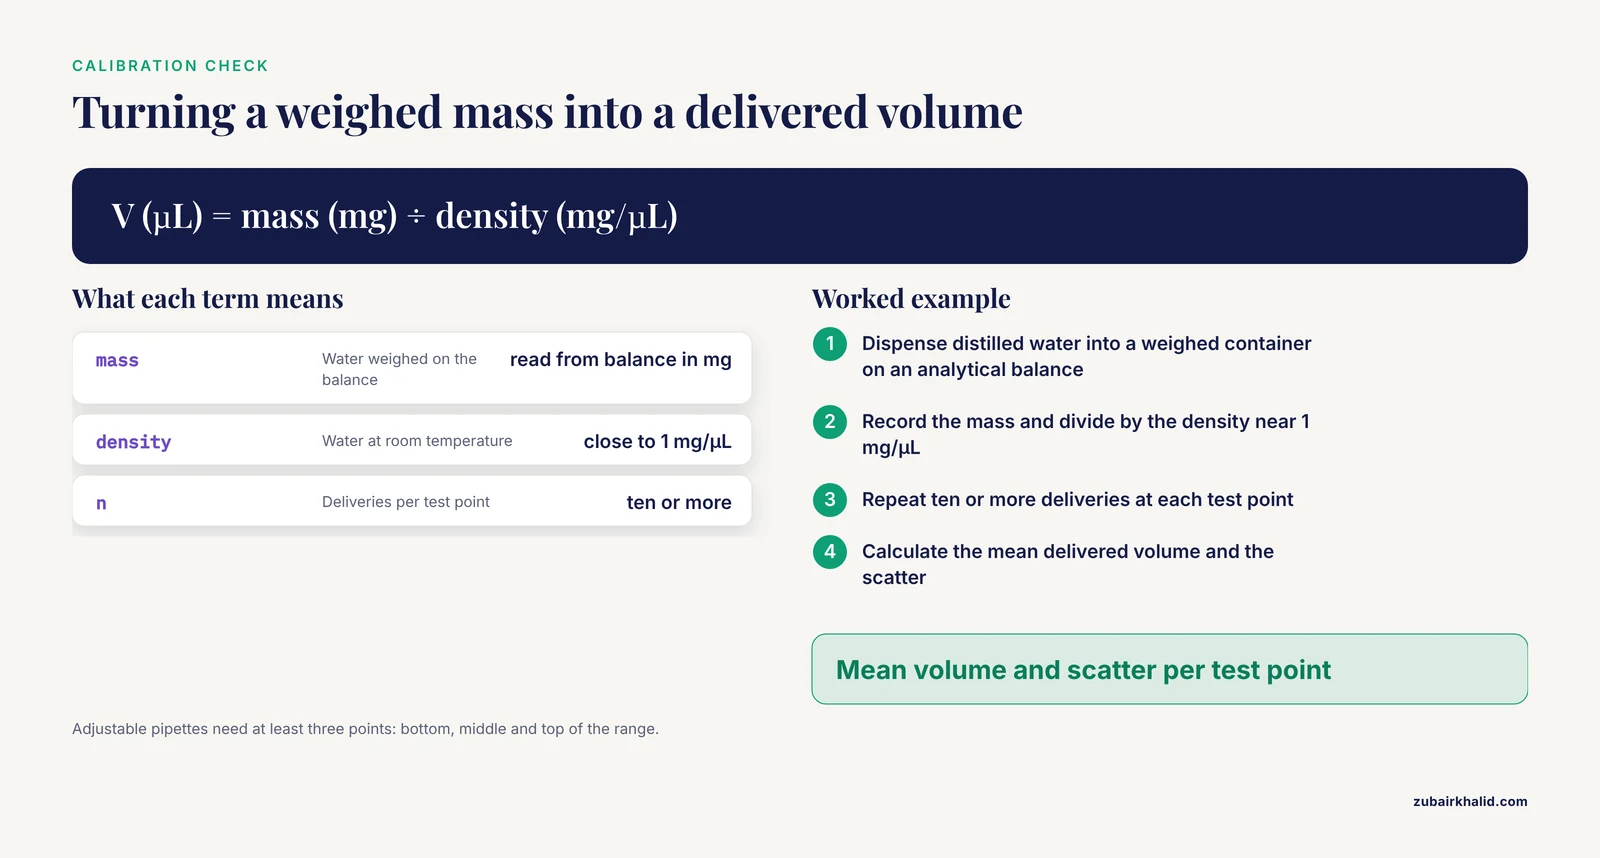
The standard method is gravimetric: dispense distilled water into a weighed container on an analytical balance, record the mass, convert mass to volume using the density of water at the test temperature, and repeat enough times, commonly ten or more deliveries per test point, to calculate both the mean delivered volume and the scatter. At room temperature, water's density is close to one milligram per microliter, which is what makes weighing such a convenient proxy for volume. Professional calibration adds corrections for evaporation during the weighing cycle and for buoyancy effects, and many labs use purpose-built calibration software or evaporation-protected weighing vessels for the smallest volumes.
For an adjustable pipette, calibrate at the volumes you actually use. A pipette that is perfect at 200 µL can be out of tolerance at 20 µL, so a single-point check at the top of the range is not a certificate of health for the whole range. Standard practice tests at least three points: near the bottom, in the middle, and near the top of the useful range. For a fixed-volume pipette, the single nominal volume is the only point, which is one practical reason fixed instruments are simpler to maintain.
When to Calibrate
Formal calibration schedules vary between institutions, and your lab's written policy or the instrument manufacturer's recommendation is the authoritative source for the interval. Beyond the scheduled interval, three events should trigger an immediate check:
- A drop, a knock, or any suspected physical impact.
- Any incident where liquid has been drawn past the tip into the barrel, which can corrode the piston assembly.
- A change in observed behavior, such as bubbles appearing consistently in the tip, a plunger that feels different, or dispensing that visibly differs from expectations.
Between formal calibrations, many labs run quick in-house checks, sometimes called verification or routine checks, using a balance and a simple record sheet. A verification result drifting toward the tolerance limit is an early warning that full calibration or seal replacement is due.
Maintenance That Protects Calibration
Calibration only holds if the instrument is mechanically sound. Three maintenance habits matter most:
- Never pipette with the pipette inverted or held horizontally during aspiration in normal use, because liquid runs into the barrel. Reverse pipetting and specialized filter-tip workflows are exceptions managed deliberately.
- Use filtered tips (barrier tips) for volatile or radioactive liquids. The filter blocks aerosols and vapors from reaching the piston, protecting the seals that define the air cushion.
- Store pipettes on a rack at their highest set volume or, where the manufacturer advises, fully released, so the internal springs are not held under tension for long periods. Follow your specific model's manual, because storage recommendations differ.
Worked Scenarios
The clearest way to see the adjustable versus fixed-volume decision in action is to walk through realistic bench situations.
Scenario 1: A Molecular Cloning Workflow
You are assembling a 20 µL restriction digest and then a 10 µL ligation, each requiring buffer, insert, vector, enzyme, and water in different volumes. You also need to prepare a dilution series of the insert for a control lane. Volumes range from 0.5 µL to 500 µL across the day.
Choose adjustable. A P20 and a P1000 cover almost everything, and the P20 handles the enzyme and DNA microliter deliveries. A drawer of fixed pipettes at 0.5, 1, 2, 10, 20, and 500 µL would be an absurd inventory for this work, and serial deliveries would multiply error opportunities. This scenario is the reason adjustable pipettes dominate research benches.
Scenario 2: A High-Volume Diagnostic Assay
You are loading 25 µL of prepared sample into each of three 96-well plates every morning, using the same reaction recipe validated by the lab. The volume never changes.
Choose fixed, or an adjustable pipette locked at the working volume and treated as fixed. With a fixed 25 µL pipette, no operator can mis-set the volume mid-run, there is no display to read between wells, and the calibration record covers exactly one point. This is the setting where fixed instruments earn their keep, and it mirrors the logic behind single-purpose clinical devices. The Impette's design, disposable enzyme-bound nylon tips fixed to an automatic pipette holder for repeated blood urea determinations in research and clinical settings, followed the same pattern of one reaction, one volume, repeated sample after sample [1].
Scenario 3: A Teaching Laboratory
Thirty undergraduates will set up PCRs with eight different component volumes, many of them touching a pipette for the first time.
Choose adjustable, with deliberate instruction. The teaching value of adjustable pipettes is that students must learn range selection, dial reading, locking, and the two-stop technique, which are the transferable skills of the lab. The risk is mis-setting, which you manage by having each student read their set volume back to a partner before any liquid is touched, and by checking the lock before the first aspiration.
Scenario 4: Method Development
You are optimizing a new qPCR master mix recipe and need to test reaction sizes of 10, 15, 20, and 25 µL with varying primer volumes.
Choose adjustable, exclusively. Method development is defined by changing volumes. A fixed-volume inventory would need to grow and shrink with every iteration of the protocol, and the whole point of the exercise is flexibility at the bench.
Scenario 5: The Hybrid Strategy
Many labs converge on a hybrid. A small set of adjustable pipettes covers everyday research work, and one or two fixed-volume pipettes, selected at the volumes their highest-throughput protocols use, serve the repetitive routines. This gets the flexibility of adjustable where it pays and the error-proofing of fixed where it pays, without a bloated instrument drawer.
Specialized Pipettes Built on Adjustable Platforms
The adjustable-versus-fixed distinction is not only about research-versus-production. The adjustable pipette holder has also served as the chassis for entirely new instrument classes. The Impette of Sundaram is a documented example: disposable polymeric nylon tube tips with enzymes bound covalently to their inside surface were fixed to the stem of an automatic, adjustable-volume pipette holder, so that each pipetting action both metered the sample and carried out an enzymatic reaction, demonstrated with urease for blood urea determination [1]. The paper explicitly addresses the scope and limitations of the device in research and clinical use [1], a reminder that even clever adaptations of pipette platforms carry boundaries that must be understood before adoption.
The lesson for everyday bench decisions is that the pipette is a platform. Whatever specialized chemistry or consumable you later attach to it, the underlying choice between a variable holder and a dedicated fixed instrument follows the same logic laid out in this article.
Common Mistakes and Limitations
These are the errors and constraints that come up repeatedly with both pipette types. Each is preventable with awareness.
- Aspirating from the second stop. This is the most common technique error in beginners and the most damaging to data quality, because it silently over-delivers by the blow-out volume in an uncontrolled way. Aspirate from the first stop, dispense through the second stop.
- Skipping pre-wetting. The first dispense from a dry tip is systematically low in volume, particularly with volatile solvents and warm liquids. Two or three pre-wet cycles fix this in seconds.
- Dialing below the minimum or forcing past the maximum. Driving an adjustable pipette outside its printed range damages the stop mechanism and voids the volume setting. If your target volume falls outside a pipette's range, use a different pipette, not more force.
- Working at the bottom of the range. Setting a P1000 to 100 µL is within range but poor practice, because performance degrades near the minimum. Use the pipette whose range puts your volume in its upper half. A P200 at 100 µL is the better choice.
- Forgetting the volume lock. An unlocked adjustable pipette can drift between setting and dispensing, and a whole experiment can be run at the wrong volume. Engage the lock every time.
- Using the wrong tip brand or a worn tip cone. Tip geometry and the seal between tip and shaft are part of the calibrated system. Substituting unverified tips can shift delivered volume enough to matter, and a chipped shaft or cracked tip cone guarantees inconsistent results.
- Reusing tips across incompatible reagents. Trace carryover from a previous dispense can inhibit enzymes or contaminate a master mix. Change tips whenever carryover is even plausibly a problem, and use filtered tips for anything volatile, radioactive, or prone to aerosolization.
- Treating fixed-volume pipettes as unbreakable. Fixed instruments still have pistons, seals, and calibration states. They drift, they degrade, and they need pipette calibration like any other pipette.
- Assuming the display is the truth. The set volume on an adjustable pipette is an instruction, not a measurement. Only calibration tells you what the instrument actually delivers.
- Pipetting with an angled shaft. Angle during aspiration adds volume through hydrostatic and surface effects. Vertical aspiration is the standard against which calibration is performed, so angling introduces error that calibration cannot see.
- Ignoring small-volume physics at the extreme. Below a few microliters, evaporation from the tip tip, electrostatic attraction to vessel walls, and surface tension dominate. Even a perfect pipette cannot rescue a technique that leaves a 1 µL droplet stranded on the outer wall. Touch off against the receiving vessel wall, and consider reverse pipetting for small organic or proteinaceous volumes.
- Over-interpreting single dispenses. Every delivery carries scatter. Conclusions should rest on repeated measurements, not on one dispense that seemed to be the source of a failed reaction.
One further limitation applies to every instrument choice described here. Equipment selection supports good results, but it does not replace trained technique, written lab procedures, and, where work touches clinical decisions, qualified professional oversight of the assay and its interpretation.
Frequently Asked Questions
Which is better, an adjustable or a fixed volume pipette?
Neither is universally better. Adjustable pipettes are better when your work involves many different volumes, and fixed pipettes are better when a single volume dominates a repetitive, high-throughput workflow. The choice follows your protocol list, not a general ranking.
Can I use an adjustable pipette at any volume within its range?
Yes, within the printed range, but accuracy and precision degrade near the bottom of the range. Set your target volume in the upper half of the range whenever possible, and pick a different pipette if your volume falls at or below the printed minimum.
How often should a pipette be calibrated?
Follow your lab's written schedule and the manufacturer's recommendation for the formal interval, and add a check after any drop, any liquid entering the barrel, or any change in pipetting behavior. Adjustable pipettes should be verified at every volume they routinely deliver, not just one.
Do adjustable and fixed pipettes use the same tips?
Usually yes, if both are from the same manufacturer or if the tip is rated as compatible with the pipette model, because the tip cone geometry is what forms the airtight seal. Always confirm compatibility for your specific model, since an imperfect seal is a common cause of under-delivery.
When should I use reverse pipetting?
Use reverse pipetting for viscous, foaming, or high-vapor-pressure liquids, such as glycerol stocks, protein solutions, and detergents. Aspirate from the second stop and dispense only to the first stop, leaving the excess in the tip to be discarded.
Why do labs still buy fixed-volume pipettes if adjustable ones are so flexible?
Because inflexibility is the feature. A fixed pipette cannot be mis-set, needs only a single-point calibration check, weighs less, and lets an operator work at maximum rhythm. For a locked-down protocol repeated hundreds of times a day, those properties are worth more than flexibility.