PCR Troubleshooting: Weak, Missing, or Nonspecific Bands
By Dr. Zubair Khalid, DVM, MS, PhD ·
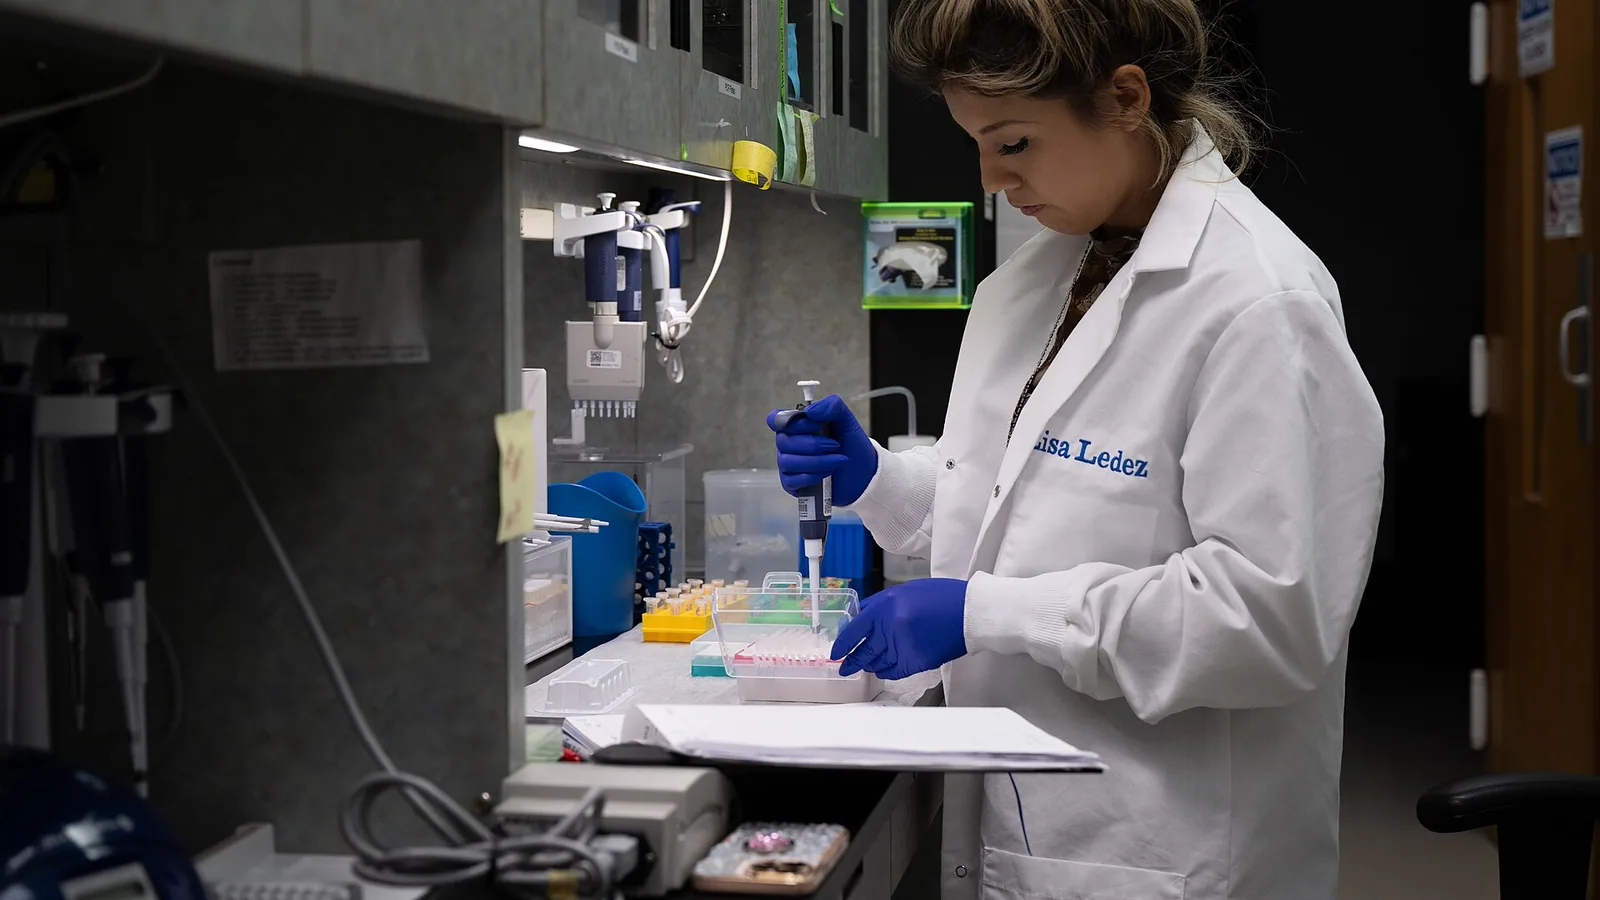
Polymerase chain reaction (PCR) troubleshooting is the systematic process of diagnosing and correcting failed or suboptimal PCR amplifications, specifically addressing weak bands, complete absence of product, or the appearance of unintended nonspecific bands. This guide is useful when standard PCR protocols yield inconsistent or poor results, providing a structured approach to identify root causes ranging from primer design flaws and suboptimal thermal cycling parameters to reagent degradation and template quality issues. The methods described here apply to conventional endpoint PCR using DNA templates and standard thermostable DNA polymerases, and are intended for students, laboratory technicians, and early-career researchers working under routine BSL-1 conditions as defined by the CDC and NIH [<a href="#ref-1">1</a>].
At a Glance
| Aspect | Key Information |
|---|---|
| Purpose | Diagnose and resolve weak, missing, or nonspecific PCR bands |
| Primary causes | Primer design errors, suboptimal annealing temperature, reagent degradation, template issues, polymerase problems |
| Key controls | Positive control (known amplifiable template), negative control (no template), internal control (housekeeping gene) |
| Critical parameters | Annealing temperature, Mg²⁺ concentration, primer concentration, cycle number, extension time |
| Common fixes | Gradient PCR for annealing optimization, primer redesign, reagent replacement, template purification |
| Safety level | BSL-1 routine; no pathogen propagation or clinical culturing |
| Time to troubleshoot | 2–4 hours per optimization round |
Key Takeaways
- Weak or absent PCR bands are most frequently caused by inadequate template DNA quality/quantity, degraded DNA polymerase, suboptimal annealing temperatures ($T_a$), or PCR inhibitors (e.g., ethanol, EDTA, heme).
- If bands are completely missing, verify primer integrity, lower the annealing temperature by 2°C–4°C, perform a magnesium ion ($Mg^{2+}$) titration (1.5–3.5 mM), or add PCR enhancers (5% DMSO or 1 M betaine) for GC-rich targets.
- Non-specific amplification bands and high-molecular-weight smears indicate excessive primer concentrations, overly low annealing temperatures, or excessive cycle numbers (>35 cycles).
- Employ Hot-Start DNA polymerases to completely eliminate room-temperature non-specific mispriming and primer-dimer formation during reaction setup.
- Primer-dimers appearing as faint <100 bp bands result from high primer concentrations or 3' complementarity; increase annealing temperature or redesign primers with $\Delta G > -5.0\,\text{kcal/mol}$.
Scientific Principle of PCR Troubleshooting
PCR relies on the exponential amplification of a specific DNA sequence through repeated cycles of denaturation, annealing, and extension, catalyzed by a thermostable DNA polymerase. Successful amplification depends on the precise interplay of multiple variables: primer specificity and thermodynamics, template integrity and concentration, buffer composition (particularly Mg²⁺ concentration), thermal cycling parameters, and enzyme activity. When any of these factors falls outside optimal ranges, the reaction fails to produce the expected amplicon or generates artifacts.
The fundamental principle underlying troubleshooting is that PCR failures fall into predictable categories based on the observed gel electrophoresis pattern. Weak bands indicate inefficient amplification, often due to suboptimal annealing, insufficient cycles, or degraded reagents. Missing bands suggest complete reaction failure from primer-template mismatch, polymerase inactivation, or template absence. Nonspecific bands arise from mispriming events, excessive cycle numbers, or suboptimal buffer conditions that permit primer-dimer formation or amplification of unintended targets. Understanding these categories allows targeted optimization rather than random parameter adjustment.
Materials and Instrumentation Considerations
DNA Polymerase Selection
The choice of DNA polymerase significantly influences troubleshooting outcomes. Standard Taq polymerase lacks proofreading activity and is more tolerant of suboptimal conditions but produces higher error rates. High-fidelity polymerases with 3'→5' exonuclease activity require different buffer systems and often have narrower optimal temperature ranges. When troubleshooting, always verify that the polymerase is compatible with the buffer system being used, as mixing components from different manufacturers can cause complete reaction failure. Store polymerases at -20°C in a frost-free freezer and minimize freeze-thaw cycles by aliquoting into single-use volumes.
Thermal Cyclers
Different thermal cycler models vary in ramp rates, temperature uniformity across the block, and calibration accuracy. A cycler that is out of calibration by even 1–2°C can cause systematic amplification failures, particularly for primers with marginal annealing temperatures. Verify cycler calibration annually using a calibrated thermocouple or commercial calibration kit. When troubleshooting across different instruments, note that block temperature may differ from the programmed set point, especially during the first few cycles.
Reagent Quality and Storage
dNTPs degrade through repeated freeze-thaw cycles and exposure to elevated temperatures. Store dNTP stocks at -20°C in small aliquots and discard after 6 months. PCR buffers should be stored at -20°C or 4°C according to manufacturer instructions; precipitation or cloudiness indicates contamination or degradation. Water quality is critical, use only molecular biology grade water (DNase/RNase-free, 0.22 µm filtered) and avoid water that has been stored in open containers or exposed to airborne nucleases.
Template Preparation
Template DNA quality directly affects amplification success. Genomic DNA should have an A260/A280 ratio of 1.8–2.0 and an A260/A230 ratio greater than 2.0. Ratios outside these ranges indicate protein or organic solvent contamination that can inhibit PCR. For plasmid templates, ensure the preparation is free of RNA and genomic DNA contamination. Template concentration should be measured accurately using fluorometric methods (e.g., Qubit) rather than spectrophotometry alone, as degraded DNA or RNA contamination can inflate spectrophotometric readings.
Controls Required for Reliable Troubleshooting
Every troubleshooting PCR run must include three essential controls to distinguish between systematic failures and sample-specific problems.
Positive control: A template known to amplify with the same primer set or a validated control primer pair targeting a housekeeping gene. This control confirms that the PCR master mix, polymerase, and thermal cycler are functioning correctly. If the positive control fails, the problem lies in the reaction components or cycling conditions rather than the test template.
Negative control (no-template control, NTC): Replace template DNA with an equal volume of molecular biology grade water. This control detects contamination of reagents with exogenous DNA or carryover from previous amplifications. Any band in the NTC indicates contamination that must be resolved before proceeding with experimental samples.
Internal amplification control: For diagnostic or quantitative applications, include a second primer pair targeting a conserved endogenous gene (e.g., GAPDH, β-actin, 18S rRNA) in the same reaction. This control verifies that the template is amplifiable and that any failure is specific to the target primer set rather than general template inhibition.
Conceptual Workflow for PCR Troubleshooting
Step 1: Visual Assessment and Pattern Recognition
Examine the gel image systematically. Note the presence or absence of the expected band at the correct molecular weight, the intensity relative to controls and markers, and the presence of additional bands. Document the exact band pattern for each sample and control lane.
Step 2: Rule Out Obvious Causes
Check the thermal cycler program for correct temperatures, times, and cycle numbers. Verify that the correct primer pair was used and that template was added to the correct tubes. Confirm that the polymerase was added and that the enzyme was not heat-inactivated before use (some polymerases require a hot-start activation step).
Step 3: Systematic Parameter Optimization
If obvious causes are ruled out, proceed with systematic optimization. Change only one parameter at a time and include appropriate controls. The most common optimization sequence is:
- Annealing temperature gradient (typically ±5°C around the calculated Tm)
- Mg²⁺ concentration gradient (1.0–4.0 mM in 0.5 mM increments)
- Template concentration series (10-fold dilutions from 1 ng to 100 ng for genomic DNA)
- Primer concentration (0.1–1.0 µM final concentration)
- Cycle number (25–40 cycles)
- Extension time (30 seconds to 2 minutes per kb of expected product)
Step 4: Primer Evaluation
If optimization fails to improve results, evaluate the primers. Check for secondary structure, self-complementarity, and cross-complementarity between forward and reverse primers. Verify that the GC content is between 40–60% and that the 3' ends have at least one GC clamp. Confirm that the primers do not form stable primer-dimers using thermodynamic prediction tools.
Step 5: Template Assessment
If primers appear correct, assess template quality. Run the template on an agarose gel to check for degradation. Test a dilution series to rule out inhibition from excess template or contaminants. If using genomic DNA, verify that the target sequence is present by Southern blot or by using a different primer pair targeting the same region.
Quality Checks During Troubleshooting
Gel Electrophoresis Quality
Poor gel quality can mimic PCR failure. Verify that the agarose concentration is appropriate for the expected amplicon size (1–2% for 100–1000 bp fragments). Ensure the gel is completely solidified before loading, and that the running buffer is fresh and at the correct concentration (1× TAE or TBE). Include a DNA ladder with appropriate size range and sufficient loading dye to visualize migration.
Reagent Integrity Checks
Test each reagent systematically. Prepare a fresh master mix using new aliquots of each component. If the problem resolves, the original reagent was likely degraded or contaminated. For polymerase, test a small aliquot in a control reaction with a validated primer-template pair.
Thermal Cycler Performance
Run a temperature verification using a calibrated thermocouple or commercial verification kit. Check that the heated lid is functioning and applying appropriate pressure. Ensure the block is clean and free of salt deposits or debris that could affect heat transfer.
Result Interpretation
Weak Bands
Weak bands indicate inefficient amplification. The most common causes are suboptimal annealing temperature (too high or too low), insufficient cycle number, degraded reagents, or template inhibition. A weak band in the positive control suggests a general reagent or cycling problem, while a weak band only in test samples points to template-specific issues.
Missing Bands
Complete absence of product indicates a fundamental failure in one or more reaction components. Check the positive control first, if it also fails, the problem is in the master mix, polymerase, or thermal cycler. If the positive control works, the issue is template-specific: degraded template, inhibitors, primer-template mismatch, or absence of the target sequence.
Nonspecific Bands
Additional bands above or below the expected product indicate mispriming events. Extra high molecular weight bands often result from partial extension products or genomic DNA contamination. Low molecular weight bands are typically primer-dimers or truncated amplification products. Multiple bands at regular intervals suggest polymerase slippage on repetitive sequences.
Smears
A smear across the lane indicates extensive nonspecific amplification, often from excessive template, too many cycles, or degraded template. A smear only in the high molecular weight region may indicate genomic DNA contamination in a cDNA template.
Troubleshooting Table
| Observation | Likely Cause | Discriminating Check |
|---|---|---|
| No bands in any lane (including positive control) | Polymerase inactive or omitted | Repeat with fresh polymerase aliquot; verify hot-start activation step |
| No bands in test samples, positive control works | Template degraded or absent | Run template on gel; measure concentration by fluorometry; test dilution series |
| Weak bands in all lanes | Suboptimal annealing temperature | Run gradient PCR ±5°C around calculated Tm |
| Weak bands only in some samples | Template inhibition or degradation | Purify template; test 1:10 and 1:100 dilutions |
| Multiple bands including expected product | Annealing temperature too low | Increase annealing temperature in 2°C increments |
| Multiple bands, no expected product | Primer-dimer or mispriming | Redesign primers; reduce primer concentration; increase annealing temperature |
| Smear across lane | Excessive template or cycles | Reduce template 10-fold; reduce cycle number by 5–10 |
| Bands at wrong size | Incorrect primer pair or template | Verify primer sequences; check template identity |
| Faint bands only in negative control | Reagent contamination | Replace all reagents; use fresh water; clean pipettes and work area |
| Bands present but inconsistent between replicates | Pipetting error or thermal cycler variation | Prepare master mix; verify pipette calibration; use same cycler position |
Limitations of PCR Troubleshooting
PCR troubleshooting has inherent limitations that must be recognized. Not all PCR failures can be resolved through parameter optimization alone. Some DNA sequences are inherently difficult to amplify due to high GC content (>70%), extensive secondary structure, or long homopolymer tracts. In such cases, specialized polymerases with GC-rich buffer systems or additives such as DMSO, betaine, or formamide may be required.
The troubleshooting process assumes that the target sequence is present in the template. If the gene is absent, deleted, or rearranged, no amount of optimization will produce amplification. Southern blot or sequencing confirmation may be necessary to verify template content.
PCR troubleshooting cannot compensate for fundamentally flawed primer design. Primers with extensive secondary structure, high self-complementarity, or significant mismatch to the target will not produce reliable amplification regardless of optimization. In such cases, primer redesign is the only solution.
The troubleshooting approach described here applies to conventional endpoint PCR only. Quantitative PCR (qPCR) and reverse transcription PCR (RT-PCR) have additional variables (probe design, reverse transcriptase efficiency, fluorescence normalization) that require separate troubleshooting protocols.
Documentation Requirements
Maintain detailed records of all troubleshooting experiments to avoid repeating failed conditions and to build a knowledge base for future work. For each PCR troubleshooting run, document:
- Date, experimenter, and sample identifiers
- Thermal cycler model and program parameters (including ramp rates)
- Master mix composition with lot numbers and expiration dates for all reagents
- Template source, preparation method, and concentration
- Primer sequences, calculated Tm, and source
- Gel electrophoresis conditions (agarose percentage, buffer, voltage, run time)
- Gel image with labeled lanes and molecular weight markers
- Observations and interpretation for each sample and control
- Parameters changed from previous run and rationale
- Outcome and next steps
Use a standardized template or laboratory notebook format to ensure consistency. Digital documentation with searchable metadata facilitates pattern recognition across multiple troubleshooting sessions.
Biosafety Considerations
PCR troubleshooting under BSL-1 conditions requires standard microbiological practices as outlined in the BMBL [<a href="#ref-1">1</a>]. While PCR itself does not involve viable organisms, template preparation from biological samples may introduce biological hazards. All work with human-derived samples should follow institutional biosafety committee guidelines and the NIH Guidelines for Research Involving Recombinant or Synthetic Nucleic Acid Molecules [<a href="#ref-2">2</a>].
Key biosafety practices for PCR troubleshooting include:
- Use dedicated pipettes and filter tips for PCR setup to prevent cross-contamination
- Perform PCR setup in a clean area separate from DNA extraction and post-PCR analysis
- Decontaminate work surfaces with 10% bleach or commercial DNA removal solutions before and after each session
- Dispose of PCR tubes and tips in appropriate biohazard waste containers
- Never use PCR products as templates for subsequent reactions without proper purification and quantification
- Follow institutional guidelines for recombinant DNA work if amplifying synthetic constructs or modified sequences
The NIH Guidelines [<a href="#ref-2">2</a>] provide the framework for risk assessment and containment of recombinant nucleic acid work. Most routine PCR troubleshooting falls under exempt or minimal risk categories, but investigators must verify their specific protocols comply with institutional policies.
Frequently Asked Questions
Q1: How do I distinguish between primer-dimer and a specific small amplicon on a gel? Primer-dimers typically appear as diffuse, low molecular weight bands (usually <100 bp) that are present in the no-template control as well as sample lanes. Specific amplicons, even small ones, produce sharper bands that are absent from the no-template control. To confirm, run the no-template control alongside samples, if the band appears in the NTC, it is almost certainly primer-dimer. Additionally, primer-dimers often show a characteristic "smiley" pattern across the gel due to differential migration in edge lanes.
Q2: Why does my PCR work with purified DNA but fail with crude lysates? Crude lysates contain numerous PCR inhibitors including proteins, polysaccharides, heme compounds, and organic solvents used in extraction. These inhibitors can chelate Mg²⁺, denature the polymerase, or interfere with primer annealing. The solution is to dilute the crude lysate (typically 1:10 to 1:100) to reduce inhibitor concentration below inhibitory thresholds, or to purify the DNA using column-based methods that remove inhibitors. Always test a dilution series when working with crude templates.
Q3: Can I reuse PCR primers that have been stored for years? Primer stability depends on storage conditions. Lyophilized primers stored desiccated at -20°C can remain stable for years, but resuspended primers degrade over time through freeze-thaw cycles, nuclease contamination, and oxidation. If using old primers, first check for degradation by running them on a high-percentage agarose gel or polyacrylamide gel, degraded primers appear as smears rather than discrete bands. For critical troubleshooting, always use freshly resuspended primers from a trusted source.
Q4: How many cycles should I use when troubleshooting weak bands? Start with 35 cycles for most genomic DNA targets. If bands are weak, increase to 40 cycles, but be aware that excessive cycling (beyond 40) increases nonspecific amplification without proportionally increasing specific product. For plasmid templates, 25–30 cycles are usually sufficient. The optimal cycle number balances yield against specificity, too few cycles gives weak bands, too many gives smears and artifacts. A cycle titration (25, 30, 35, 40 cycles) can quickly identify the optimal number for your specific reaction.
Related Clinical & Scientific Guides
- Loop-Mediated Isothermal Amplification (LAMP) Assay for Rapid Detection of African Swine Fever Virus in Oral Fluids
- How to Calculate the Concentration of Protein Using the Lowry Assay
- DNA Extraction from Saliva: Non-Invasive Sampling and Protocols
- PCR Troubleshooting: No Amplification or Weak Bands
References and Further Reading
[1] [Biosafety in Microbiological and Biomedical Laboratories (BMBL), 6th Edition](https://www.cdc.gov/labs/bmbl/index.html), Authoritative principles for risk assessment, containment, decontamination, and microbiological laboratory practice. [2] [NIH Guidelines for Research Involving Recombinant or Synthetic Nucleic Acid Molecules](https://osp.od.nih.gov/policies/biosafety-and-biosecurity-policy/nih-guidelines-for-research-involving-recombinant-or-synthetic-nucleic-acid-molecules/), Institutional and biosafety framework for recombinant and synthetic nucleic acid research.Related Articles
- RT-PCR Troubleshooting: No Amplification or Multiple Bands
- Ethanol Precipitation of DNA: Protocol and Troubleshooting
- Restriction Enzyme Digestion: Protocol and Troubleshooting
- RNA Extraction from Plant Tissues: Methods and Troubleshooting
- PCR Primer Design: Rules, Tools, and Validation
- Agarose Gel Electrophoresis for DNA Analysis: Protocol and Troubleshooting