Aerosol Containment in Microbiology
By Dr. Zubair Khalid, DVM, MS, PhD ·
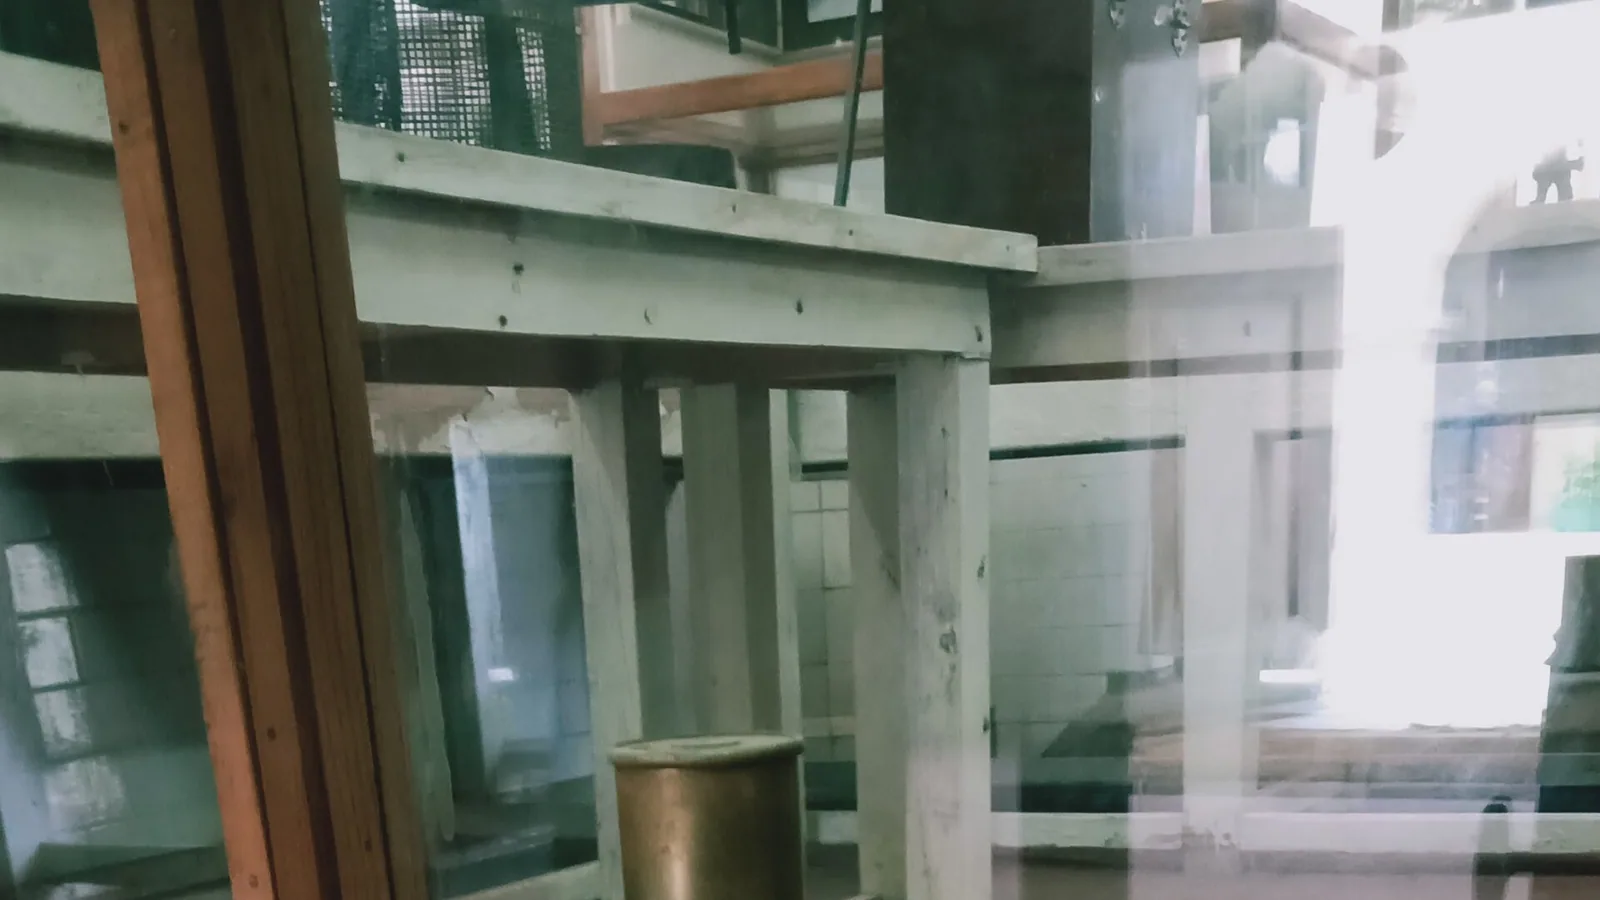
Aerosol containment in microbiology means capturing infectious particles at the moment they are generated, and the one-sentence difference between the main options is this: primary containment encloses the work inside a cabinet or isolator, local containment captures aerosols at the point of release with barriers or suction, and room-level controls clean the air after it escapes. The rule of thumb for choosing between them is simple. Enclose the source whenever the task allows it, evacuate or shield the source when enclosure is impossible, and treat room air purification as an adjunct that never replaces the first two. Every serious infection control program layers these approaches, because each one fails in a different way.
This article walks through the full range of aerosol containment microbiology techniques, gives the quantitative evidence behind each, explains the trade-offs that decide real purchasing and workflow choices, and shows how a structured biosafety risk assessment ties the whole system together.
Where the Aerosol Hazard Comes From in a Microbiology Lab
An aerosol is a suspension of particles small enough to remain airborne and travel with room air currents. Particles below roughly 5 micrometers in diameter stay suspended long enough to be inhaled into the lung's gas-exchange region, which is why aerosol-generating events carry a different risk profile than splashes and droplets, which settle quickly.
The most instructive data on laboratory aerosols come from controlled simulations of real accidents. Investigators devised a series of laboratory accident scenarios, measured the microbial aerosol each one generated with a range of air samplers, and calculated a spray factor, an index describing the fraction of the starting microbial load that becomes airborne [1]. The scenarios that produced the highest aerosol concentrations were dropping a fungal culture plate, dropping a large liquid bottle, leaks from a centrifuge rotor, and a blocked syringe filter [1]. Two findings from that work should shape every containment decision in a diagnostic laboratory.
First, many of these accidents generated low particle size aerosols, the fraction that penetrates deep into the lungs of anyone nearby [1]. A dropped plate does not just splatter the floor. It creates an invisible cloud that lingers in the breathing zone.
Second, the aerosol outcome of an accident is predictable enough to model. The spray factor data allowed the authors to build model risk assessments that a microbiological safety officer can use to quantify exposure and to design both containment laboratories and spill response procedures [1]. That quantitative approach is the foundation of any defensible biosafety risk assessment, and it is developed in detail later in this article.
Routine procedures also generate aerosols, not just accidents. Pipetting, vortexing, decanting, flaming loops, sonication, centrifugation, and, outside the traditional lab, bone sawing in the autopsy suite and drilling or biopsy in procedural settings all release particles. The containment strategy has to match the procedure, the volume of material, and the agent's route of infection.
Aerosol Containment Micrology Techniques at a Glance
The table below is the core of this article. It lays out the main aerosol containment microbiology techniques options side by side, using the criteria that actually decide which one a laboratory adopts. Each option is then explained on its own terms, with its pros and cons.
| Technique | What it protects against | Where it works best | Main strength | Main weakness | Verification |
|---|---|---|---|---|---|
| Class II biosafety cabinet | Aerosols from open manipulation of cultures and specimens | Routine bench work with moderate-risk agents | Proven inward airflow and HEPA-filtered exhaust | Work practices can defeat airflow, dexterity penalty | Annual certification, airflow alarms |
| Class III cabinet and flexible film isolator | High-hazard agents needing total enclosure | BSL-3 and higher work, high-consequence agents | Complete physical separation of hands and sample | Large dexterity penalty, sharps risk, slow workflow | Leak testing, pressure gauges |
| Full-body barrier chamber (for example, a low-cost infection containment chamber) | Aerosols from aerosol-generating procedures such as bone sawing | Autopsy and field settings without negative-pressure suites | Cuts aerosol levels by roughly 86 to 88 percent, inexpensive, fast to assemble | Single-use or limited reuse, restricted access to the work | Dye visualization plus particle counting |
| Procedure box or drape barrier (aerosol box, glove box, slit box, drape tent) | Droplets and some aerosols around a defined procedure | Short procedures at a fixed site, intubation analogs | Cheap, transparent, immediate deployment | Only closed and semiclosed designs cut aerosol counts, leaks at arm holes and edges | Smoke or vapor visualization |
| Local suction and aerosol evacuation devices | Aerosols at the point of generation where enclosure fails | Cell sorters, procedural sites, spill capture | Reduces airborne residence time measurably | Performance varies widely with capture geometry | Bead-based functional challenge tests |
| Room air purification (HEPA filtration or electrostatic precipitation) | Residual aerosol that escapes source controls | Whole-room adjunct in hospitals and labs | 97 to 99 percent viral load reduction within one hour in tested systems | Adjunct only, cannot replace source containment | Clean air delivery rate testing |
| Respiratory protection (PAPR, respirators) | Inhalation by the worker when source controls are incomplete | Sharps-heavy tasks inside containment, incident response | Protects the person regardless of source behavior | Least effective layer, does not protect the sample or environment | Fit testing and seal checks where applicable |
Primary Containment: Safety Cabinets and Isolators
Primary containment means the barrier sits between the material and the worker. In a microbiology laboratory this category covers the biosafety cabinet family and the true isolators.
Class II Biosafety Cabinets
A Class II cabinet draws room air inward across the open work face, filters the supply air with a HEPA filter (high-efficiency particulate air filter), and exhausts HEPA-filtered air, so both the product and the operator are protected. For most BSL-2 bacteriology, mycology, and virology work, a correctly used Class II cabinet is the default containment tool, and it is one of the three containment formats tested in the dexterity work described below [2].
The cabinet's protection depends entirely on airflow that the user can destroy. Working with the sash too high, rapid arm movement in and out of the face, crowded work surfaces, and using the cabinet as a Bunsen burner enclosure all create escape routes for aerosols. Training, covered later, is what keeps the engineering intact.
Class III Cabinets, Half Suits, and Flexible Film Isolators
When the agent demands total separation, laboratories move to barrier containment: gas-tight Class III cabinets operated through glove ports, half suits that enclose the upper body of the operator, and flexible film isolators that put the entire work area inside a plastic envelope. These are the highest-grade options among aerosol containment microbiology techniques, and they are the correct answer for high-consequence pathogens.
Their cost is measured in hands. A controlled study using three manual dexterity tests compared bare hands against latex gloves, a positive pressure respirator, and three forms of containment equipment, a Class II safety cabinet, a half suit, and a flexible film isolator, in ten subjects, and then extended the comparison to Class III cabinets with twenty subjects [2]. With the exception of latex gloves, every piece of personal and containment equipment produced a statistically significant reduction in manual dexterity compared with bare hands [2]. Barrier systems such as Class III cabinets and isolators had the largest effect, and the authors concluded that this loss of dexterity may increase the chance of accidents, particularly when sharps are involved [2].
That conclusion has direct practical consequences. When a task requires needles, scalpels, or glass Pasteur pipettes, the degraded proprioception inside a half suit or isolator changes the risk calculation. The study found that the perception among microbiologists, that containment equipment reduces dexterity to the point where sharps risks rise, is measurable and real, and that where sharps are essential, respiratory protection combined with double gloves affects dexterity less than barrier containment [2]. This is one of the clearest examples of pros and cons in the entire field: the strongest containment is also the most accident-prone for fine motor work, so the best aerosol containment microbiology techniques are chosen per task, not per laboratory.
Physical Barrier Chambers and Enclosures
Barrier chambers sit between the primary enclosure and the room. They are typically transparent plastic enclosures built around a specific procedure, and they range from a simple drape to a sealed glove box. Their popularity surged during the COVID-19 pandemic, and the evidence base that emerged is directly relevant to laboratory microbiology.
What the Barrier Device Evidence Shows
A landmark evaluation tested aerosol retention across a spectrum of barrier designs: a glove box sealed with gloves and a caudal drape (a closed device), a drape tent over a frame, a slit box with armholes covered by vinyl slit diaphragms (semiclosed), the original aerosol box, a collapsible interlocking box, and a simple drape over the patient, with no barrier as the control [3]. The investigators used two complementary methods. They instilled vapor at a manikin's arm and evaluated containment visually with video assistance, and they ejected submicrometer ammonium sulfate aerosol particles through the manikin's mouth during mechanical ventilation and simulated coughs, sampling inside and around each barrier with a particle counter and a mass spectrometer [3].
The results drew a hard line between designs. Vapor experiments demonstrated leakage through arm holes and barrier edges [3]. Only the closed and semiclosed devices and the aerosol box reduced aerosol particle counts outside the barrier [3]. In other words, a barrier with an unsealed opening performs closer to no barrier than to containment, because the aerosol finds the path of least resistance, which is usually the hole made for the operator's arms.
The same study measured evacuation, testing standard hospital suction, a surgical smoke evacuator, and a shop vacuum for removing aerosol from inside the devices [3]. This pairing of a barrier with active evacuation is the design principle behind several of the tools below.
For laboratory planning, the practical rule from this work is that barrier effectiveness is binary in a way intuition often misses. Sealed glove ports work. Slit diaphragms work partially. An open-framed box or a loose drape gives the operator psychological protection and little else [3].
Full-Body Containment Chambers for High-Risk Procedures
At the largest scale, a full-length, transparent, impermeable containment chamber can enclose an entire aerosol-generating procedure. The clearest published example is the Low-Cost Infection Containment Chamber (LCICC), developed for high-risk autopsies in settings without negative-pressure autopsy suites [4]. Autopsy personnel face substantial exposure during bone sawing, and the COVID-19 pandemic underlined how dangerous those aerosols are.
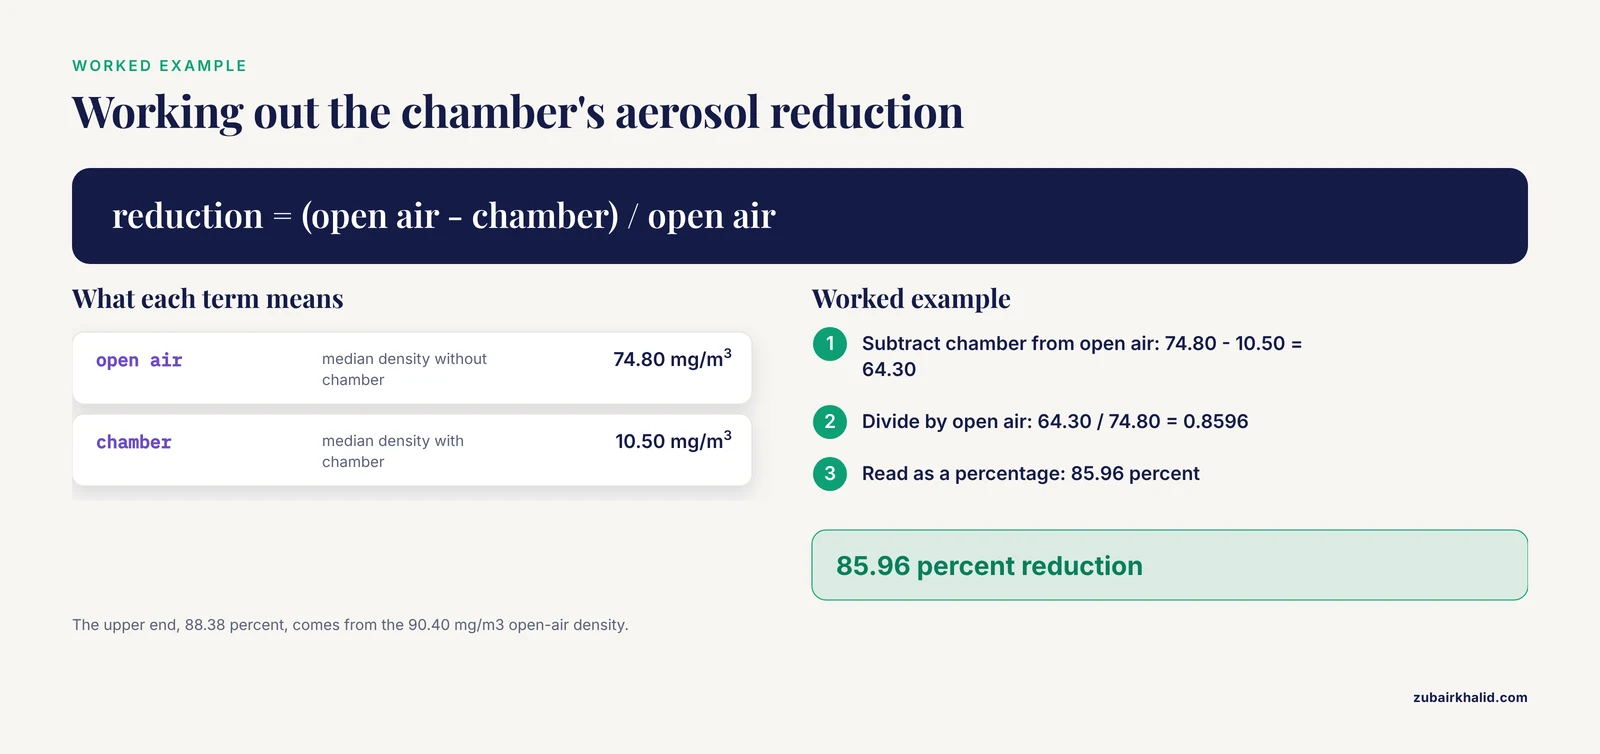
The evaluation used goat skulls to simulate aerosol generation during sawing. Aerosol densities were measured under open-air conditions and with the chamber in place, with fluorescein dye for visualization and a particle counter for quantification, and statistical analysis confirmed the chamber's effectiveness [4]. The numbers were striking. The LCICC reduced aerosol levels by 85.96 to 88.38 percent across all particle sizes tested, and median aerosol densities were consistently 10.50 mg/m³ with the chamber compared with 74.80 to 90.40 mg/m³ in open air [4]. The authors highlighted the chamber's affordability, ease of assembly, and reliable performance, positioning it as a tool for protecting healthcare workers in low-resource settings where a permanent negative-pressure suite is out of reach [4].
Disposable Procedure-Specific Chambers
The same containment principle scales down to single procedures. A disposable, customized aerosol containment chamber was described for oral cancer biopsy as a novel technique during the COVID-19 pandemic [5]. The design logic transfers directly to laboratory and point-of-care settings: a single-use transparent enclosure tailored to the procedure, discarded with the waste afterward so that decontamination of a reusable structure is never needed. The trade-off against a reusable chamber is waste volume and per-use supply cost, and the trade-off in the other direction is that a contaminated enclosure never has to be cleaned.
Pros and Cons of Barrier Chambers
The advantages are speed and cost. A barrier chamber deploys in minutes, needs no ductwork, no certification contract, and no building modification, which is exactly why the LCICC was designed for resource-limited settings [4] and why disposable chambers appeared during the pandemic surge [5]. The disadvantages are the leak paths documented in the barrier device study, arm holes and edges, and the restricted access that complicates long procedures [3]. A chamber that has to be opened mid-procedure releases what it was holding, so the procedure must either fit inside the enclosure or the enclosure must be equipped with sealed glove access.
Local Aerosol Evacuation and Suction Devices
When the aerosol source cannot be enclosed, the next best option is to remove the aerosol the instant it forms, at the source, with directed suction. This category includes both improvised setups and purpose-built systems.
A purpose-built low-cost suction device was evaluated against simulated coughs using an artificial cough generator, a particle counter, and a mannequin in an isolated system [6]. Droplet removal rates were measured for single and repeated cough events, with sampling at four distinct areas to separate direct plume capture from indirect particle removal [6]. The device reduced airborne transmission risk in two measurable ways. It cut the half-life of aerosol volume from 23.6 minutes to 15.6 minutes, meaning the airborne burden decayed substantially faster with capture running, and at 22 minutes after the peak droplet count the total count had fallen 24 percent without the device versus 43 percent with it [6]. The authors designed the device to be inexpensive, easy to manufacture, and adaptable to diverse environments, which is the same design brief that drove the containment chambers above [6].
In the barrier device study, evacuation was tested explicitly, with standard hospital suction, a surgical smoke evacuator, and a shop vacuum used to clear aerosol from inside barrier enclosures [3]. The lesson is that barrier plus suction is a stronger configuration than either alone, because the barrier catches the initial plume and the suction removes what accumulates inside the enclosure.
Aerosol Evacuation on Cell Sorters
The highest-risk aerosol scenario in a modern diagnostic laboratory is flow cytometric cell sorting of potentially infectious samples. During an instrument failure that deviates the stream, such as a partial nozzle obstruction, high concentrations of aerosols can be generated within the sort collection area [7]. Complete containment then becomes essential, and it is achieved through continuous negative airflow within the sort collection area using an aerosol evacuation system, often enhanced by placing the sorter inside a biosafety cabinet [7].
The critical difference between this system and a biosafety cabinet is oversight. Unlike biosafety cabinets, many aerosol evacuation systems are not certified or tested on a regular basis after installation [7]. That gap makes user verification mandatory, and the verification protocol is described below in its own section because it is a model for how every local containment device should be treated [7].
Room-Level Controls: Air Purification and Ventilation
Room-level controls are the outer layer of containment. They do not stop the aerosol from reaching the room, they clean the room air afterward, so their role is adjunctive by definition.
A rigorous test methodology was developed to demonstrate whether air purification systems reduce virus-loaded aerosol in indoor air. A containment room equipped with a HEPA filter on both air intake and exhaust was connected via an inlet to a BSL-2 facility, and Feline Coronavirus (FCoV)-loaded aerosols were released into the room from the BSL-2 side [8]. After nebulization, air sampling determined the viral load in air, and the clean air delivery rate of each purification system was assessed. The infectivity of captured virus was also examined [8].
The results support room purification as a real, quantifiable layer. The air purification systems achieved a 97 to 99 percent reduction in viral load in air within one hour [8]. Captured infectious FCoV was reduced by 99.9 to 99.99 percent by electrostatic precipitation (ESP) technology, and the ESP purifiers inactivated the captured virus, so HEPA filtration removes aerosolized virus while ESP both removes and inactivates it [8]. The authors concluded that these systems can be used as an adjunctive infection control measure [8], and that word, adjunctive, is the correct placement. A purifier cannot substitute for a cabinet, a chamber, or an evacuation system, because it acts on air that has already escaped the source.
Respiratory Protection as the Final Layer
Respiratory protection, including powered air-purifying respirators (PAPRs), protects the worker when source controls are absent, failed, or incomplete. In the dexterity study, the positive pressure respirator with double gloves impaired manual dexterity significantly less than barrier containment systems did, though more than bare hands [2]. That relative preservation of fine motor control explains the common practice of favoring respiratory protection for tasks where sharps are essential and barrier containment would raise the accident rate [2]. Respiratory protection has two structural weaknesses as a containment strategy. It protects only the wearer, leaving the sample, the room, and colleagues exposed, and its performance depends on fit, maintenance, and user behavior, all of which degrade without training and oversight.
How to Choose Among the Options
Selecting among aerosol containment microbiology techniques comes down to five questions, applied in order.
- Can the work be fully enclosed? If yes, and the agent's risk group justifies it, barrier containment (Class III cabinet, isolator, or half suit) is the ceiling of protection. Accept the dexterity cost and design sharps handling around it [2].
- If not fully enclosed, can the work be done in a ventilated primary barrier? For most BSL-2 diagnostic work the Class II cabinet is the answer, provided work practices preserve the airflow.
- Is the aerosol source fixed and local? A cell sorter with an aerosol evacuation system [7], a sawing station inside a containment chamber [4], or a procedure inside a sealed barrier with suction [3] all follow the same logic: capture at the source.
- Is the source mobile or the enclosure impossible? Local suction devices measurably shorten aerosol residence time and are the most portable option [6].
- What happens when containment fails or leaks? Room air purification cuts the residual viral load, and the best-performing systems inactivate captured virus as well as removing it [8]. Respiratory protection covers the individual worker during failures and spills [2].
The best aerosol containment microbiology techniques are layered combinations, not single purchases. A typical modern arrangement is a Class II cabinet for routine culture manipulation, a verified aerosol evacuation system for sorting, a barrier chamber for oversized or field-based aerosol-generating procedures, and HEPA or ESP purification for the room, with respiratory protection issued for spill response.
Verifying That Containment Actually Works
Containment hardware without verification is a promise, not a control. Three published verification approaches cover the main categories, and all three share a principle: challenge the system with a known aerosol and look for it where nobody wants to find it.
Cell sorter aerosol evacuation systems. Because these systems are often not certified or regularly tested after installation, the user must verify proper function before running potentially infectious samples [7]. The published protocol generates aerosols that simulate a partial nozzle obstruction by running 1-micrometer fluorescent beads, then collects air samples just outside the sort collection area with a disposable impactor-style aerosol sampler cassette. The samples are examined for the presence of beads, and bead detection outside the containment zone means the system is not protecting the operator [7]. This test should be repeated after any instrument service, filter change, or airflow alarm, and on a fixed schedule.
Barrier devices. The barrier study used two challenge methods, vapor instillation with video-assisted visual evaluation and submicrometer ammonium sulfate aerosol quantified by particle counter and mass spectrometer [3]. A laboratory can adopt the qualitative version cheaply: introduce theatrical smoke or a visible vapor inside the barrier and watch where it escapes. Arm holes and edges will betray an imperfect seal immediately [3]. This smoke test belongs in commissioning any new procedure box, slit box, or glove box, and after any repair.
Containment chambers. The LCICC evaluation used fluorescein dye for visualization and particle counting for quantification, comparing chambered and open-air conditions [4]. The same visualization approach, fluorescent dye under UV illumination, maps contamination spread after a simulated spill inside any enclosure, revealing which surfaces and which escape routes were involved.
Room air purification. The air purification methodology itself is a template: release a defined viral aerosol, sample the room air over time, and calculate the clean air delivery rate [8]. Laboratories commissioning purifiers should demand performance data in that form rather than airflow specifications alone.
Biosafety Risk Assessment: Quantifying the Hazard Before Buying Hardware
A biosafety risk assessment is the structured process of identifying what agents are handled, what procedures release them, what goes wrong in practice, and what controls reduce the resulting exposure. The accident-simulation work described earlier turns this from a checklist exercise into a quantitative one [1].
The methodology works like this. Each accident scenario, a dropped fungal plate, a dropped large bottle, a leaking centrifuge rotor, a blocked syringe filter, is reproduced under controlled conditions while microbial air samplers measure the aerosol produced. From those measurements a spray factor is calculated for each scenario, expressing the aerosol-generating potential of that accident as a single index [1]. Those spray factors then feed model risk assessments, giving the microbiological safety officer data to support the design of containment laboratories and the response to laboratory accidents [1].
The practical payoff for a diagnostic laboratory is that risk assessment stops being argumentative. Instead of debating whether a centrifuge leak matters, the laboratory can weigh the measured aerosol output of that scenario against the containment options above and document the decision. Two accident classes deserve particular attention because they topped the measurements: dropped fungal plates, which matter because spore-forming molds aerosolize catastrophically, and centrifuge rotor leaks, which matter because the rotor's rotation actively disperses the release across a wide particle size range [1]. Both findings argue for opening centrifuges and dropped-plate incidents inside a biosafety cabinet or with local suction running, and for treating fungal culture handling as a containment-driven workflow from the first subculture onward.
Risk assessment also dictates the tier of containment. An agent with demonstrated aerosol infectivity, such as Rift Valley fever virus, which infects via the aerosol route and whose study models must be run in high containment biosafety level laboratories, drives enclosure-based controls that a low-risk bacterium would not [9]. Matching the containment tier to the agent's aerosol infectivity is the first step of any biosafety risk assessment.
Microbiology Biosafety Training: The Layer That Makes Hardware Work
Every device above fails silently when used badly. A Class II cabinet with a blocked front grill, a barrier chamber opened mid-procedure, an evacuation system with a dislodged hose, all look operational while releasing aerosol. Microbiology biosafety training is what keeps the hardware honest, and it should cover four competencies.
Work practice inside primary containment. Slow arm movement, minimal obstructions across the cabinet grille, correct sash height, and no open flames. These behaviors preserve the inward airflow that the certification test measured.
Aerosol-generating procedure awareness. Staff should be able to name the procedures in their own workflow that create aerosols, from vortexing to cell sorting, and know the designated containment for each. The accident scenarios that generated the highest aerosol concentrations, dropped plates and bottles, rotor leaks, and blocked syringe filters, should be rehearsed physically, with spill response practiced until it is automatic [1].
Verification competency. Staff who run hazardous samples on a sorter must know how to execute the bead-based aerosol evacuation verification before each infectious run and interpret the sampler results [7]. Staff who use barrier enclosures should be able to run a smoke test and recognize leakage at arm holes and edges [3].
Risk assessment literacy. Senior technologists and safety officers should be able to build a spray-factor-informed risk assessment for a new procedure or agent, following the published model framework [1], rather than defaulting to habit or hierarchy alone.
Training works best when it is hands-on and scenario-based. Reading about containment does not prepare anyone for the dexterity penalty of a half suit, which is only discoverable with gloved hands on a task [2]. Competency checks should include a practical component in the actual containment equipment the staff member will use.
Worked Scenarios
Scenario 1: A technician drops an open fungal culture plate on an open bench. This is one of the highest-aerosol accident scenarios ever measured in a laboratory, and it produces small particles that reach the deep lung [1]. Correct response: leave the room, allow aerosol settling, and re-enter to do the cleanup inside a biosafety cabinet or with respiratory protection and local suction running. Prevention: process mold cultures inside a Class II cabinet from the first inoculation, and consider isolator-level containment for cultures of known high-risk molds. The spray factor framework lets the safety officer document why this protocol exists [1].
Scenario 2: A cytometry unit sorts a potentially infectious cell suspension. Before the run, the operator executes the aerosol evacuation verification: 1-micrometer fluorescent beads are run while aerosols are generated to simulate a partial nozzle obstruction, a disposable impactor-style cassette samples air just outside the sort collection area, and the filter is examined for beads [7]. No beads, the run proceeds. Beads found, the system is repaired and retested before any infectious sample is loaded. During the sort, the operator watches for stream deviation, the failure mode that turns the sort collection area into an aerosol generator [7].
Scenario 3: A high-risk autopsy requires bone sawing in a facility without a negative-pressure suite. A full-length transparent containment chamber is assembled over the work area. Validation data for this configuration showed median aerosol densities of 10.50 mg/m³ inside the chambered procedure compared with 74.80 to 90.40 mg/m³ open air, an 85.96 to 88.38 percent reduction across particle sizes [4]. Fluorescein visualization during setup confirms the seal. The chamber's ease of assembly matters here because it deploys per-case rather than as fixed infrastructure [4].
Scenario 4: A short bedside or field procedure cannot be moved to a cabinet. A sealed glove box or a slit box with vinyl diaphragms is deployed, following the barrier hierarchy in which only closed and semiclosed designs reduced aerosol counts outside the device [3]. A smoke test before the first patient or specimen confirms that vapor does not escape at the arm holes and edges [3]. A single-use disposable variant is appropriate when the enclosure would be contaminated and decontamination is impractical. Suction is added inside the barrier to clear accumulated aerosol, using the barrier-plus-evacuation configuration validated in the barrier study [3].
Common Mistakes and Limitations
Trusting open barriers. The most common error with procedure boxes and drapes is assuming that a physical presence between operator and source equals containment. Only closed and semiclosed devices and the aerosol box reduced aerosol particle counts in controlled testing. Simple drapes and open frames did not [3]. If the design has an unsealed arm port, it is decoration.
Never re-testing evacuation systems. Aerosol evacuation systems on cell sorters are frequently not certified or tested after installation, unlike biosafety cabinets, so the operator inherits a device whose function is unknown [7]. Running infectious samples on an unverified sorter is the single sharpest gap in current practice.
Ignoring the dexterity penalty. Choosing barrier containment without testing whether staff can actually perform the task inside it creates a paradox: the safest enclosure raises accident risk with sharps [2]. Pilot the task in the containment equipment, with the intended gloves, before committing the workflow.
Treating room purifiers as primary containment. HEPA and ESP purifiers reduced viral aerosol load by 97 to 99 percent within an hour in the tested room, and ESP inactivated captured virus [8], but they act on escaped aerosol. No purifier rescues a procedure performed on an open bench.
Confusing droplet protection with aerosol protection. A splash barrier stops droplets. Submicrometer aerosols follow air currents and leak through every opening, as the vapor experiments demonstrated at arm holes and edges [3]. Containment claims must specify particle size.
Skipping the pre-task risk assessment. New procedures get introduced with whatever containment is already in the room. The spray factor methodology exists precisely so that the aerosol potential of a new procedure or accident scenario can be estimated before the first sample is opened [1].
Assuming containment equals sterility. Most of the devices above protect the worker, not the sample. Open-front containment designs and simple barriers offer no product protection, so contamination control and aerosol containment are separate specifications.
Limitations of the evidence base. The strongest quantitative data come from simulation models, goat skulls for sawing [4], manikins with ammonium sulfate aerosol [3], artificial cough generators [6], nebulized feline coronavirus in a test room [8], and bead aerosols at sorters [7]. Simulations measure the hardware, not the full complexity of clinical and laboratory work, and field performance can differ. Individual agent selection, procedure design, and containment decisions need the judgment of a qualified biosafety professional or veterinary or medical officer familiar with the specific setting.
Frequently Asked Questions
What is aerosol containment in microbiology?
It is the set of engineering controls, barriers, and work practices used to capture infectious particles at the moment they become airborne, so laboratory staff do not inhale them. The main categories are primary containment such as biosafety cabinets and isolators, local barriers and suction at the source, and room-level air purification as an adjunct.
Which aerosol containment microbiology techniques provide the best protection?
Fully sealed barrier containment, meaning Class III cabinets, half suits, and flexible film isolators, provides the strongest protection because the worker never has open access to the material. The trade-off is a significant loss of manual dexterity, which can increase accident risk during sharps work, so the best choice depends on the specific task, not on containment strength alone.
Do aerosol boxes and drape barriers actually stop aerosols?
Only designs that are closed or semiclosed, such as sealed glove boxes and slit boxes with vinyl diaphragms, measurably reduced aerosol particle counts outside the barrier. Simple drapes and open-framed boxes did not perform better than no barrier, and leakage occurred at arm holes and edges in every imperfectly sealed design.
How can I verify that an aerosol evacuation system on a cell sorter is working?
Run a functional challenge with 1-micrometer fluorescent beads while generating aerosols that simulate a partial nozzle obstruction, then sample the air just outside the sort collection area with a disposable impactor-style cassette and examine it for beads. Beads found outside the containment area mean the system is failing and hazardous samples must not be run until it is repaired and retested.
Why do laboratory accidents like dropped culture plates matter so much for aerosol exposure?
Controlled simulations show that dropping a fungal plate, dropping a large bottle, a centrifuge rotor leak, and a blocked syringe filter generate the highest microbial aerosol concentrations of the tested accident scenarios, and much of that aerosol is in the small particle range that reaches the deep lung. Quantitative spray factor data from these simulations let safety officers build defensible risk assessments and spill protocols.
Do air purifiers replace biosafety cabinets or containment chambers?
No. Air purification systems reduced viral aerosol load in room air by 97 to 99 percent within one hour in controlled testing, and electrostatic precipitation systems also inactivated captured virus, but they clean air that has already escaped the source. They are an adjunctive layer that supports, and never replaces, source containment.
Sources
- Microbial aerosol generation during laboratory accidents and subsequent risk assessment.
- The effect of microbiological containment systems on dexterity.
- Aerosol Retention Characteristics of Barrier Devices.
- Evaluating the effectiveness of a novel cost-effective aerosol containment chamber for high-risk autopsies: a pilot study.
- Disposable customized aerosol containment chamber for oral cancer biopsy: A novel technique during COVID-19 pandemic.
- Effectiveness of a suction device for containment of pathogenic aerosols and droplets.
- Verifying Proper Function of the Aerosol Evacuation System Prior to Sorting Potentially Infectious Samples.
- Establishment and application of test methodology demonstrating the functionality of air purification systems in reducing virus-loaded aerosol in indoor air.
- Pathogenesis of Rift Valley Fever Virus Aerosol Infection in STAT2 Knockout Hamsters.