How to Convert a Conda Environment to Docker
By Dr. Zubair Khalid, DVM, MS, PhD ·

By the end of this guide you will be able to take a working conda environment, export it to a definition file, bake it into a Docker image, run that image as a container, verify that the tools inside behave exactly as they do on your host, and share the image through a registry or as a single tarball. You will also see how to hand the finished image to a bioinformatics workflow manager such as Nextflow, Snakemake, or CWL.
This guide walks through how to convert a conda environment to Docker step by step, then covers tips for smaller images, the mistakes that produce most build failures, and the checks that confirm the conversion worked.
You need four things on hand:
- Docker. Docker Desktop on macOS or Windows, Docker Engine on Linux.
- A conda-family installer on the machine where you built the environment: Miniconda, Miniforge, mamba, or micromamba.
- The environment itself, either still installed or already exported to an
environment.ymlfile. - A few gigabytes of free disk space and a network connection for the first build. A Docker Hub account only if you plan to push the image.
The payoff is portability. Container virtualization technologies such as Docker are popular in bioinformatics because they improve the portability and reproducibility of software deployment [1]. A conda environment on your laptop depends on your operating system, your CPU architecture, and the state of the package channels at the moment you solved it. A Docker image wraps the operating system libraries, the conda installation, and the solved environment into one artifact that runs unchanged on a server, in continuous integration, or on a cloud instance.
Why containerize a conda environment
Conda solves the hard part of dependency management. It resolves package versions, pulls compiled libraries, and isolates everything from the system Python. What it does not capture is everything above the kernel: the C library versions, the system tools, the architecture, and the channel state at solve time. Move the same environment.yml to a different Linux release a year later and the solve can drift.
Docker closes that gap. A Dockerfile is a build recipe. Each instruction in it records a layer, a change set stacked on the previous one. The finished stack of layers is an image, a read-only template. A container is a running instance of that image. A registry is a server that stores images so other people and machines can pull them by name and tag.
Containers also pair naturally with standardized workflow descriptors such as the Common Workflow Language (CWL), which let the same analysis run across multiple computing environments [1]. That combination is what makes a converted environment useful beyond your own workstation: collaborators can pull it, clusters can run it through Apptainer, and workflow engines can schedule it anywhere.
Convert when any of the following is true. You want to hand a pipeline to a collaborator without a setup call. You want the exact same tool versions on a cluster and in continuous integration. You plan to run on cloud instances and need predictable behavior. A journal or repository asks for a reproducible software artifact.
What you need before you start
Confirm Docker works and the daemon is reachable:
docker versionThis prints two sections, Client and Server. If you see only Client, the daemon is not running. Start Docker Desktop, or on Linux run sudo systemctl start docker.
Confirm conda is available:
conda -VExpected output looks like:
conda 24.1.2Any conda version from the last few years handles everything in this guide. If you use mamba or micromamba instead, the export commands in Step 1 work the same way.
Convert a conda environment to Docker step by step
The walkthrough uses a small example environment with samtools, bwa, cutadapt, and one pip package. Substitute your own packages throughout.
Step 1: Export the environment to environment.yml
Activate the environment and export it:
conda activate myenv
conda env export > environment.yml
head -n 7 environment.yml
Expected output:
name: myenv
channels:
  - conda-forge
  - bioconda
  - defaults
dependencies:
  - _libgcc_mutex=0.1=conda_forge
Below that comes one line per package, each ending in a build string, then a pip: subsection if you installed anything with pip, then a final prefix: line pointing at your local install path.
Three parts of this file matter for the conversion:
- Channels are the servers conda searches, listed in priority order.
conda-forgeandbiocondacover most bioinformatics software. - Build strings are the hashed suffixes after each version. They pin the exact compiled variant. They are also platform specific, which matters in Step 2.
- The prefix line records your local path. Delete it. It has no meaning inside an image.
For the Docker build, ship a cleaned version of the file:
name: myenv
channels:
  - conda-forge
  - bioconda
  - nodefaults
dependencies:
  - python=3.10
  - samtools=1.17
  - bwa=0.7.17
  - cutadapt=4.6
  - pip
  - pip:
      - multiqc==1.21
What changed and why:
nodefaultsexcludes the defaults channel. That channel carries commercial-use terms for larger organizations, while conda-forge and bioconda are community channels. Check your own situation before relying on defaults in a distributed image.- Versions stay pinned so rebuilds produce the same tools.
- Build strings are dropped. If you exported on macOS, the build strings describe macOS binaries and a Linux build will fail. Without build strings, conda picks the right variant for the image architecture at build time.
- The
pipsubsection stays. If your environment used pip packages and you omit this block, those imports vanish inside the container.
If you exported on Linux and want maximum strictness, keep the build strings. If you want a shorter file that lists only what you explicitly installed, run conda env export -h and use the option that exports from your install history, which drops build strings automatically.
Step 2: Write the Dockerfile
Create a file named Dockerfile in the same directory as environment.yml:
# Start from an image that already has Miniconda on Debian
FROM continuumio/miniconda3:latest

# Set the working directory for build steps and for the container
WORKDIR /app

# Copy the environment definition first, so this layer
# only rebuilds when the file changes
COPY environment.yml .

# Create the environment, then delete caches in the same layer
RUN conda env create -f environment.yml \
    && conda clean -afy

# Put the environment's bin directory first on PATH
ENV PATH="/opt/conda/envs/myenv/bin:${PATH}"

# Default command when the container starts
CMD ["bash"]
Each instruction, and the parameter that matters in it:
FROMselects the base image.continuumio/miniconda3ships Miniconda on a Debian base, soconda env createworks out of the box. Thelatesttag is fine for a first build. Pin a specific tag, or the base image digest, once the image is stable.WORKDIR /appsets the directory used by later instructions and by the container at run time.COPY environment.yml .places the definition into the image. Order matters. Docker re-runs an instruction only when its inputs change, so putting the environment file before your code means code edits do not trigger a full conda solve.RUN conda env create -f environment.ymlbuilds the environment under/opt/conda/envs/myenv, the name coming from thename:field. The&& conda clean -afyon the same line deletes package tarballs and caches inside the same layer, so they never end up stored in the image.ENV PATHputs the environment'sbindirectory first. This is the line that lets you typesamtoolsinstead of a full path, and it is why you never needconda activateinside the image.CMD ["bash"]sets the default command. Anything you pass after the image name at run time replaces it.
Step 3: Build the image
From the directory containing both files:
docker build -t mytools:1.0 .Expected output (BuildKit format, times will differ):
[+] Building 84.3s (10/10) FINISHED
 => [1/4] FROM docker.io/continuumio/miniconda3:latest
 => [2/4] WORKDIR /app
 => [3/4] COPY environment.yml .
 => [4/4] RUN conda env create -f environment.yml && conda clean -afy
 => exporting to image
 => => naming to docker.io/library/mytools:1.0
Parameter notes:
-t mytools:1.0sets the image name and tag. The tag is your version handle. Bump it every timeenvironment.ymlchanges so old results can always be traced to an old image.- The trailing
.is the build context, the directory Docker may copy from. Run the command from the directory that holds the Dockerfile. - The first build takes minutes because conda solves and downloads everything. The second build is fast because the unchanged
environment.ymllayer comes from cache.
Step 4: Run and test the container
Open a shell inside the image:
docker run -it mytools:1.0 bash-it allocates an interactive terminal. Inside, probe the tools:
samtools
bwa
python -V
conda list -n myenv | head -n 5
exit
samtools and bwa print their banners when run with no arguments, which makes them convenient version probes:
Program: samtools (Tools for alignments in SAM format)
Version: 1.17 (using htslib 1.17)
Program: bwa (alignment via Burrows-Wheeler transformation)
Version: 0.7.17-r1188python -V prints the interpreter version, and conda list -n myenv prints the package table for the environment inside the container.
Now run a real job with data from your host. The -v flag mounts a host directory into the container:
docker run -v "$PWD":/data mytools:1.0 \
  bash -c "bwa mem /data/ref.fa /data/reads.fq | samtools sort -o /data/aln.bam"

docker run -v "$PWD":/data mytools:1.0 samtools view -c /data/aln.bam
The first command aligns reads and sorts them into /data/aln.bam, which appears in your current host directory because of the mount. The second prints the mapped record count, for example 10000. Compare against the same job in your host environment:
conda activate myenv
samtools view -c aln.bam
Matching counts mean the container reproduces your host behavior for this job. Two more checks round out verification:
docker images
docker history mytools:1.0
docker images lists the new tag and its size. docker history shows each layer and its size, which is where you look when an image feels heavy.
Step 5: Tag and share the image
To publish through Docker Hub, rename the image with your account name, log in, and push:
docker tag mytools:1.0 yourdockerid/mytools:1.0
docker login
docker push yourdockerid/mytools:1.0
The registry records a digest for every push, and anyone can pull that exact digest later for byte-level reproducibility.
For clusters or collaborators with no registry access, move the image as a tarball:
docker save -o mytools_1.0.tar mytools:1.0On the target machine:
docker load -i mytools_1.0.tarCommand quick reference
| Task | Command | Notes |
|---|---|---|
| Export an environment | conda env export > environment.yml | Run inside the environment |
| Create an environment from a file | conda env create -f environment.yml | Works in a Dockerfile RUN step |
| Build an image | docker build -t mytools:1.0 . | -t sets name and tag, the dot is the build context |
| Open a shell in the image | docker run -it mytools:1.0 bash | -it gives an interactive terminal |
| Run one command | docker run mytools:1.0 samtools | Text after the image name replaces the default command |
| Mount a host folder | docker run -v "$PWD":/data mytools:1.0 bash | Host folder appears at /data |
| Run as a host user | docker run -u 1000:1000 mytools:1.0 bash | Avoids root-owned output files |
| Rename an image | docker tag mytools:1.0 yourdockerid/mytools:1.0 | Needed before a push |
| Push to a registry | docker push yourdockerid/mytools:1.0 | Registry stores a digest per push |
| Export an image to a tarball | docker save -o mytools_1.0.tar mytools:1.0 | Transfer without a registry |
| Inspect layer sizes | docker history mytools:1.0 | Finds bloat |
| Clean conda caches | conda clean -afy | Run in the same RUN step that creates the environment |
Tips for smaller images and faster builds
Use the micromamba base image
The mambaorg/micromamba image is small, runs as a non-root user by default, and uses a solver that handles large bioinformatics environments far faster than the classic conda solver:
FROM mambaorg/micromamba:latest

COPY environment.yml /tmp/environment.yml

RUN micromamba create -y -f /tmp/environment.yml \
    && micromamba clean -afy

ENV PATH="/opt/conda/envs/myenv/bin:${PATH}"

CMD ["bash"]
The same environment.yml works unchanged.
Pack the environment into a slim base with conda-pack
If final image size matters more than build simplicity, build the environment once, pack it, and ship the archive into a minimal base:
conda install -n base -c conda-forge conda-pack -y
conda pack -n myenv -o myenv.tar.gz
FROM debian:bookworm-slim
COPY myenv.tar.gz /tmp/myenv.tar.gz
RUN mkdir /opt/env \
&& tar -xzf /tmp/myenv.tar.gz -C /opt/env \
&& rm /tmp/myenv.tar.gz
ENV PATH="/opt/env/bin:${PATH}"
CMD ["bash"]Run source /opt/env/bin/activate once at the start of any job, because conda-pack ships activation scripts that repair absolute paths recorded at pack time. A multi-stage Dockerfile can do the packing and the slim copy in one build.
Keep layers lean
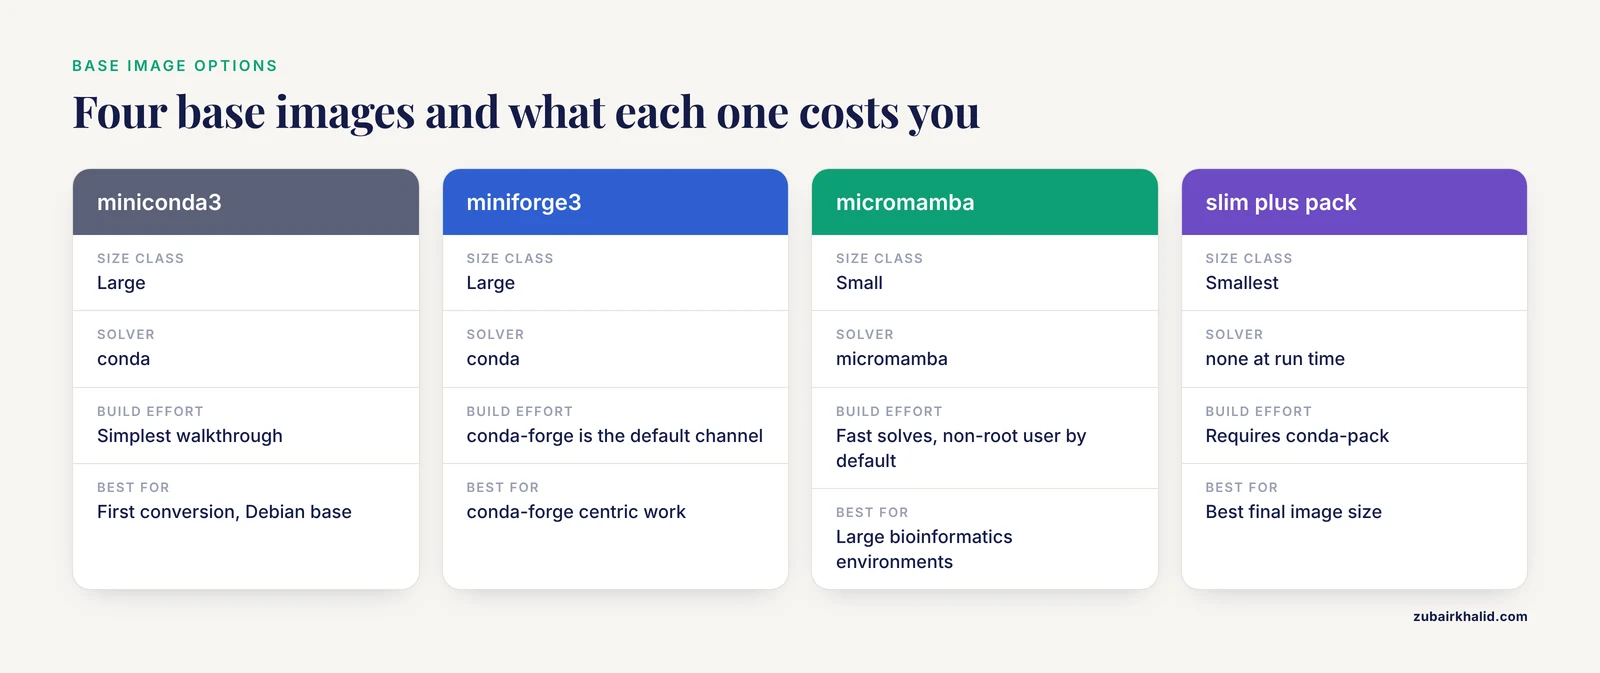
- Merge related work into one
RUNline joined with&&, and clean caches on that same line. Anything written in a layer stays in the image even if a later layer deletes it. - Pin the base image tag instead of
latestso a rebuild six months later starts from the same base. - Check disk pressure with
docker system df, and reclaim space withdocker system prune -awhen old images pile up.
| Base image | Size class | Solver | Notes |
|---|---|---|---|
continuumio/miniconda3 | Large | conda | Debian base, conda preinstalled, simplest walkthrough |
condaforge/miniforge3 | Large | conda | conda-forge is the default channel |
mambaorg/micromamba | Small | micromamba | Fast solves, non-root user by default |
debian:bookworm-slim plus a packed env | Smallest | none at run time | Requires conda-pack, best final size |
Using the image with a bioinformatics workflow manager
A bioinformatics workflow manager chains individual tools into a pipeline, tracks file dependencies between steps, and restarts from the last successful step after a failure. Nextflow, Snakemake, and CWL are the three you are most likely to meet, and all three can drive your new image.
Nextflow
Enable Docker in nextflow.config:
docker.enabled = trueDeclare the image on a process in main.nf:
process ALIGN_READS {
    container 'yourdockerid/mytools:1.0'

    input:
    path reads
    path reference

    output:
    path "${reads.simpleName}.bam"

    script:
    """
    bwa mem ${reference} ${reads} | samtools sort -o ${reads.simpleName}.bam
    """
}
Run the pipeline:
nextflow run main.nf -resumeYou can also pass the image on the command line with -with-docker followed by the image name. Nextflow stages input files into its own work directory and mounts it automatically, then runs your script as the container command. That means no conda activation ever happens, and the ENV PATH line in your Dockerfile is what makes bare tool names resolve.
Snakemake
Attach the image to a rule in a Snakefile:
rule align_reads:
    input:
        reads="data/reads.fq",
        reference="data/ref.fa"
    output:
        bam="results/reads.bam"
    container:
        "docker://yourdockerid/mytools:1.0"
    shell:
        "bwa mem {input.reference} {input.reads} | samtools sort -o {output.bam}"
Invoke Snakemake with its Apptainer integration enabled. Snakemake converts the docker:// address into a Singularity image file, caches it, and runs the rule inside it. Per-rule container directives let different rules use different images in one pipeline.
Nextflow vs Snakemake
| Aspect | Nextflow | Snakemake |
|---|---|---|
| Language | Groovy-based DSL | Python-based syntax |
| Container runtimes | Docker and Apptainer/Singularity built in | Apptainer/Singularity for containers, plus native conda environments |
| Reruns | Built-in caching of completed tasks with a resume flag | Reruns only tasks whose inputs or code changed |
| Ecosystem | Large collection of community genomics pipelines, notably nf-core | Common in single-lab pipelines and methods supplements |
| Sweet spot | Cloud and large cluster execution | Local HPC and mixed local or cluster work |
Both managers consume the same image you built, so the choice is about language and infrastructure rather than the conversion itself. Teams writing Groovy or running on cloud batch systems tend toward Nextflow. Teams living in Python or running on a local cluster tend toward Snakemake. Either way, the image is the portable unit.
CWL and cwltool
CWL describes each tool in a separate YAML document and declares the image:
requirements:
  DockerRequirement:
    dockerPull: yourdockerid/mytools:1.0
Run it with cwltool tool.cwl job.yml. cwltool is the reference implementation of CWL, and it pulls the declared image from the registry the first time the tool runs [1].
What container metrics tell you about compute
Once your tools run in containers, their resource use becomes measurable in a consistent way across machines. CWL-metrics, a companion tool for cwltool, records runtime metrics of Docker containers together with workflow metadata to analyze workflow resource requirements [1]. In the published demonstration, 7 transcriptome quantification workflows ran on 6 cloud instance types, and the choice of instance type changed both financial cost and execution time [1]. The tool generates a summary of resource requirements per workflow execution, which is exactly the evidence needed to select appropriate cloud instances [1].
The practical version of that result for your own pipeline: run the containerized workflow once on a small representative sample with a metrics collector enabled, read the peak CPU and memory per step, then size your cloud instances or scheduler memory requests from measured peaks instead of guesses.
Common Mistakes and Limitations
- Reconstructing the package list from memory. The single most common failure. Always export with
conda env exportfrom the live environment. A hand-typed list drops transitive dependencies and pip packages.
- Missing channels. Without bioconda in the channels block, builds fail with:
   PackagesNotFoundError: The following packages are not available from current channels:

     - samtools

   Current channels:
     - https://conda.anaconda.org/conda-forge
The channel list shows what conda searched, and the missing channel is obvious there. Fix by adding bioconda and conda-forge to the channels: block in priority order.
- Exporting build strings on one operating system and building on another. A macOS export carries macOS build strings, and a Linux build fails with
ResolvePackageNotFoundlisting each package together with its build string. Fix by deleting the build strings from the dependencies, or by exporting on Linux, or by using the history-based export option described in Step 1.
- Calling
conda activatein a Dockerfile. Non-interactive shells are not initialized for activation, and the build fails with:
CommandNotFoundError: Your shell has not been properly configured to use 'conda activate'.Fix by setting ENV PATH to the environment's bin directory, as in the walkthrough, or by invoking tools through conda run -n myenv <command> inside RUN steps.
- Building for the wrong CPU architecture. An image built on Apple Silicon defaults to arm64. On an amd64 server the container dies immediately with a message containing
exec format error. Fix by building throughdocker buildx buildwith its platform option set tolinux/amd64, or by building on a continuous integration runner with the target architecture.
- Docker not running, or no permission to the socket. A stopped daemon prints:
Cannot connect to the Docker daemon at unix:///var/run/docker.sock. Is the docker daemon running?Start Docker Desktop or the docker service. A permissions problem prints permission denied while trying to connect to the Docker daemon socket. Fix by adding your user to the docker group with sudo usermod -aG docker $USER and logging in again, or run the command with sudo.
- Missing files in the build context. If
environment.ymlis not in the directory where you run the build, the COPY step fails withCOPY failed: file not found in build context or excluded by .dockerignore. Run the build from the directory that holds both files, and check.dockerignoreif the file is present but still not copied.
- Omitting the pip section. If your original environment installed packages with pip and the exported file lacks the
pip:block, imports fail inside the container withModuleNotFoundError: No module named 'multiqc'. Keep thepipentry and thepip:subsection inenvironment.yml.
- Root-owned output files. Files a container writes into a mounted folder are owned by root on the host. Fix by running the container as your host user with
docker run -u $(id -u):$(id -g), or by building the image with a non-root user whose UID matches yours.
- Bloated images. Package tarballs, apt lists, and layer history accumulate. Clean conda caches in the same RUN step that creates the environment, remove package manager lists, merge RUN steps, and inspect the result with
docker historyanddocker system df.
- Building on
latestforever. The base image moves under you, and a rebuild a year later is not the image you shipped. Pin the base tag, or reference the base image by digest once the pipeline is stable.
Limitations to accept
A Docker image is a snapshot, not a living environment. Rebuilds pick up whatever the channels serve at build time unless you pin versions, build strings, and the base image digest. Conda solves drift as channels change, so two builds from the same file months apart can differ in transitive dependencies. Docker on macOS and Windows runs inside a virtual machine, so mounted-folder input and output is slower than on Linux and the container architecture can differ from your host. GPU workloads need the NVIDIA container toolkit and a compatible driver, configured outside the Dockerfile. Every pipeline and dataset differs, so validate the converted image against your own data before you rely on it.
Next steps
- Add a continuous integration job that builds the image and runs the bare-command probes from Step 4 whenever
environment.ymlchanges. - Adopt semantic tags such as
mytools:1.2.0and push every build, keeping old tags published. - Wire the image into Nextflow or Snakemake, profile one run, and size your compute from the measured peaks.
- For shared clusters, pull the same image through Apptainer instead of maintaining a separate environment there.
Frequently Asked Questions
Can I convert a conda environment to Docker without an environment.yml file?
Yes, but export one first. On the machine with the environment, activate it and run conda env export, then build the image from that file. Rebuilding the package list from memory or shell history is the least reliable path because it drops transitive dependencies.
Should I use conda, mamba, or micromamba inside the image?
Use micromamba or mamba for large bioinformatics environments because their solver is much faster than the classic conda solver, and plain conda for small ones. The same environment.yml works with all three, so you can switch without editing the file.
How do I run the image on a cluster that does not allow Docker?
Use Apptainer or Singularity, which run on shared systems without root privileges. Apptainer pulls your image straight from the registry with apptainer pull docker://yourdockerid/mytools:1.0 and runs it with apptainer exec.
Why is my Docker image so large?
Leftover caches and layer history are the usual causes. Clean conda caches in the same RUN step that creates the environment, remove package manager lists, merge RUN steps, and inspect layer sizes with docker history to find the heavy ones.
How do I handle R packages in the conversion?
Treat R packages like any other conda package. Export the environment with the R packages included from conda-forge and the same Dockerfile works unchanged. For RStudio Server, the rocker project provides ready-made images instead.
Nextflow vs Snakemake: which should I use with my Docker image?
Both handle Docker images well, so choose by language and infrastructure. Nextflow suits cloud-scale genomics with built-in resume, while Snakemake suits Python-oriented labs and mixed local or cluster work.
Do I still need conda after moving everything into Docker?
Yes, for development. You will keep editing environments on your machine, exporting, and rebuilding the image. Docker packages the result, it does not replace environment creation.
How do I update the image after adding a package?
Edit environment.yml, rebuild with a new tag, test the container with the probes from Step 4, and push. Keep old tags published so older analyses can still pull the exact image they used.